3D Fabrication: 3D Printer
Additive manufacturing in plastic.
3D Printer
- ‘Additive manufacturing’, like Lego
- Process: FDM (Fused Deposition Modelling: i.e. hot, layers)
- Materials: PLA, ABS, TPU, Nylon, PET
- Our machine: Creality CR-10 (affordable, Arduino-powered, classic Cartesian design)
Safety
- Materials: only PLA (no fumes)
- Heat: hot end approx 200°C, bed approx 40–70°C
- Motors: keep your fingers out of the way
- Unattended prints: prints go wrong; you must be in the room and keep an eye on the printer.
Constraints / Design rules
- Print volume: your model must fit!
- Print time: expect 1 – 60 hours
- Printing layer by layer: think about overhangs and support (consider rotating model)
- Resolution
- Aesthetic limitations
- Mechanical weakness
- Material vulnerabilities (heat, moisture, light)
Anti-constraints (or new abilities):
- Pre-assembled parts / mechanisms
- Programmatic customisation
- Affordable one-offs (no tooling)
-
Novel modes enable new kinds of making: e.g. vase mode
- Follow some simple design rules
Workflow
1. CAD
Design your 3D model and save as an .STL file
Software:
- Fusion 360
- Solidworks
Or download a model as STL (e.g. Thingiverse)
2. Slice
- ‘Slice’ the model into layers to generate tools paths.
- Configure settings for your printer and model
- Inspect the preview and adjust the ‘printing strategy’ (Here’s a video showing how to view the layers and toolpath in Cura.)
- Save file as
.GCODEonto SD card
Software:
- Ultimaker Cura
- Slic3r
- Simplify3d
3. Print
- Load filament into printer
- Check bed
- Print file from SD card
- Monitor while printing, especially first few layers. Be careful of tall models with overhangs
4. (Repeat)
- What worked, what didn’t?
- Do you need to change your design, or just your print settings?
5. Finishing / Assembly
- Often much easier to print a model in 2 parts and assemble
- Surface finishing (more with ABS)
- Bodging
Some typical print settings in Cura
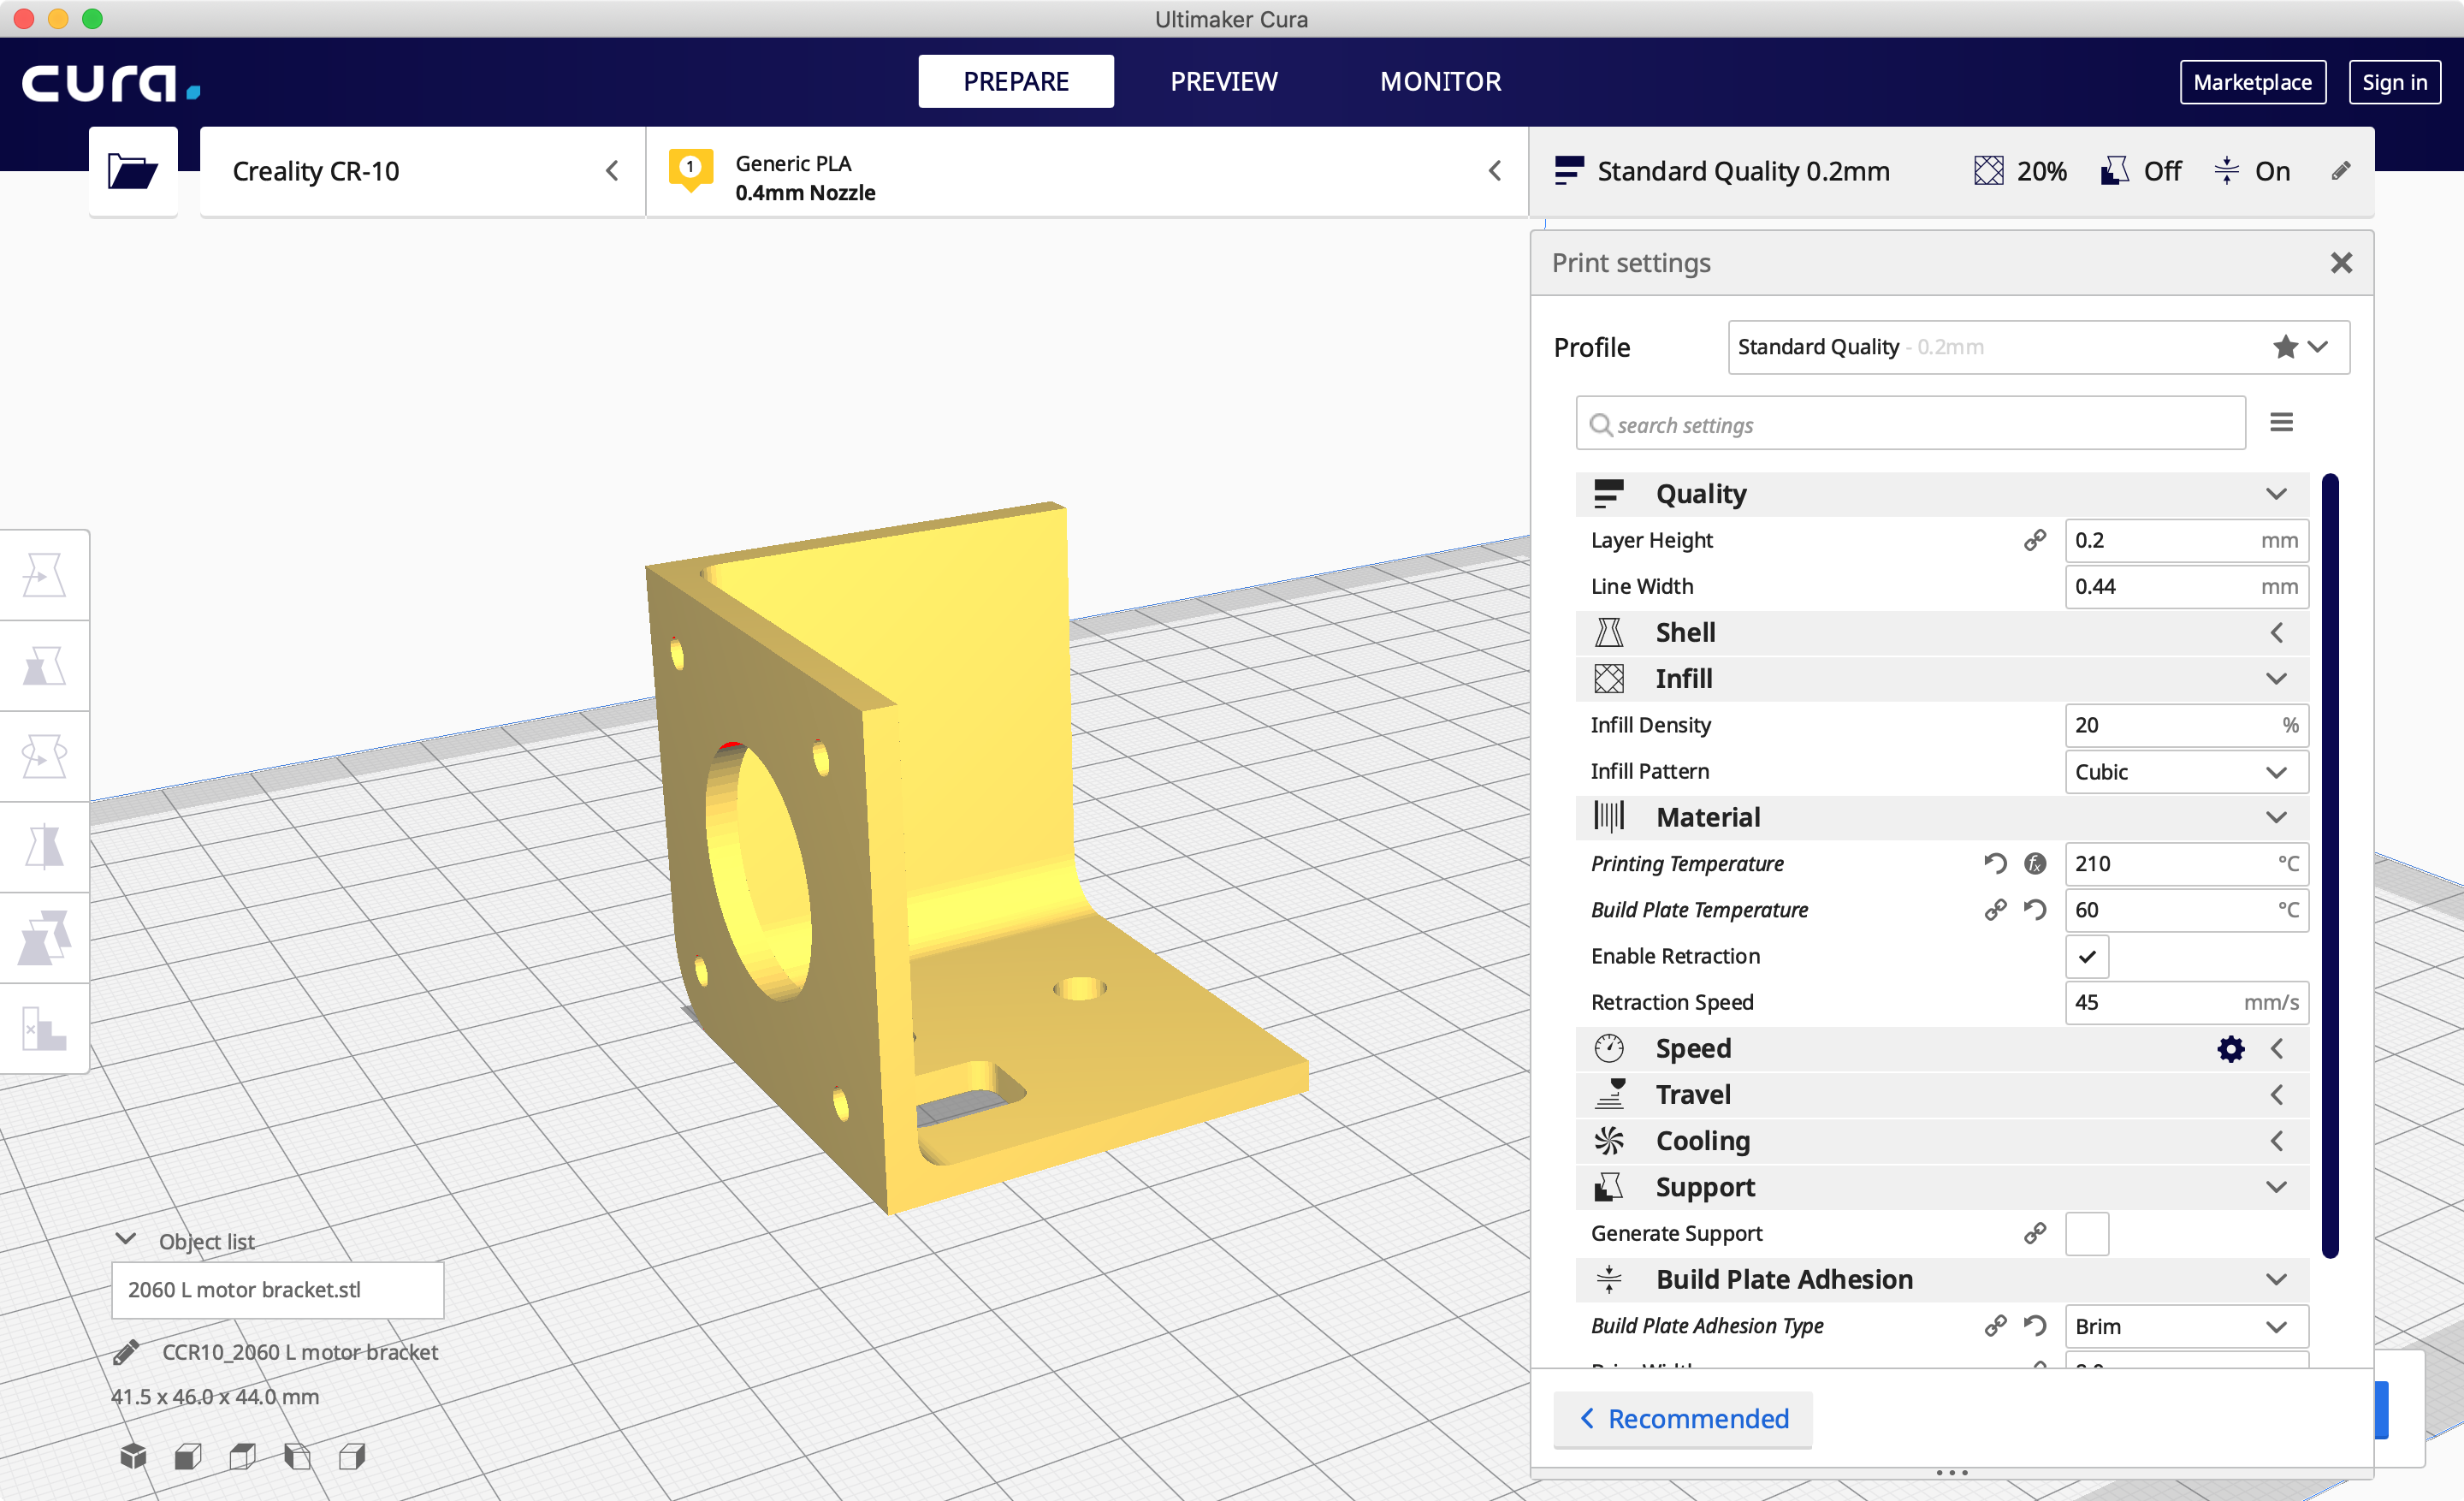
Basics: model orientation, print quality preset, temperature, support, adhesion.
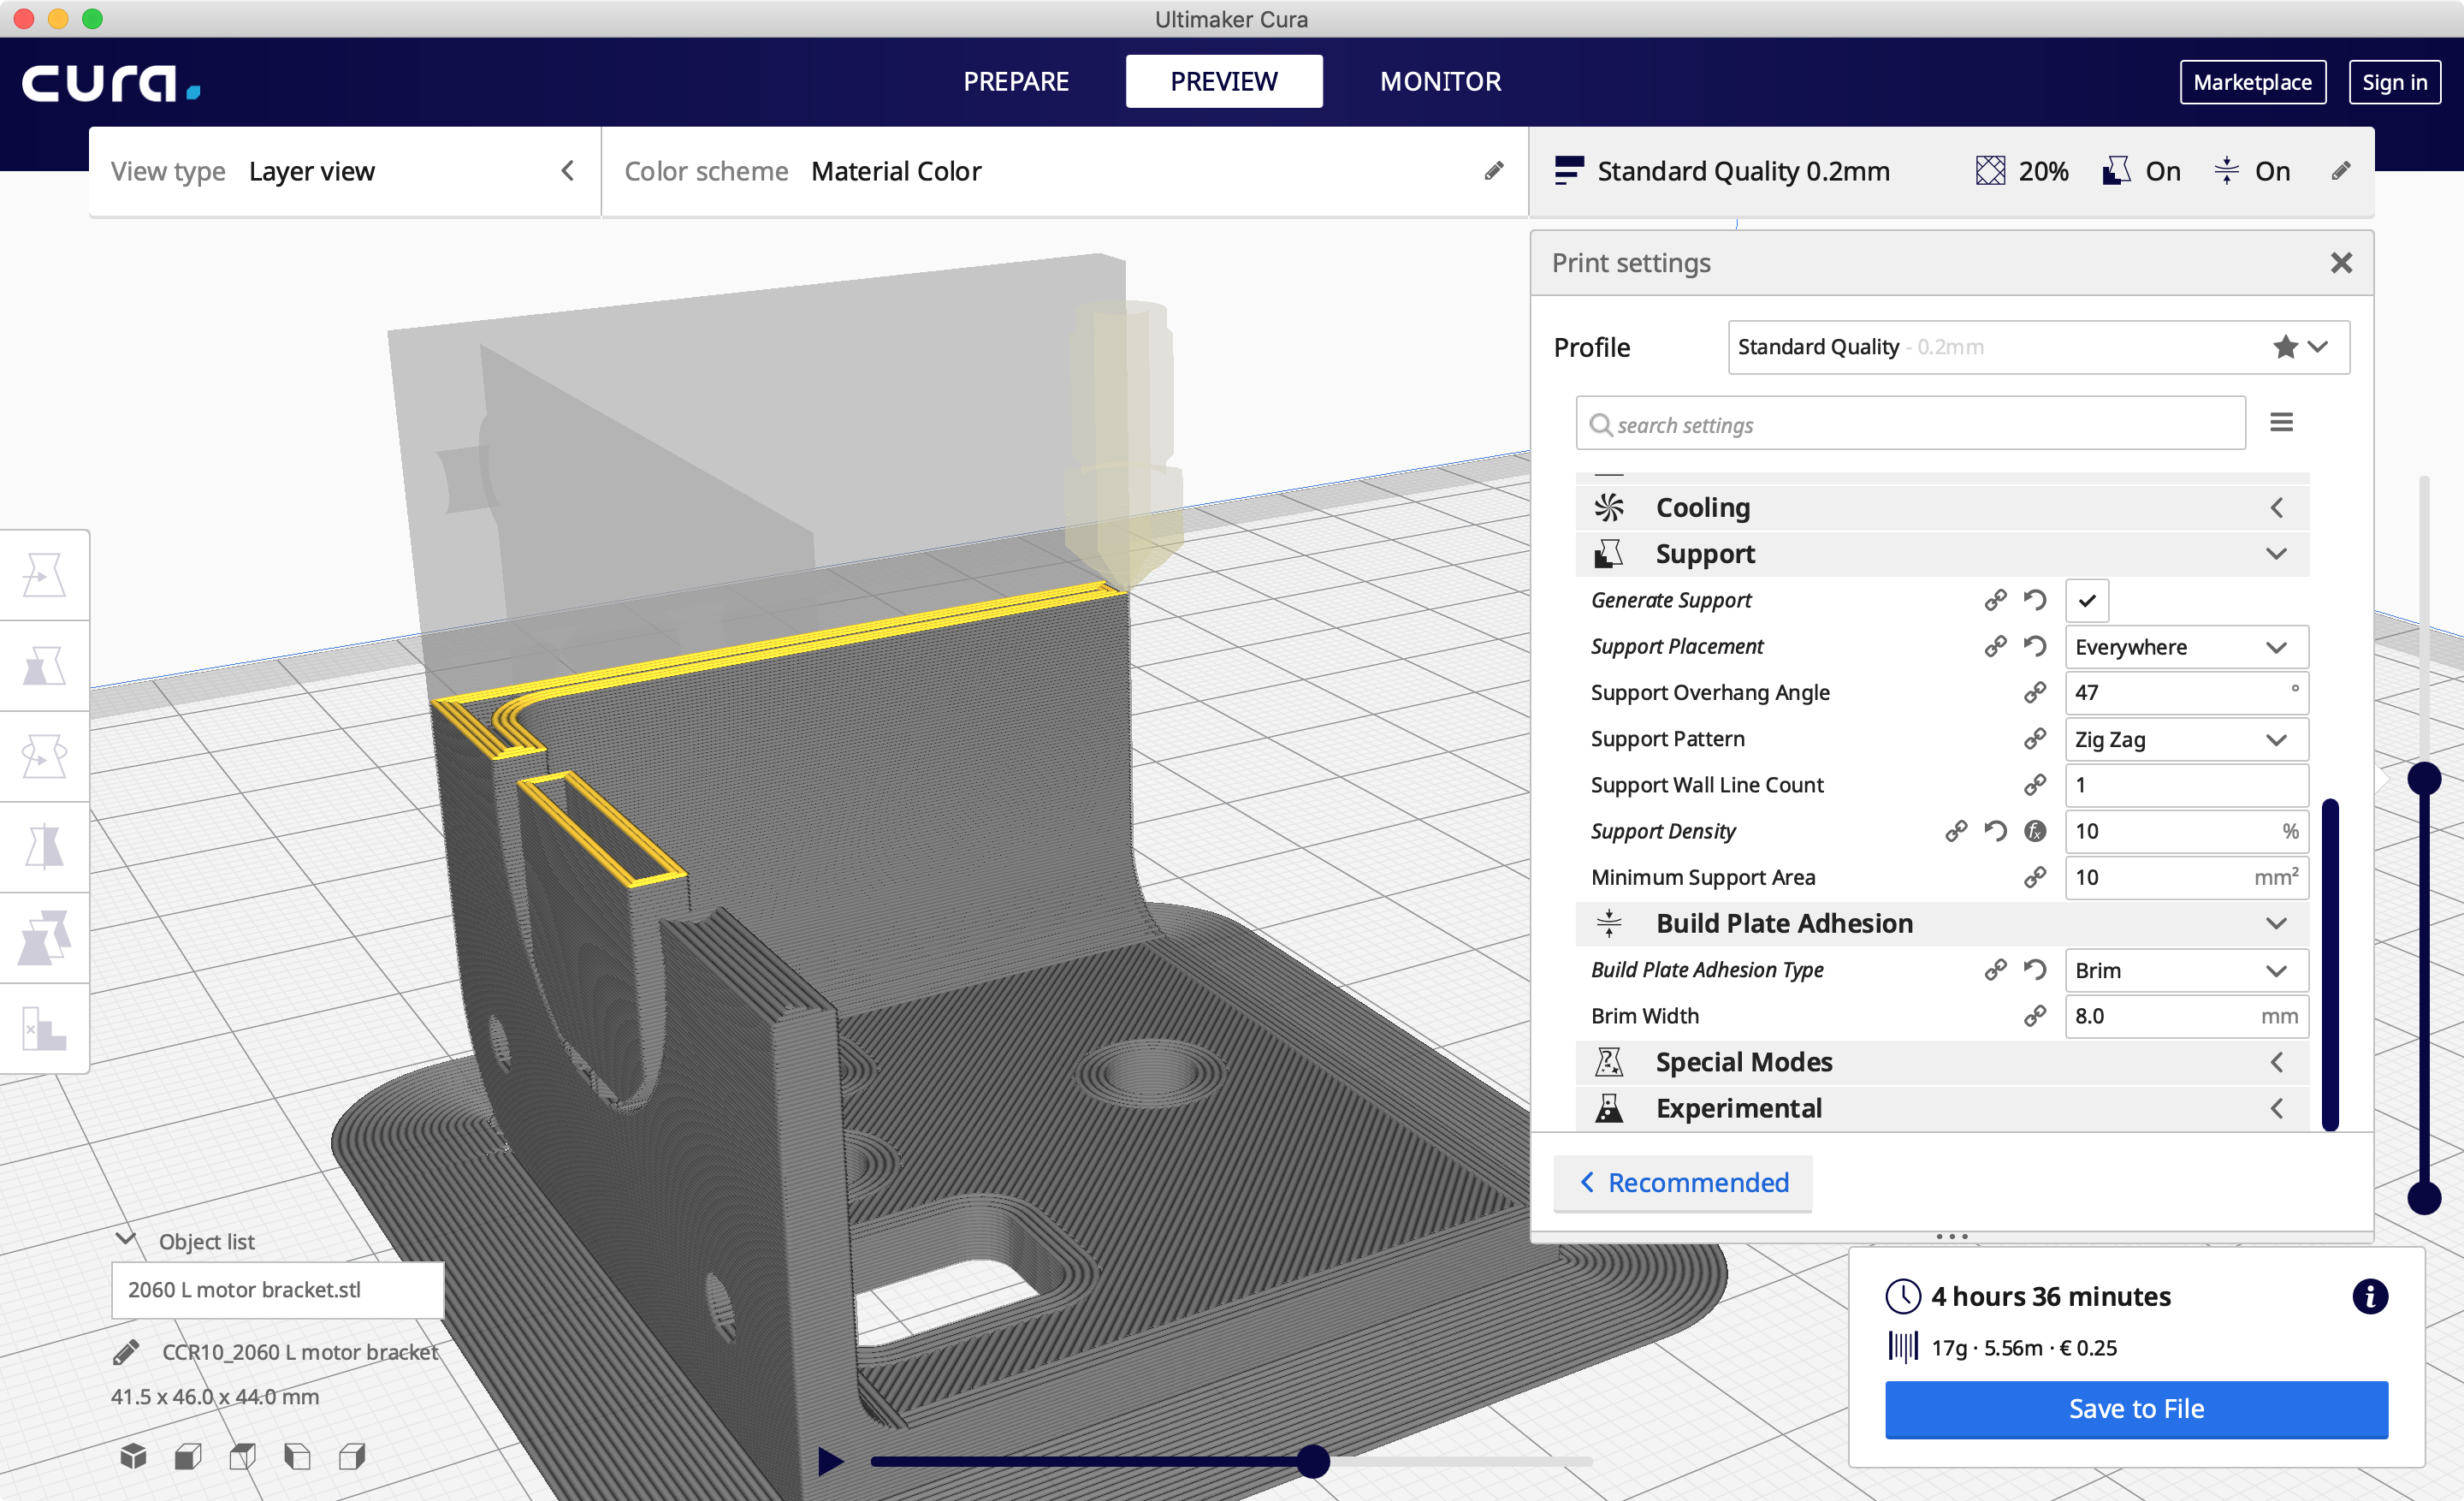
Note build plate adhesion and supports for overhangs.
Assignment
Print a pre-designed 3D object (e.g. from Thingiverse).
What do I need to do to pass? (40%)
- Demonstrate safe use of the 3D printer.
- Consider how your choice of model affects print time and difficulty
- Choose appropriate slicing settings that are likely to result in a successful print
- Document your choices, settings and result and reflact on what you did and how it could be improved
Extra credit (50-100%)
- Try printing a model you have designed.
- Experiment with different slicer settings, and document the effect on the model
- Try printing a torture test model
- Experiment with vase mode
- Try making a model that breaks one or more of the design rules and see how it prints
- Try printing a model with functional, interacting or mechanical parts
- Try making a part that interacts with parts made on the laser cutter
Prep for next week
- Install Fusion 360, or try it out on a university machine
- Watch some Fusion tutorials: https://www.linkedin.com/learning/fusion-360-essential-training-2/use-fusion-360-to-turn-your-ideas-into-designs?u=67552674
- Design and slice something you can print in next week’s session (if you are ready to go when we start, you can set it off at the beginning of the session)