3D Design: Software
An introduction to Fusion 360 CAD (Computer Aided Design) software.
Prep for this week’s class
If you have a laptop, download and install Fusion 360, and create an Autodesk account to save your work in the cloud (you will then be able to use Fusion on any computer on which it’s installed):
Fusion 360 free education license
If you don’t have a laptop, create a user account with Autodesk, and log into Fusion in a computing lab.
Familiarise yourself with the interface, or watch some introductory videos
Baseline
No knowledge of CAD software assumed. However, you will find this session much easier if you have spent some time playing with Fusion or watching some tutorial videos.
Fusion 360 Basic Principles
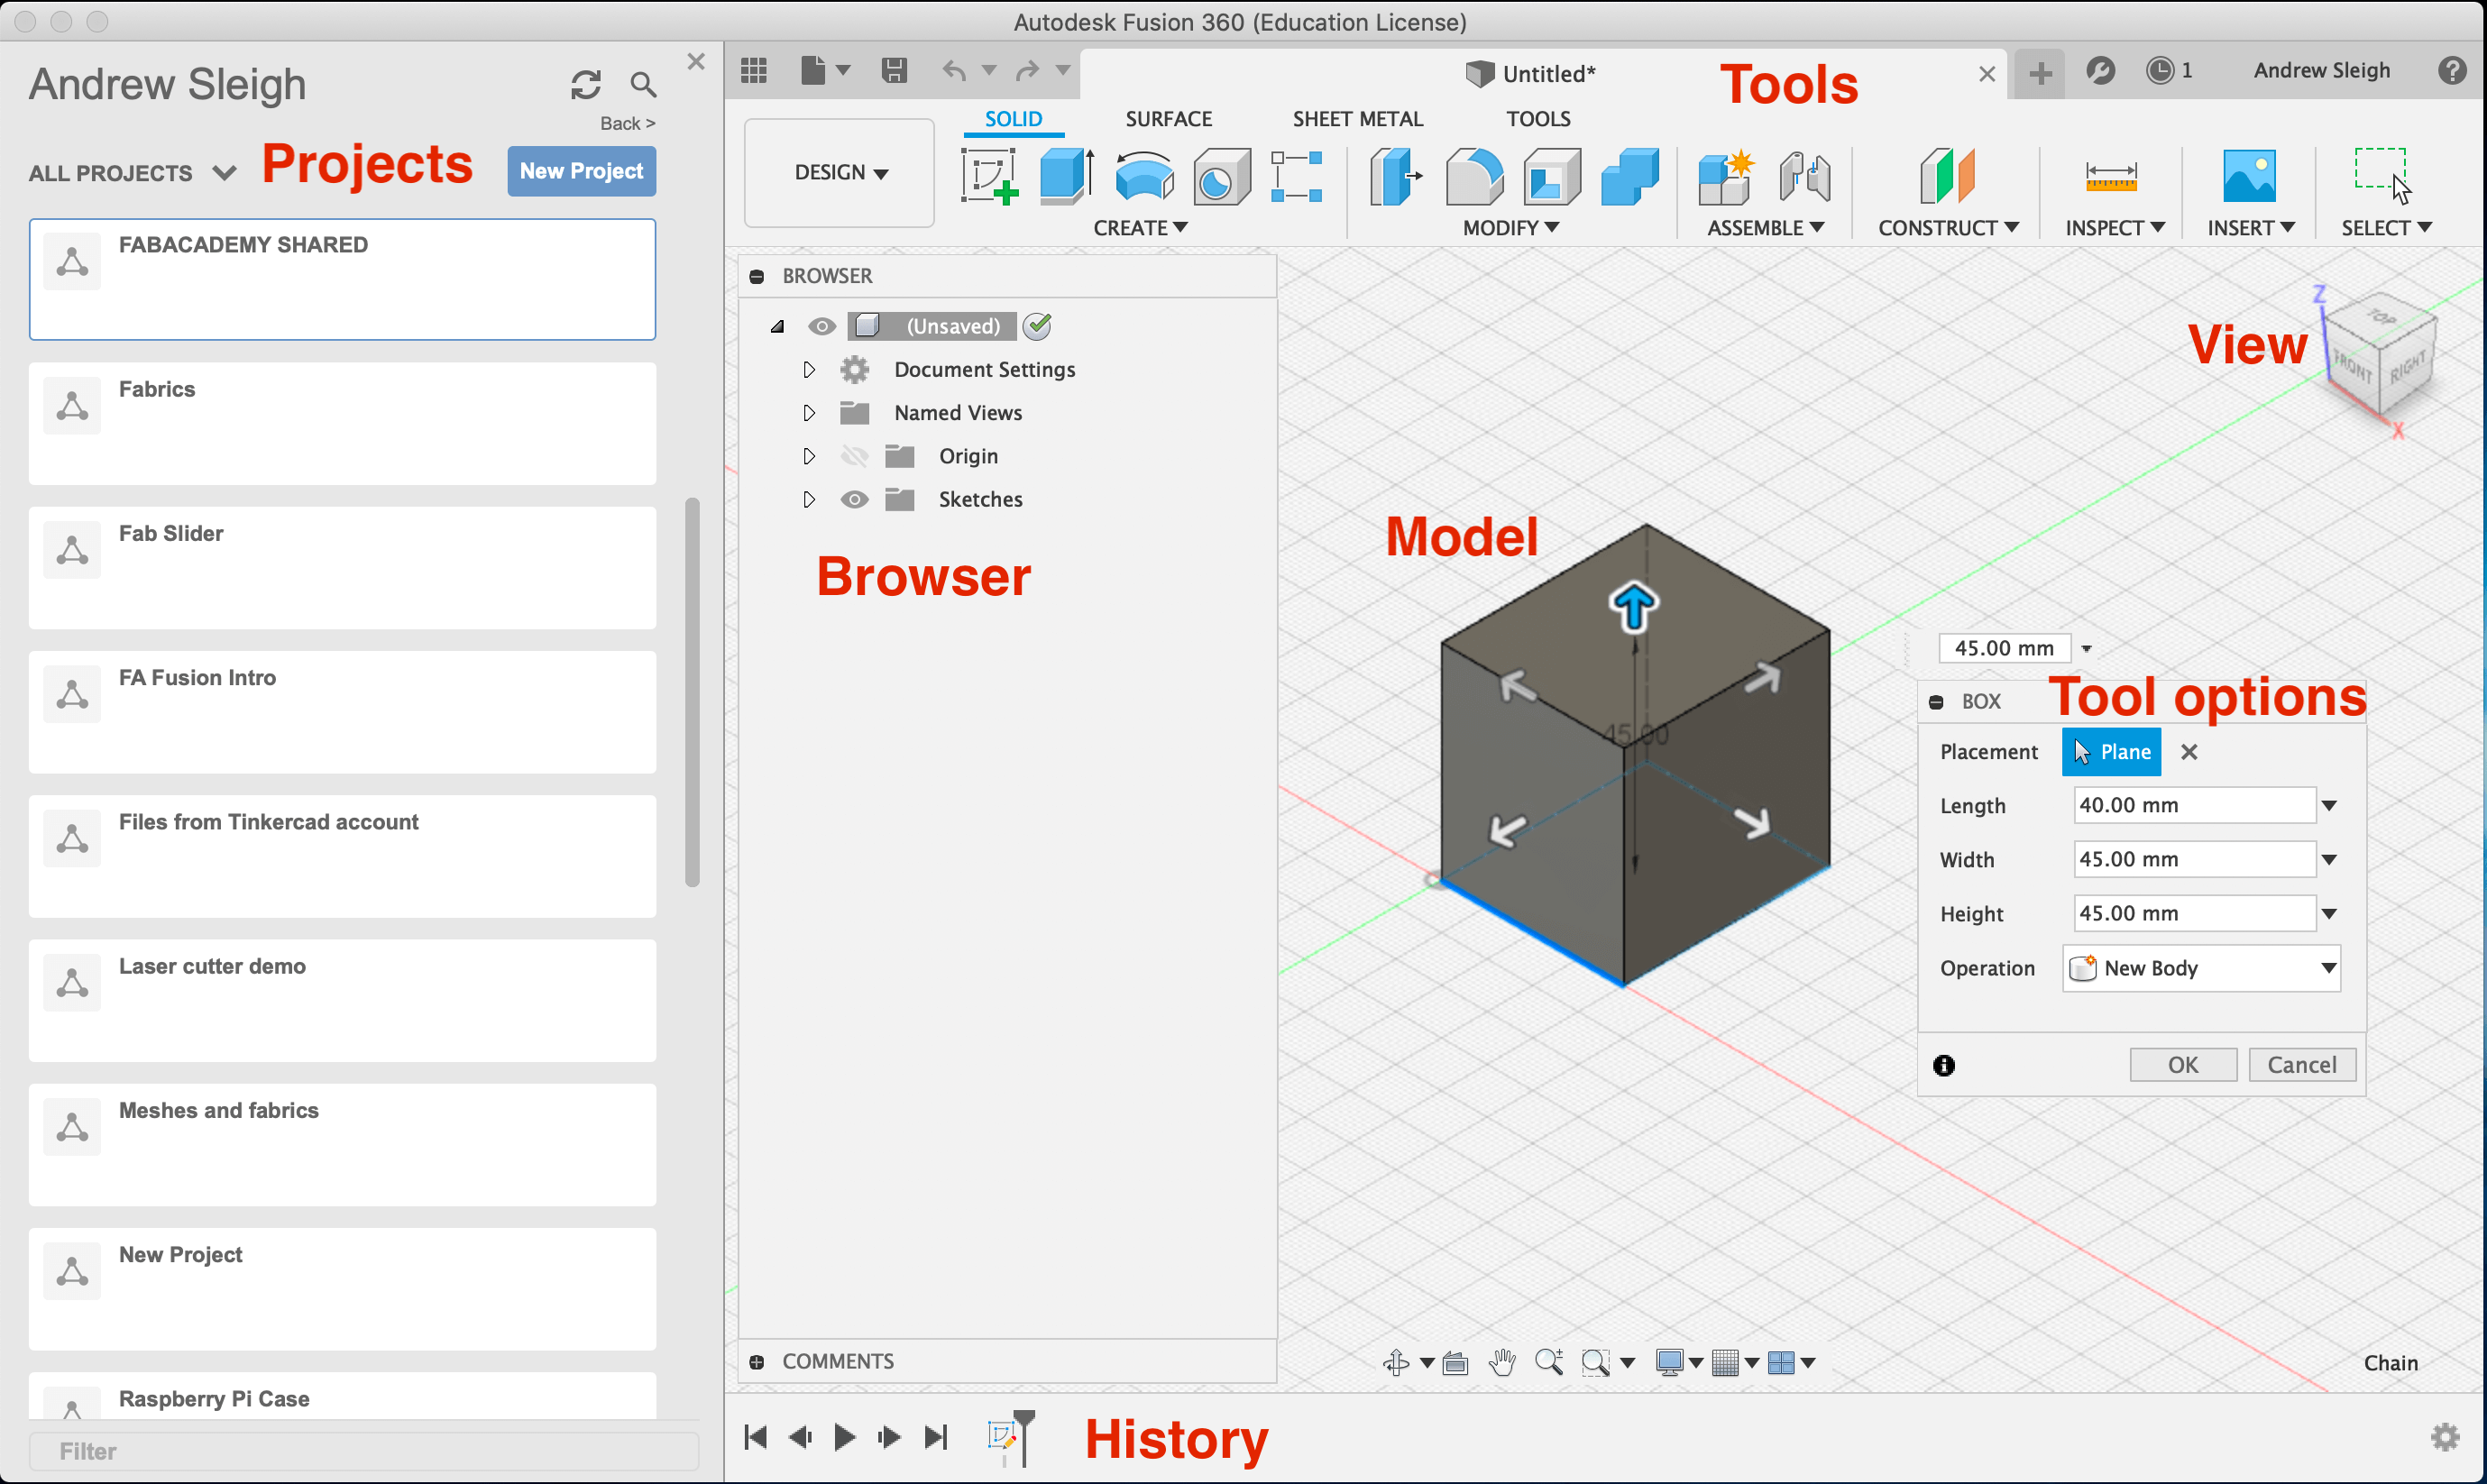
Interface elements:
- Projects
- Modelling area
- Tools
- View cube
- Browser
- History
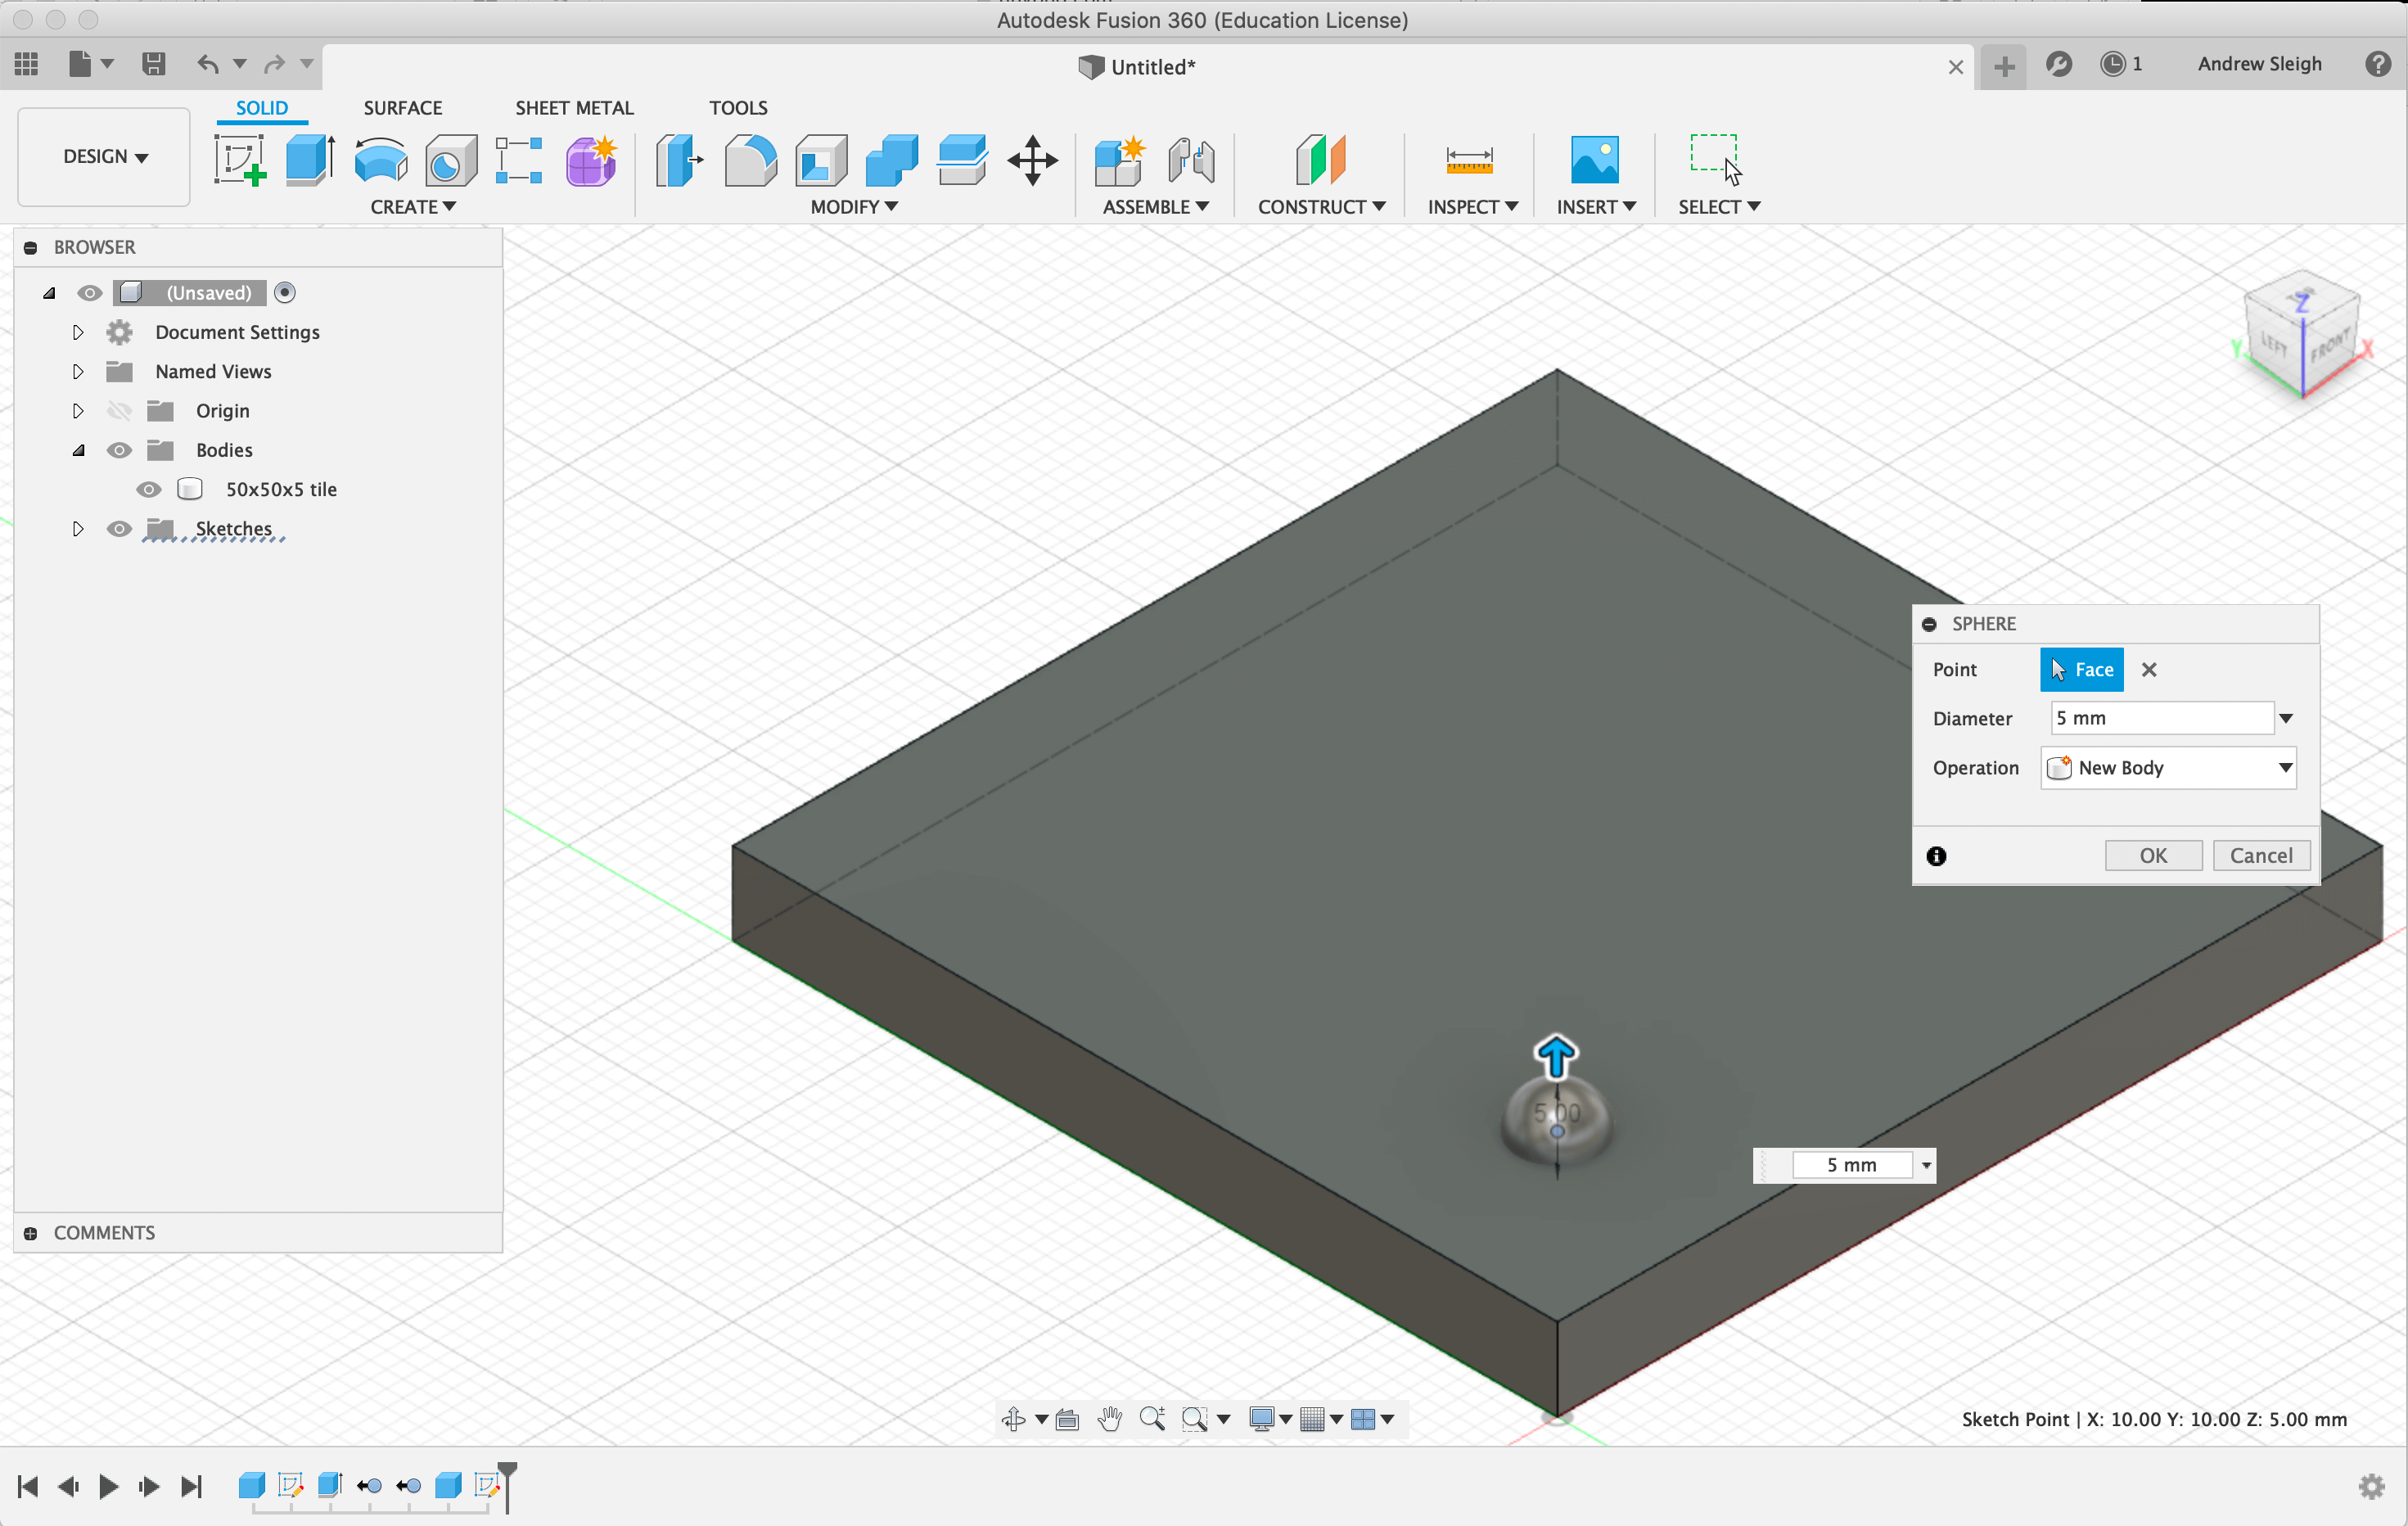
Modelling by combining and adjusting solid forms: create complex shapes from primitive parts
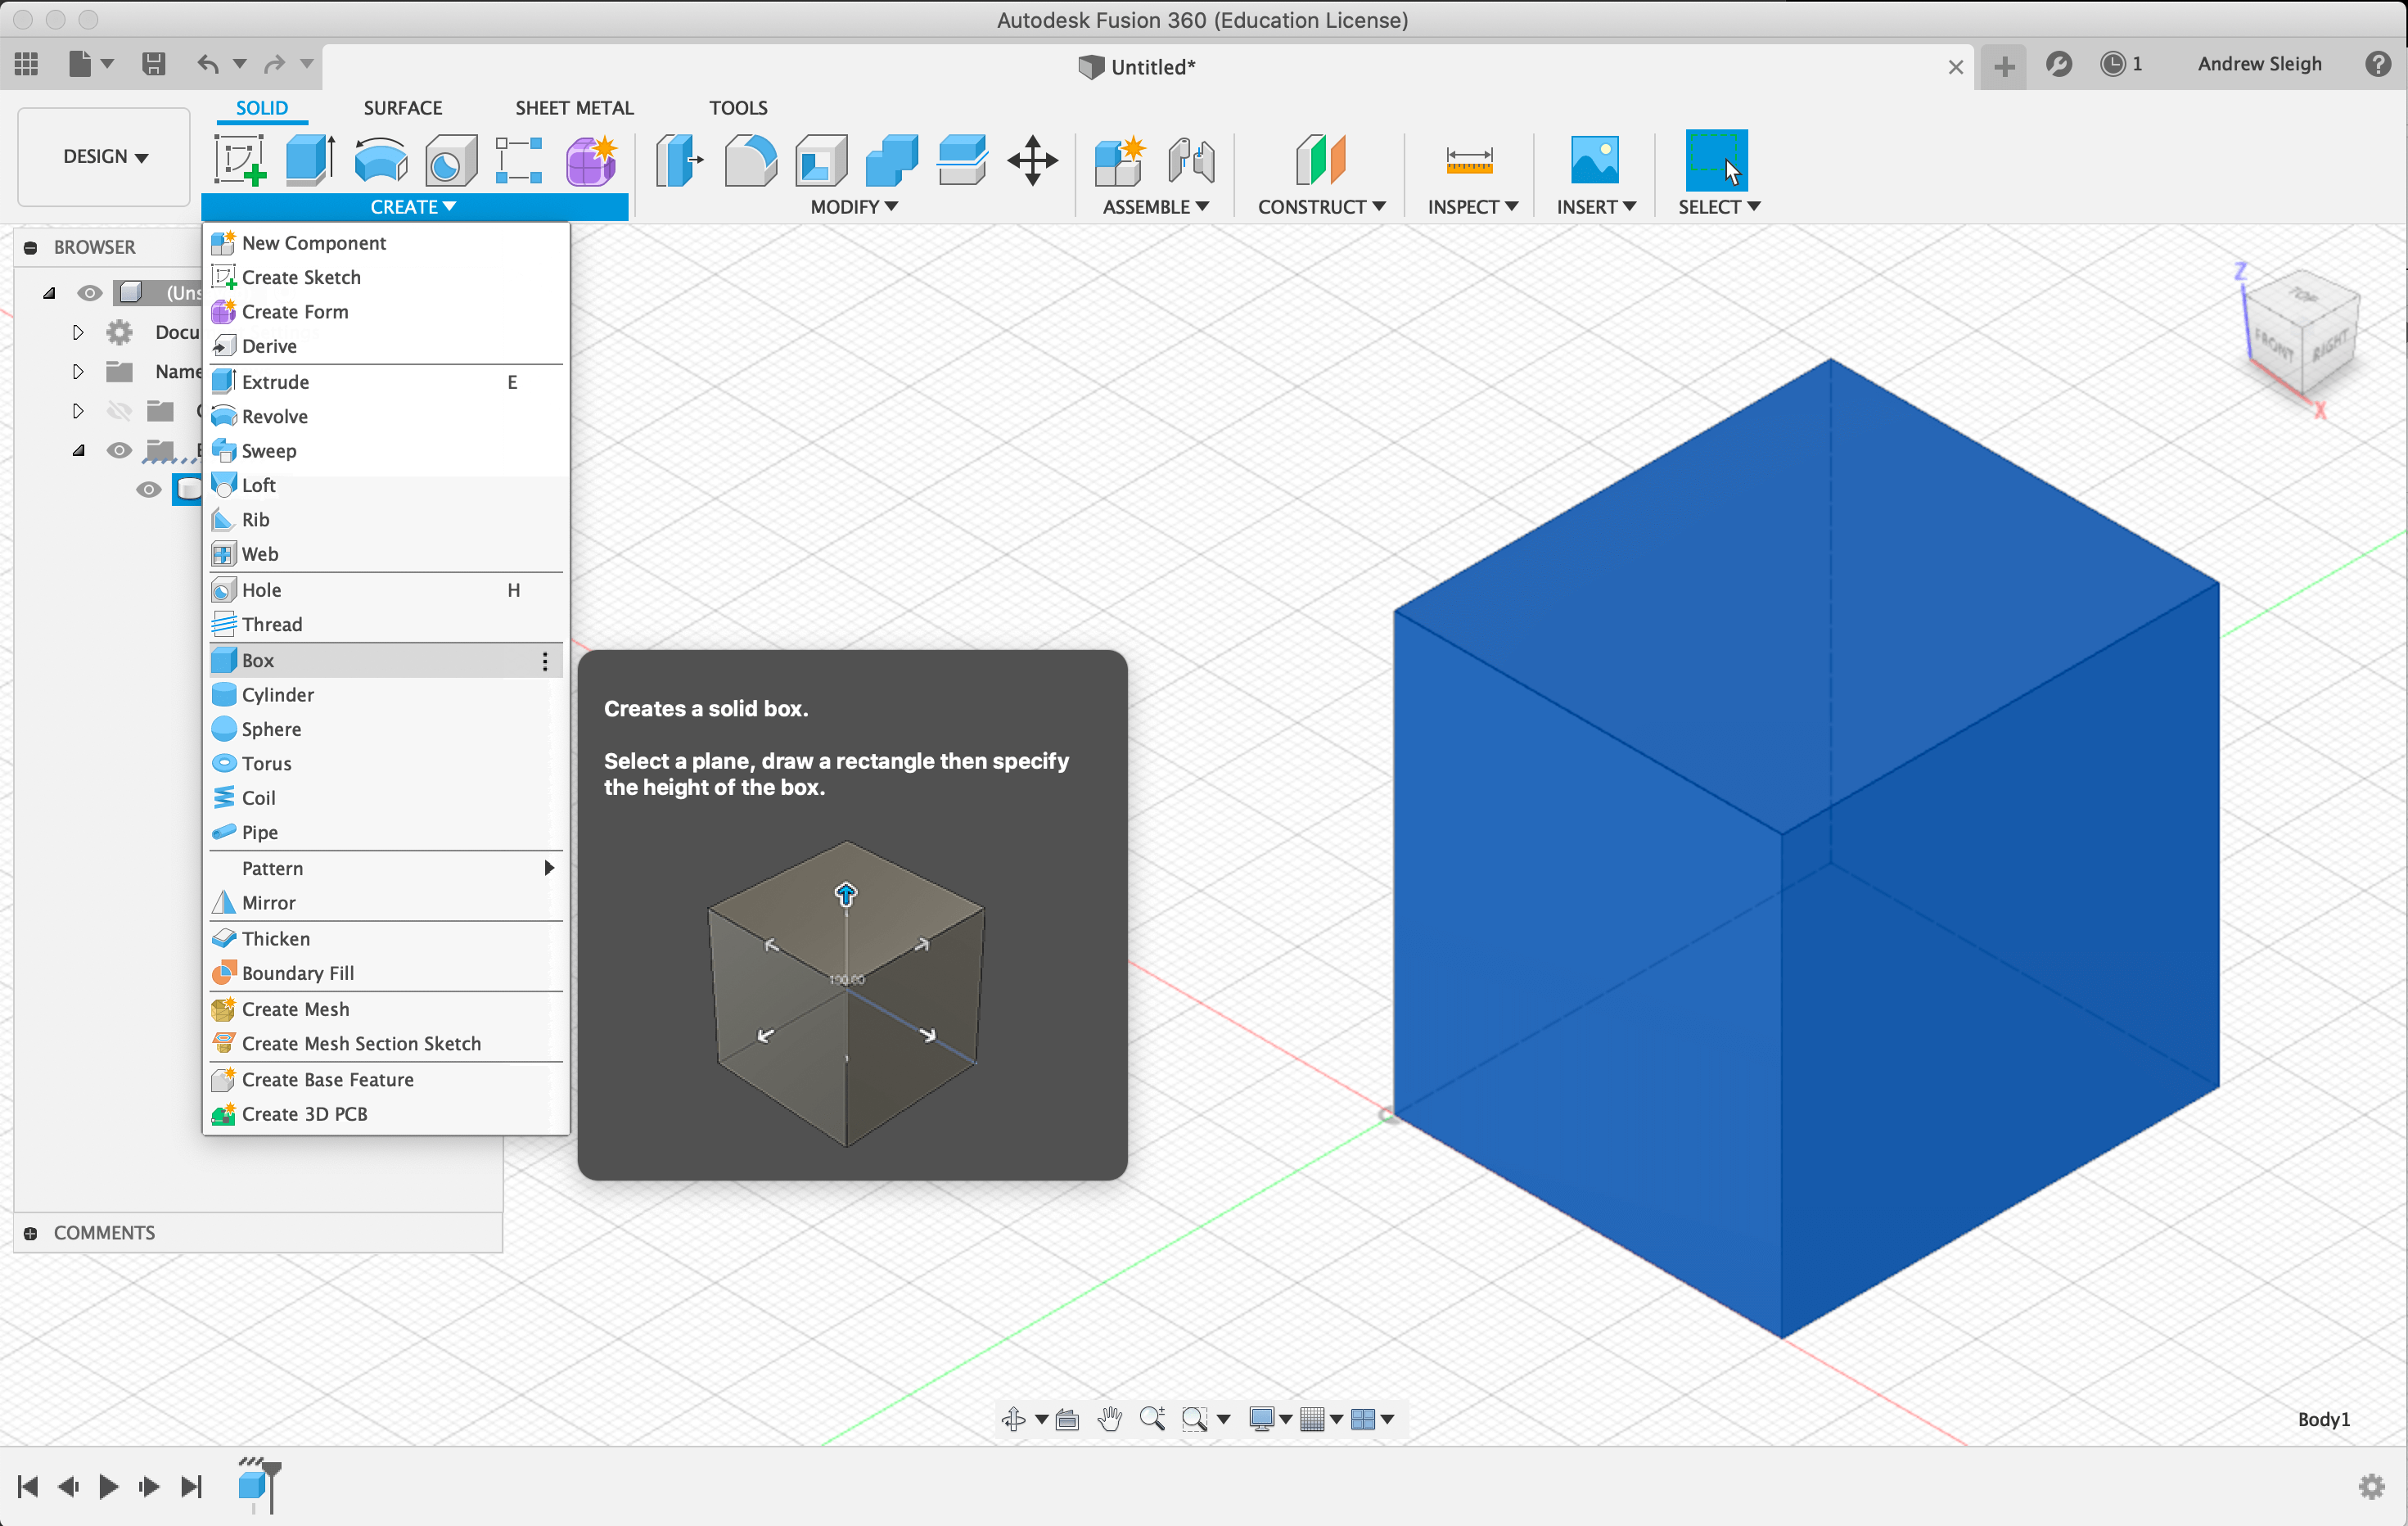
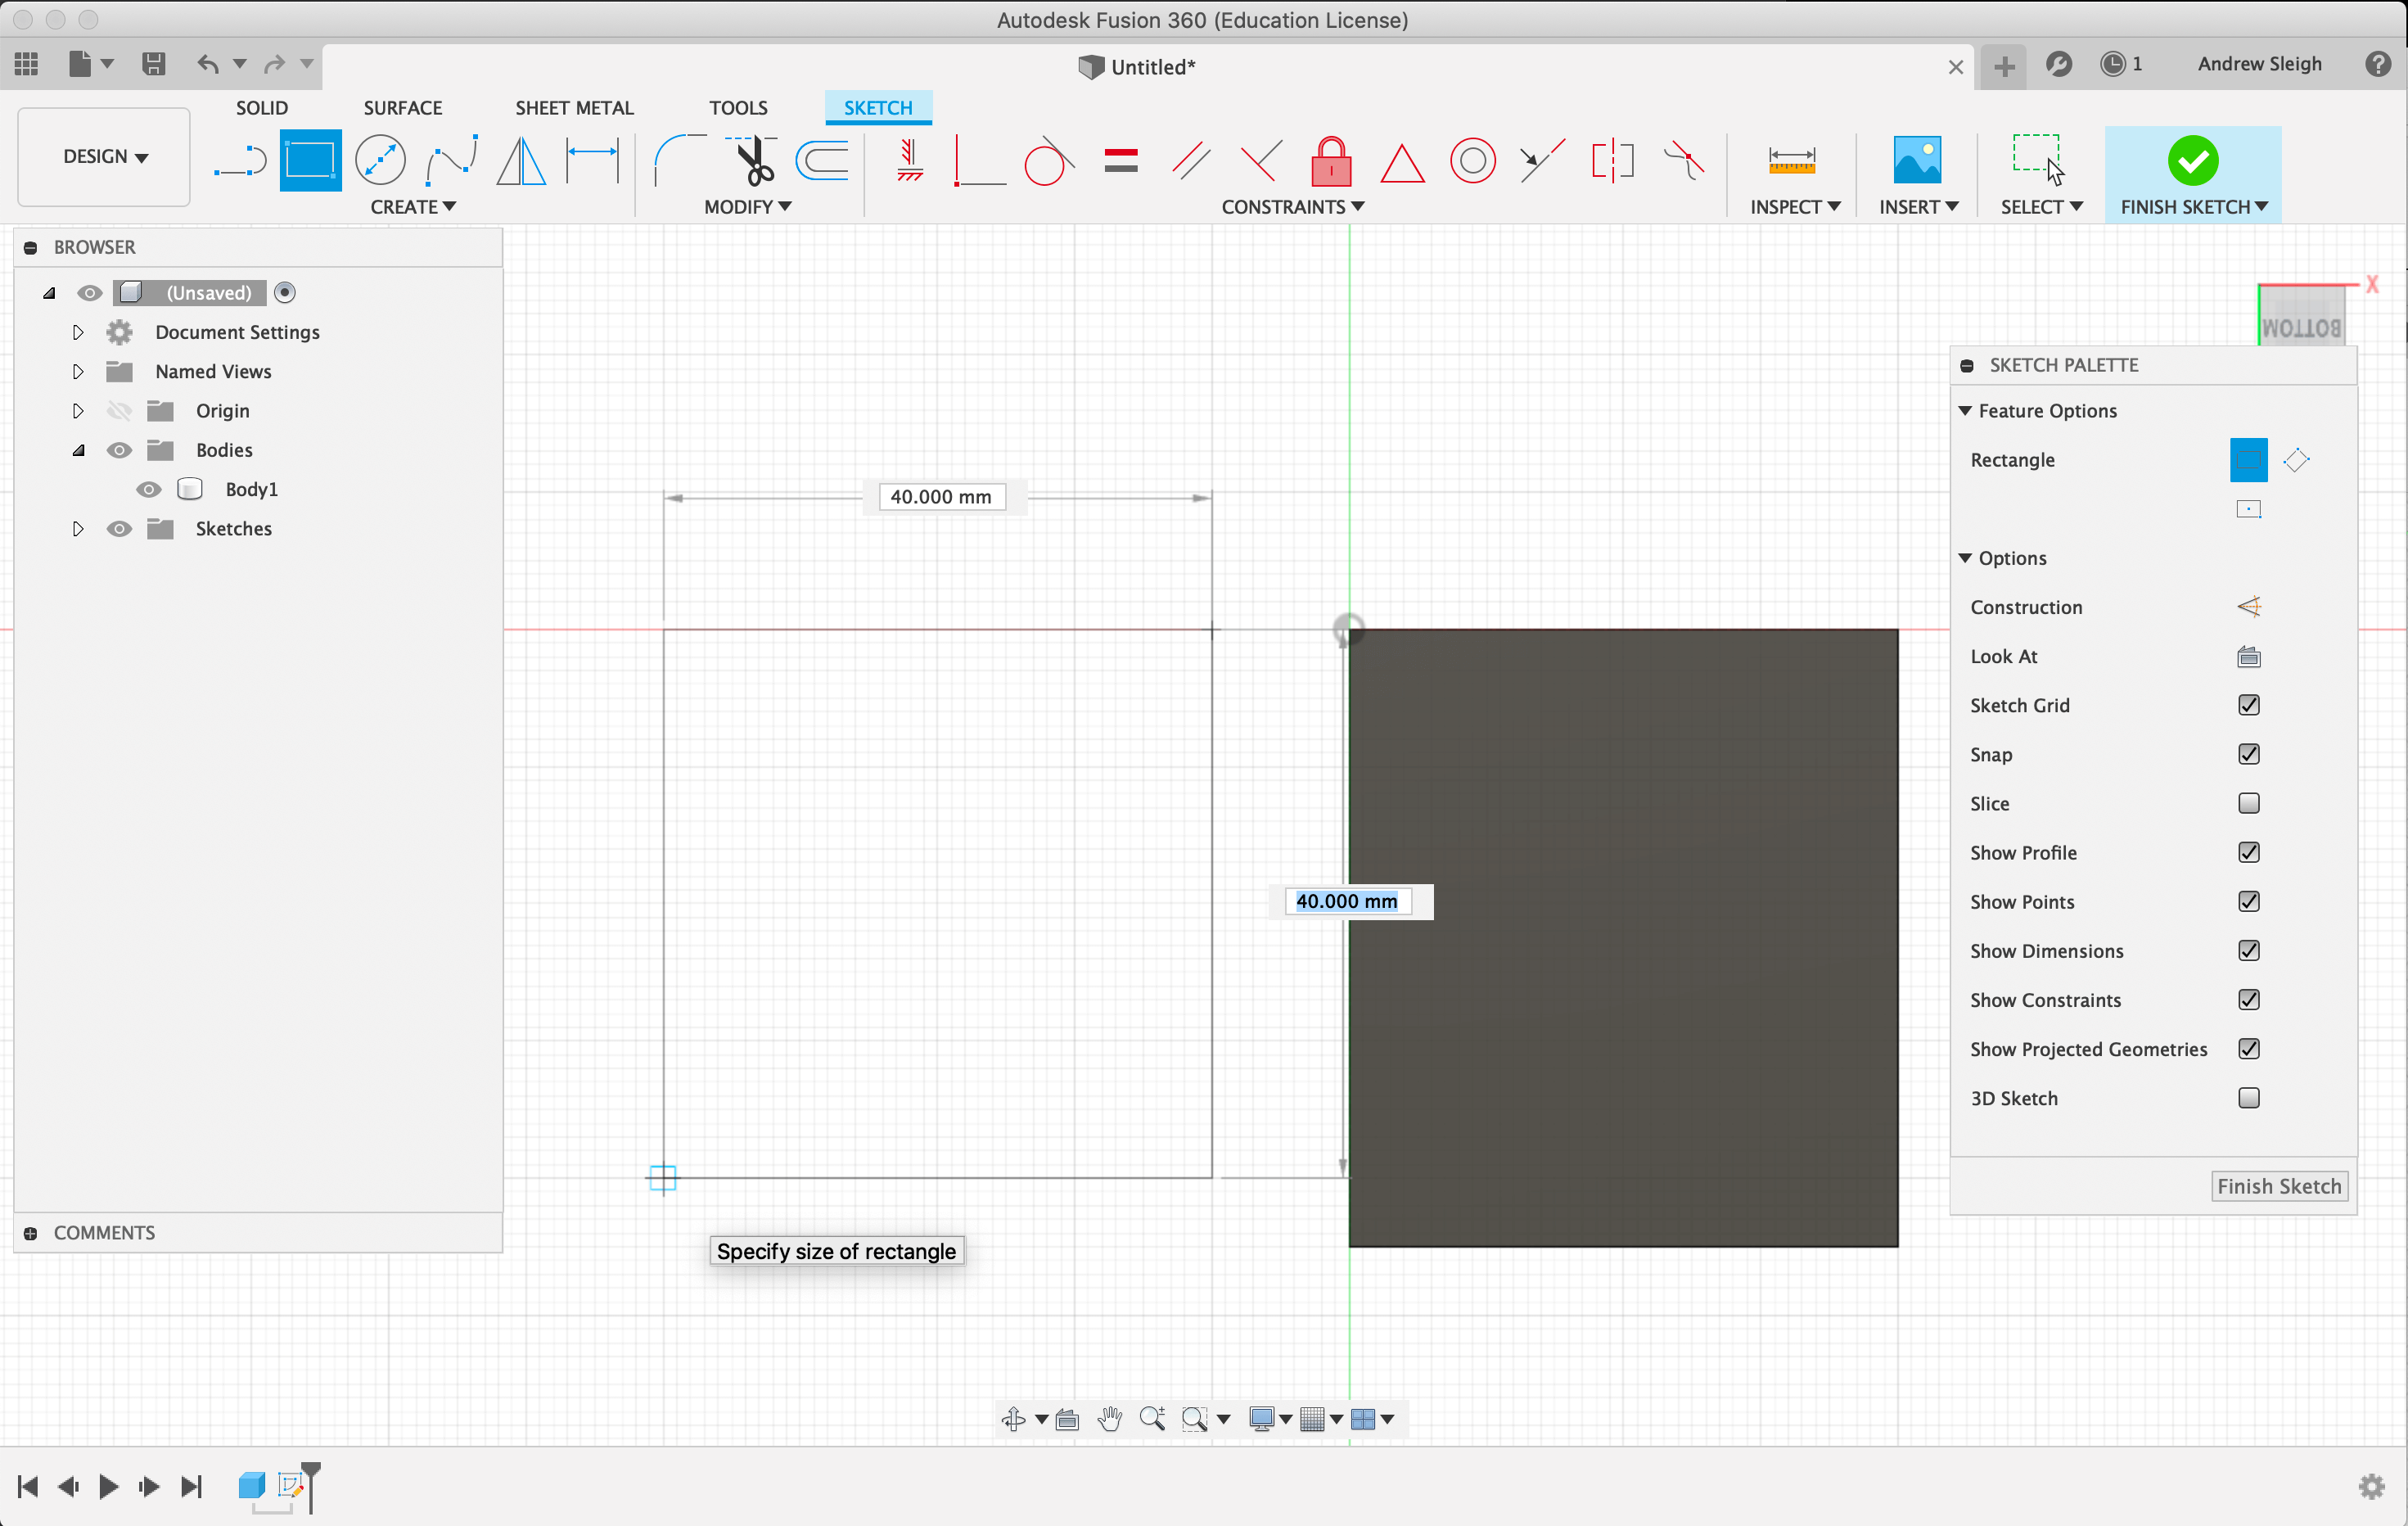
You can start by drawing 3D forms or extruding 2D sketches

Almost every operation starts from a specific plane, or face of an existing object.

Task 1: create two cubes (or simple 3D objects):
- by creating a 3D primitive directly
- by extruding a 2D sketch
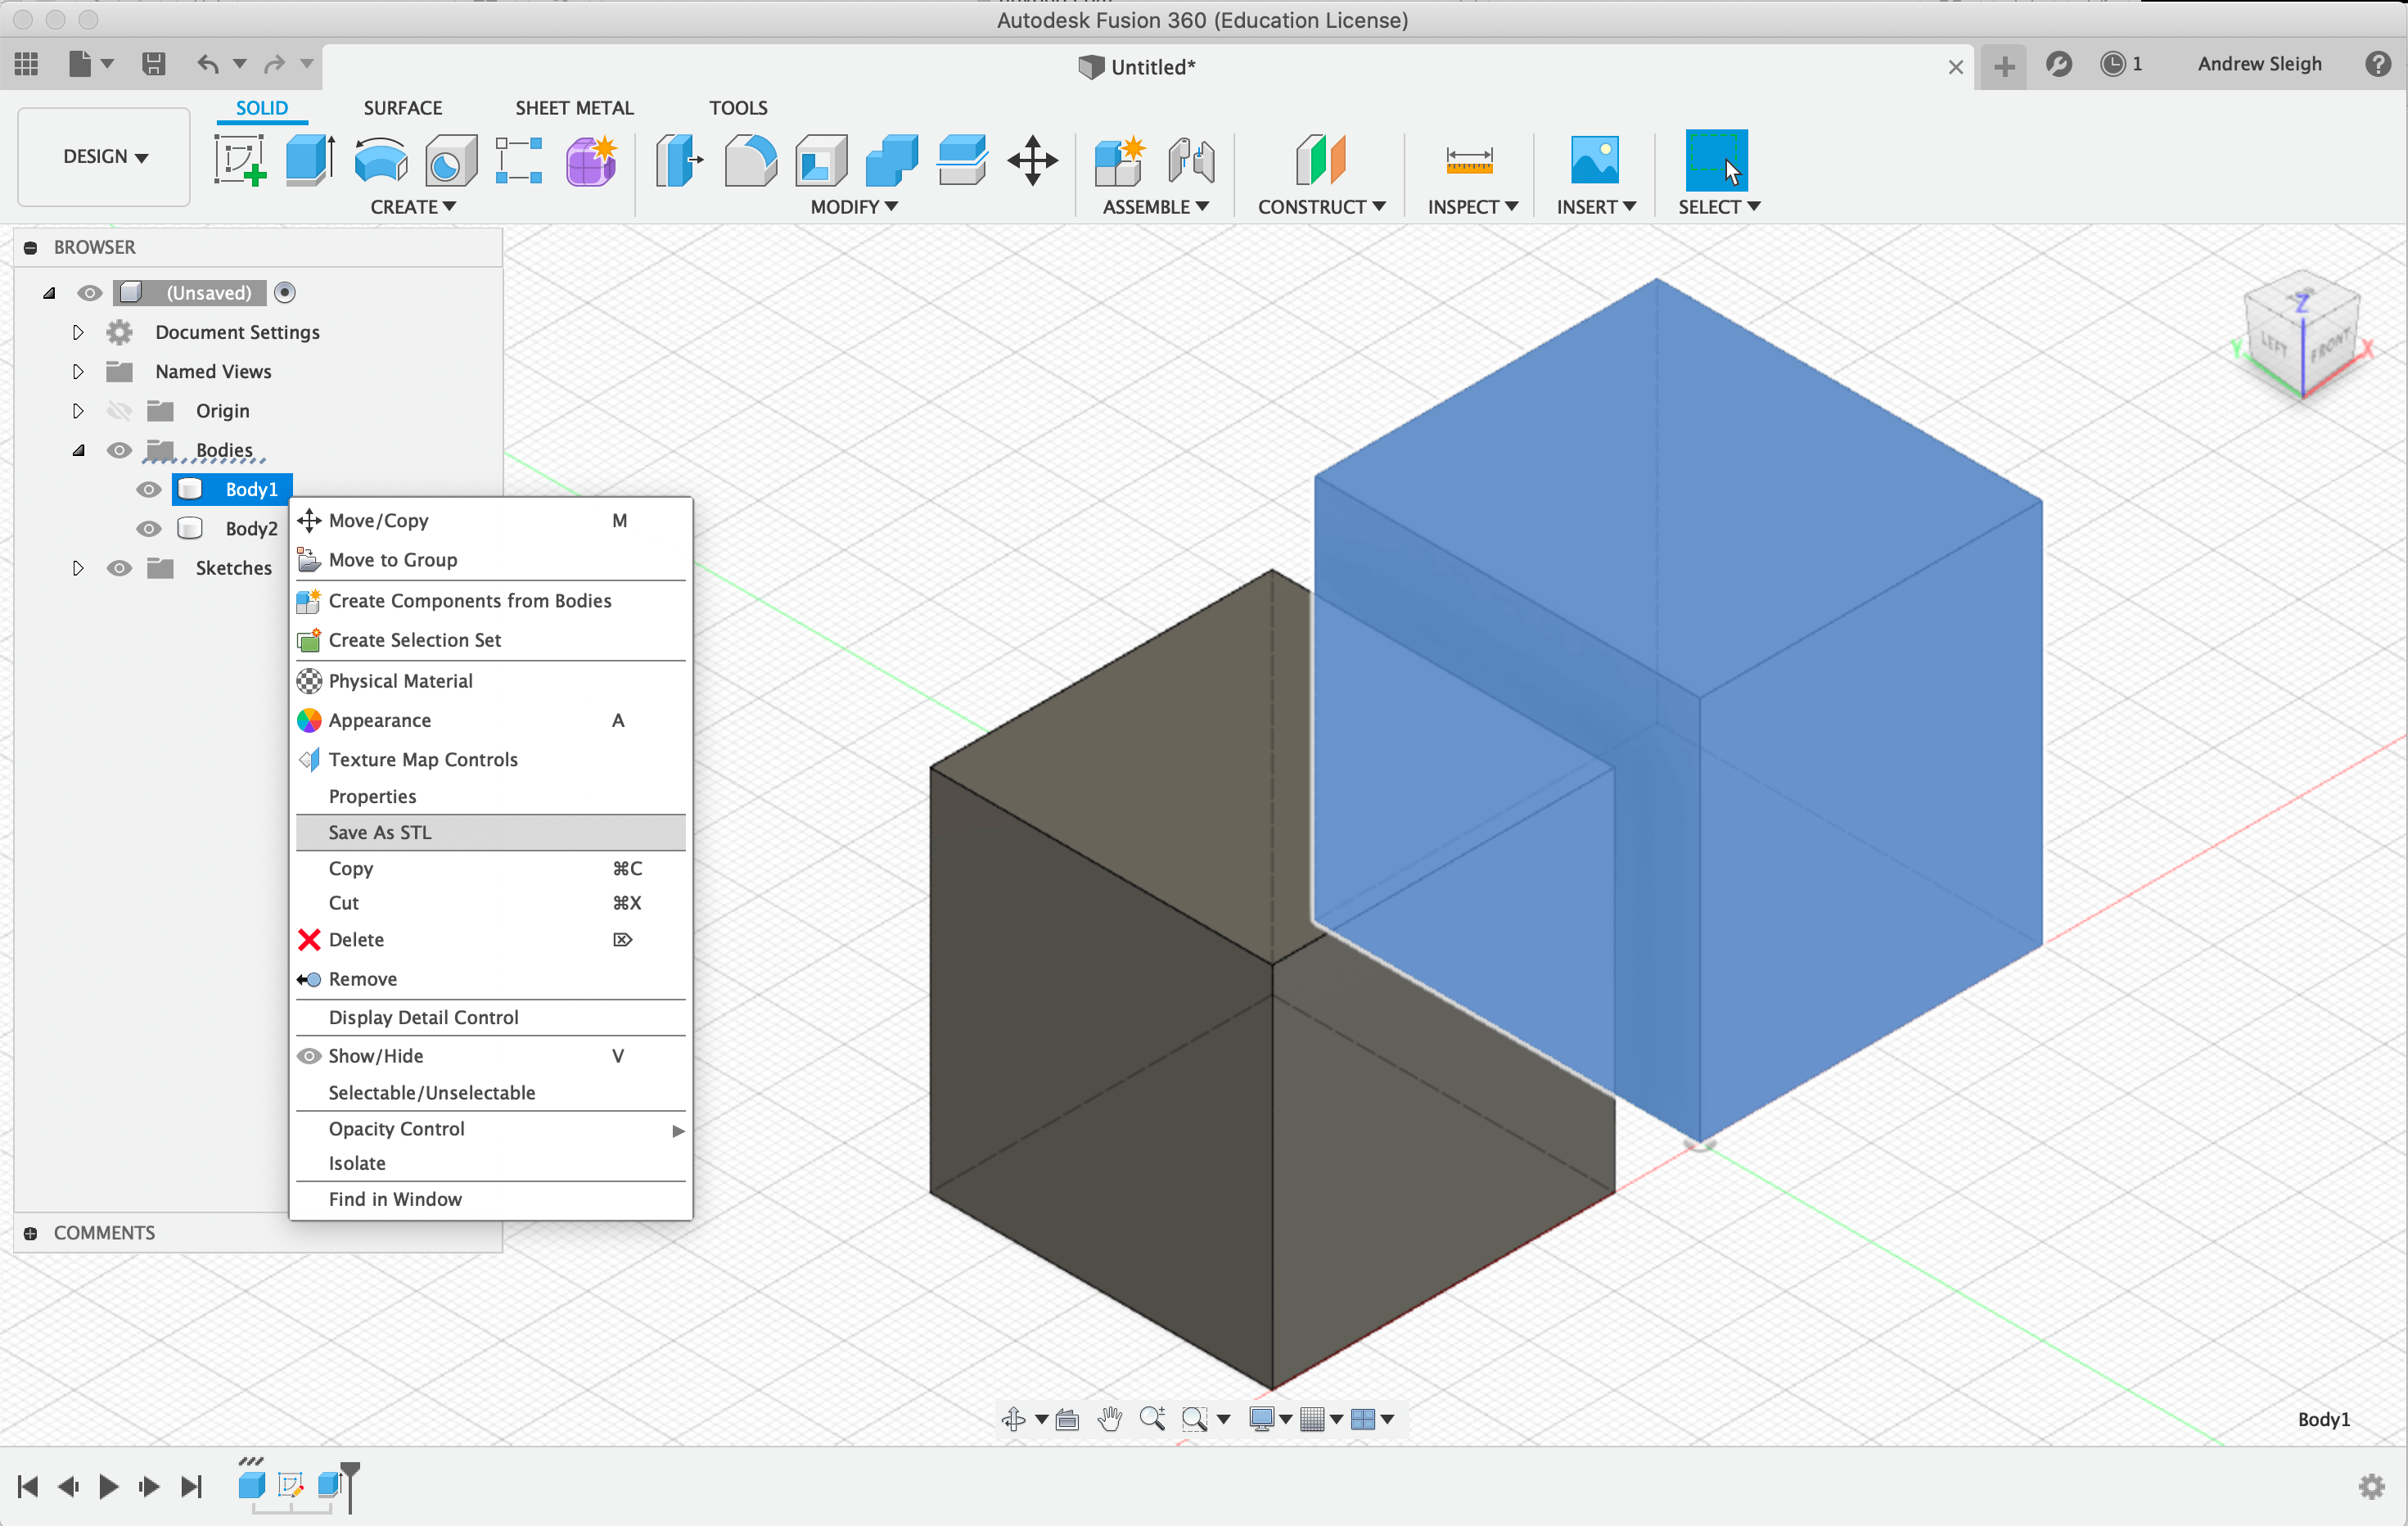
Bodies are stored in a hierarchy of objects (including sketches, axes, bodies and components).
Operations are recorded in a project history and can be suppressed, deleted or modified at any time.
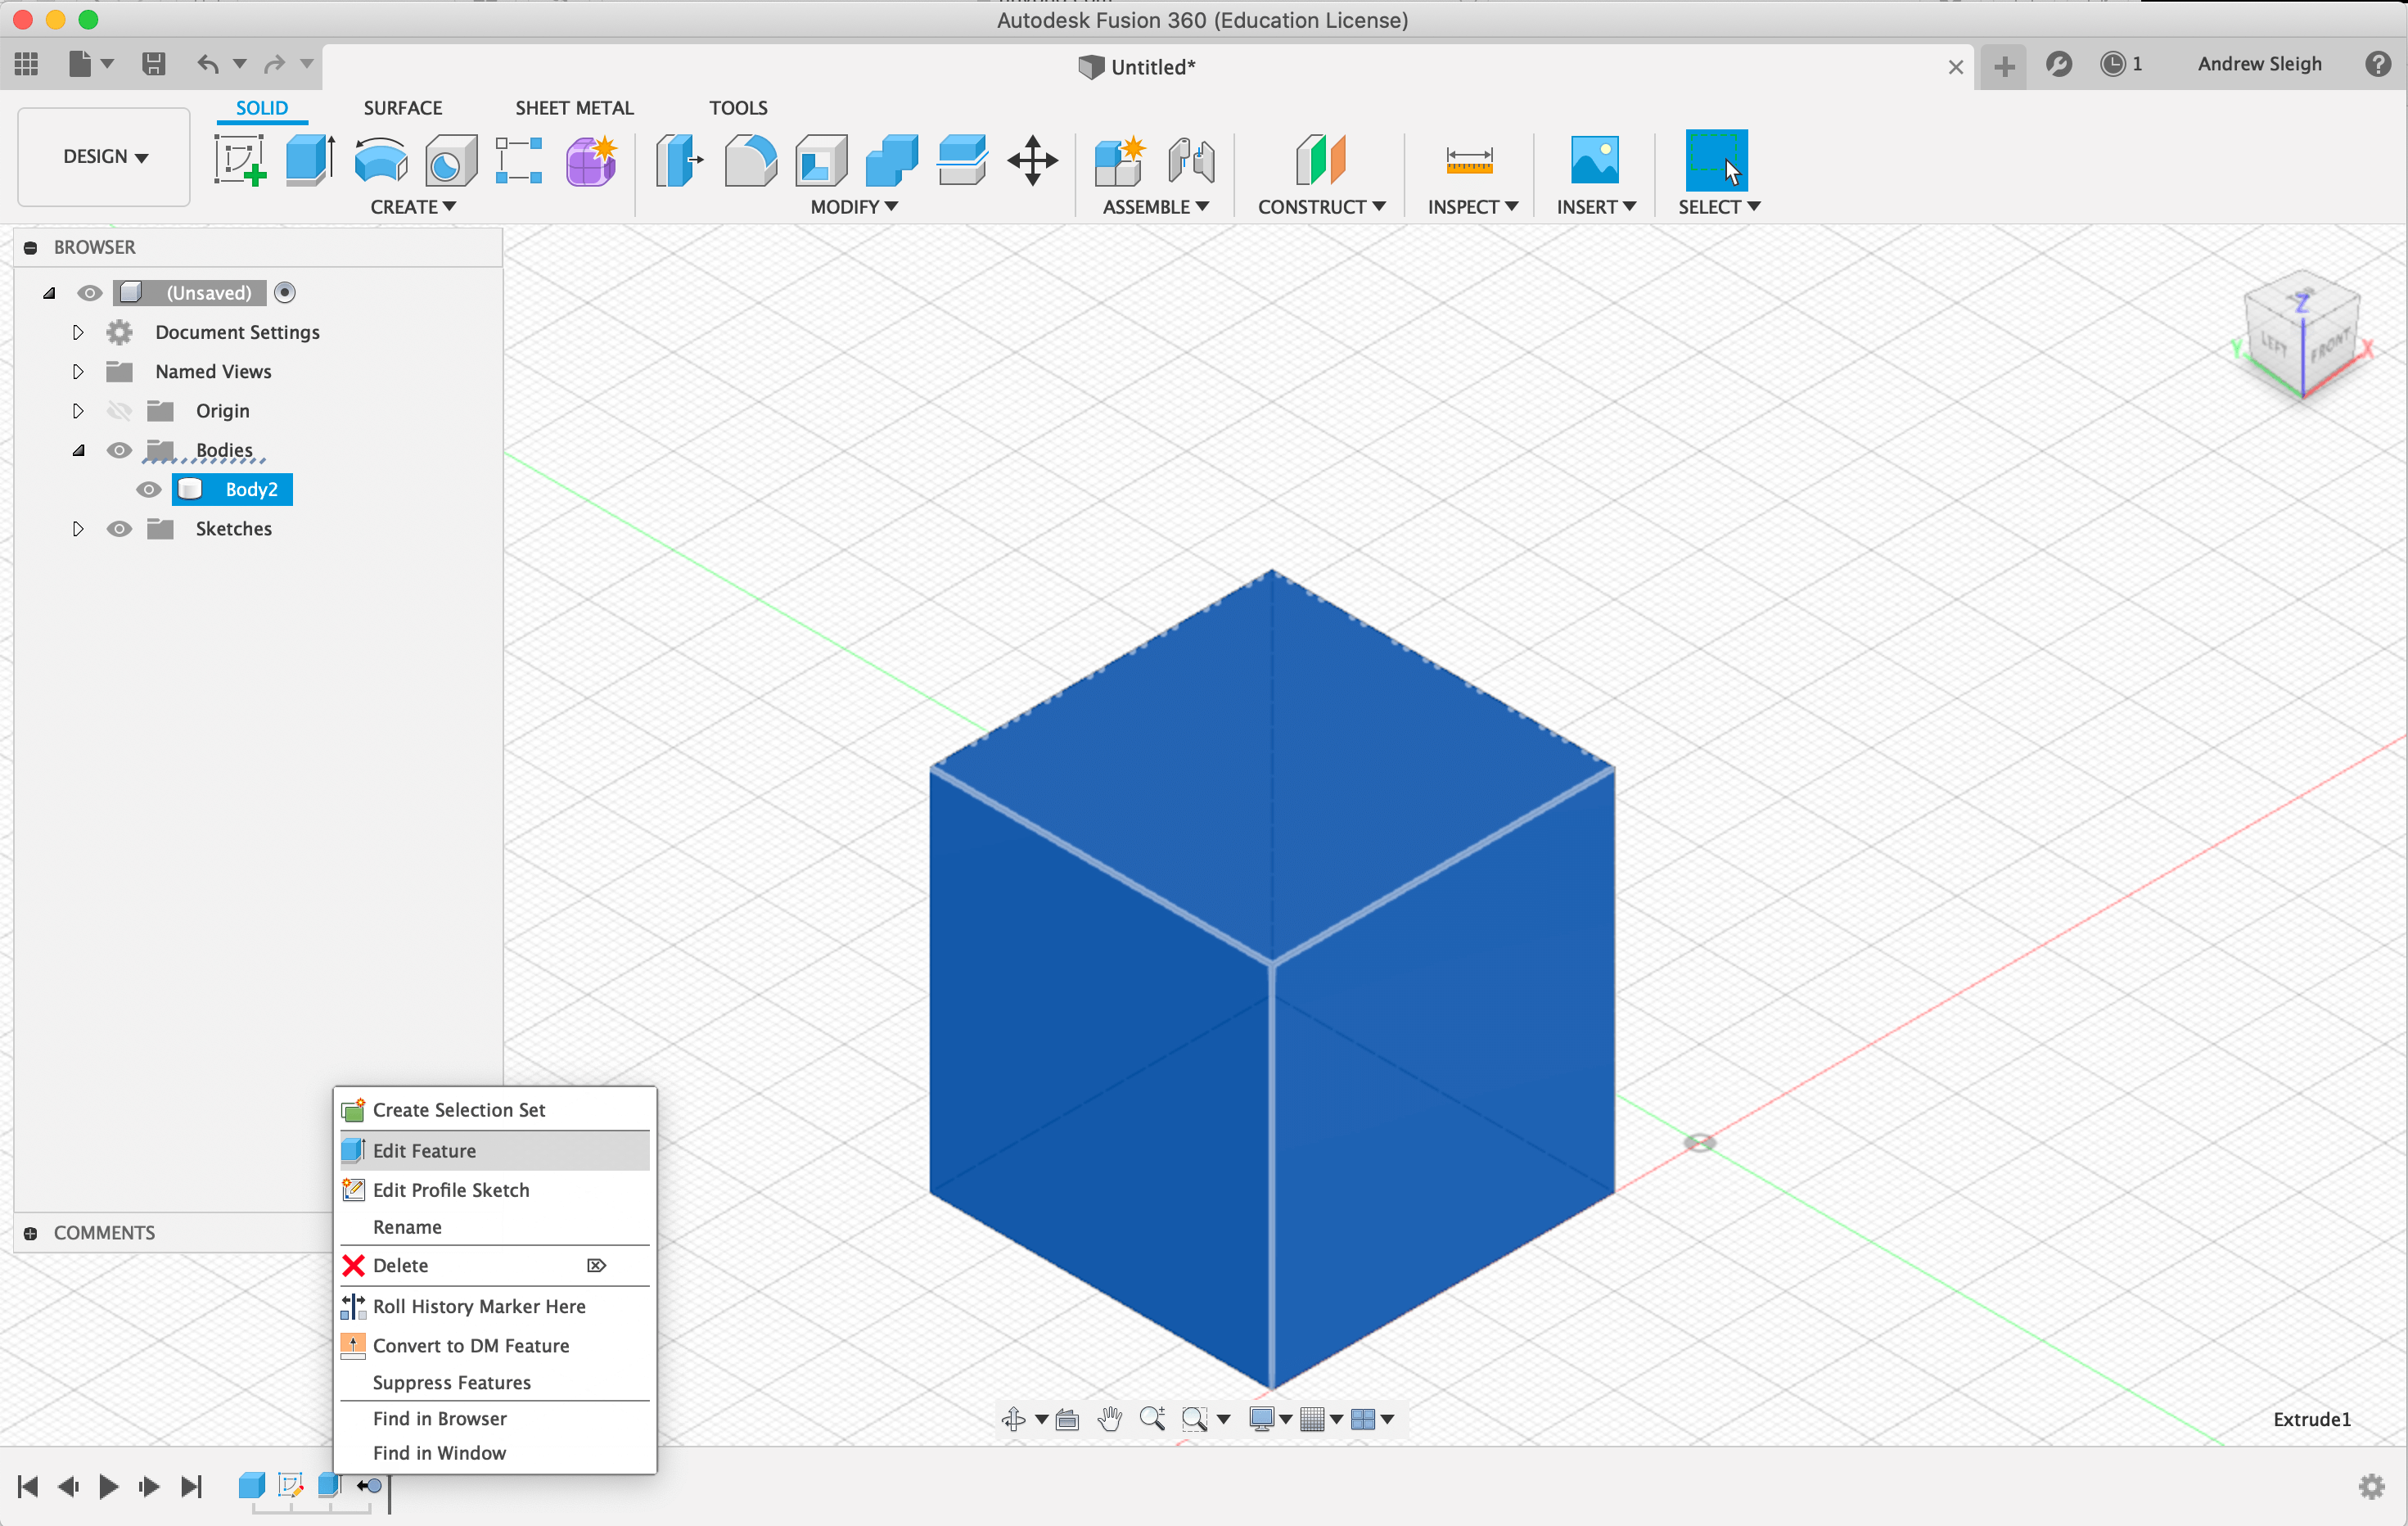
Task 2: remove a body from the browser, and edit another from the timeline
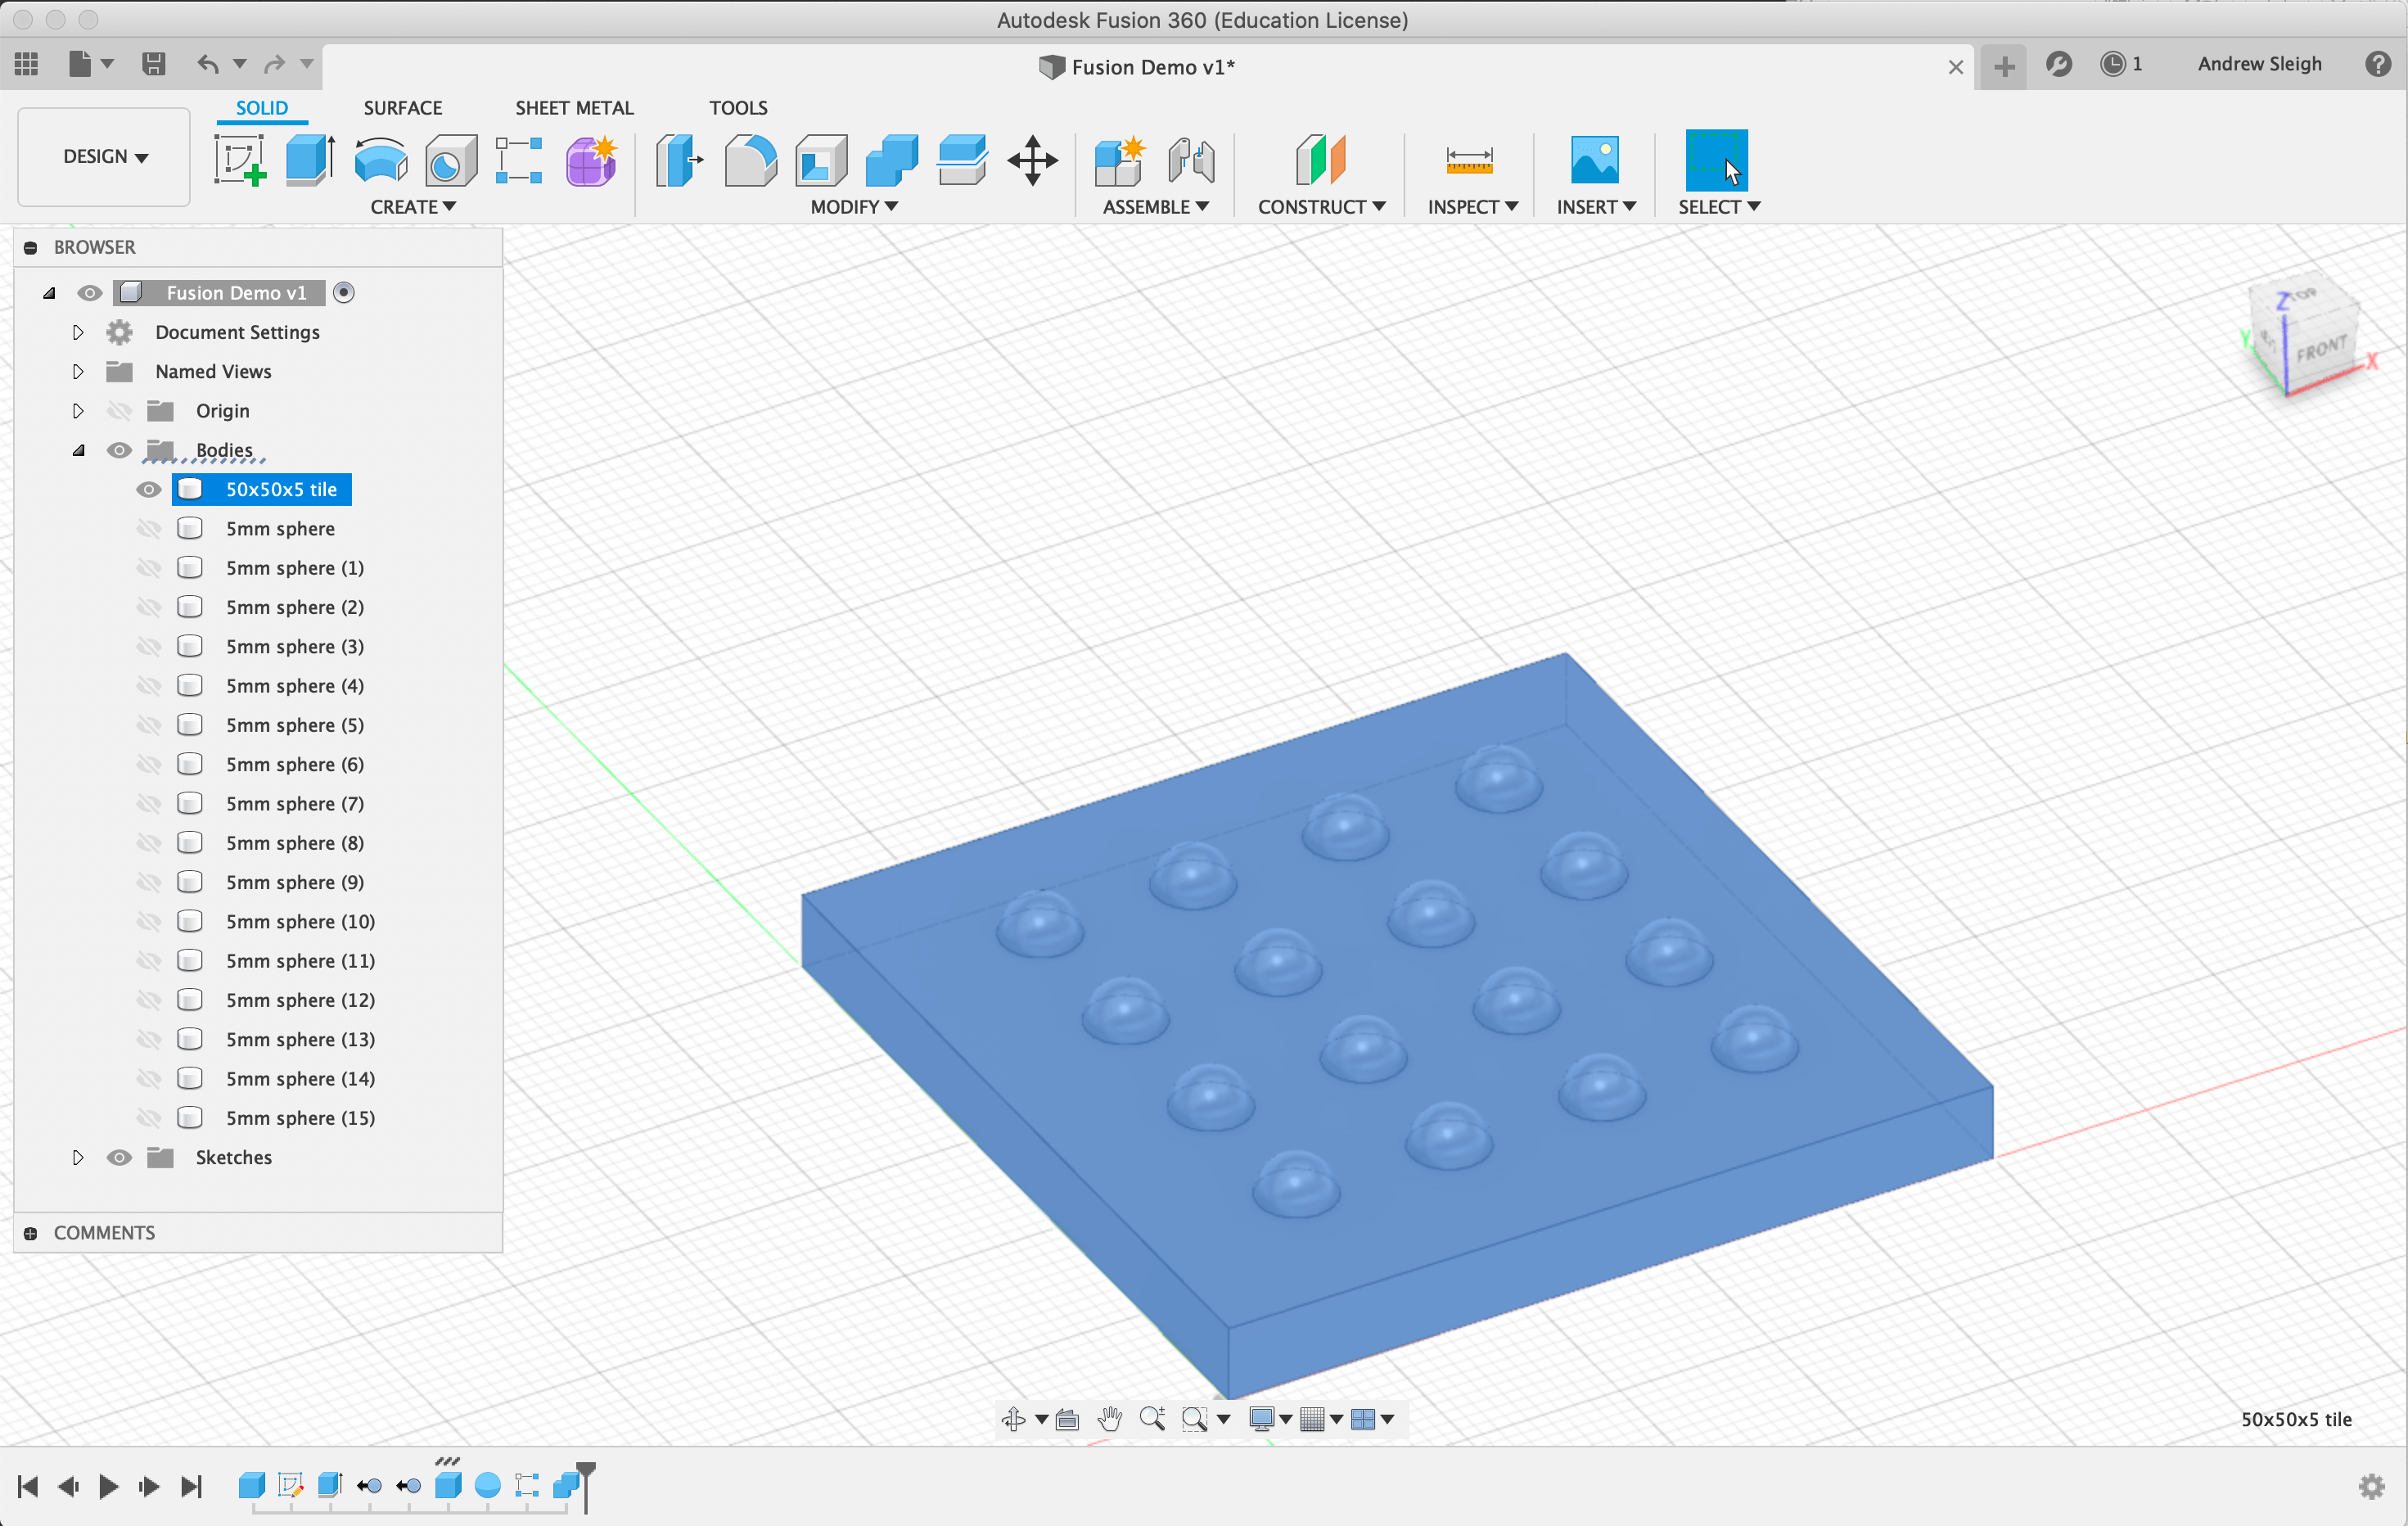
Bodies are independent and editable seperately until they are joined. (Don’t join your bodies until you need to.)
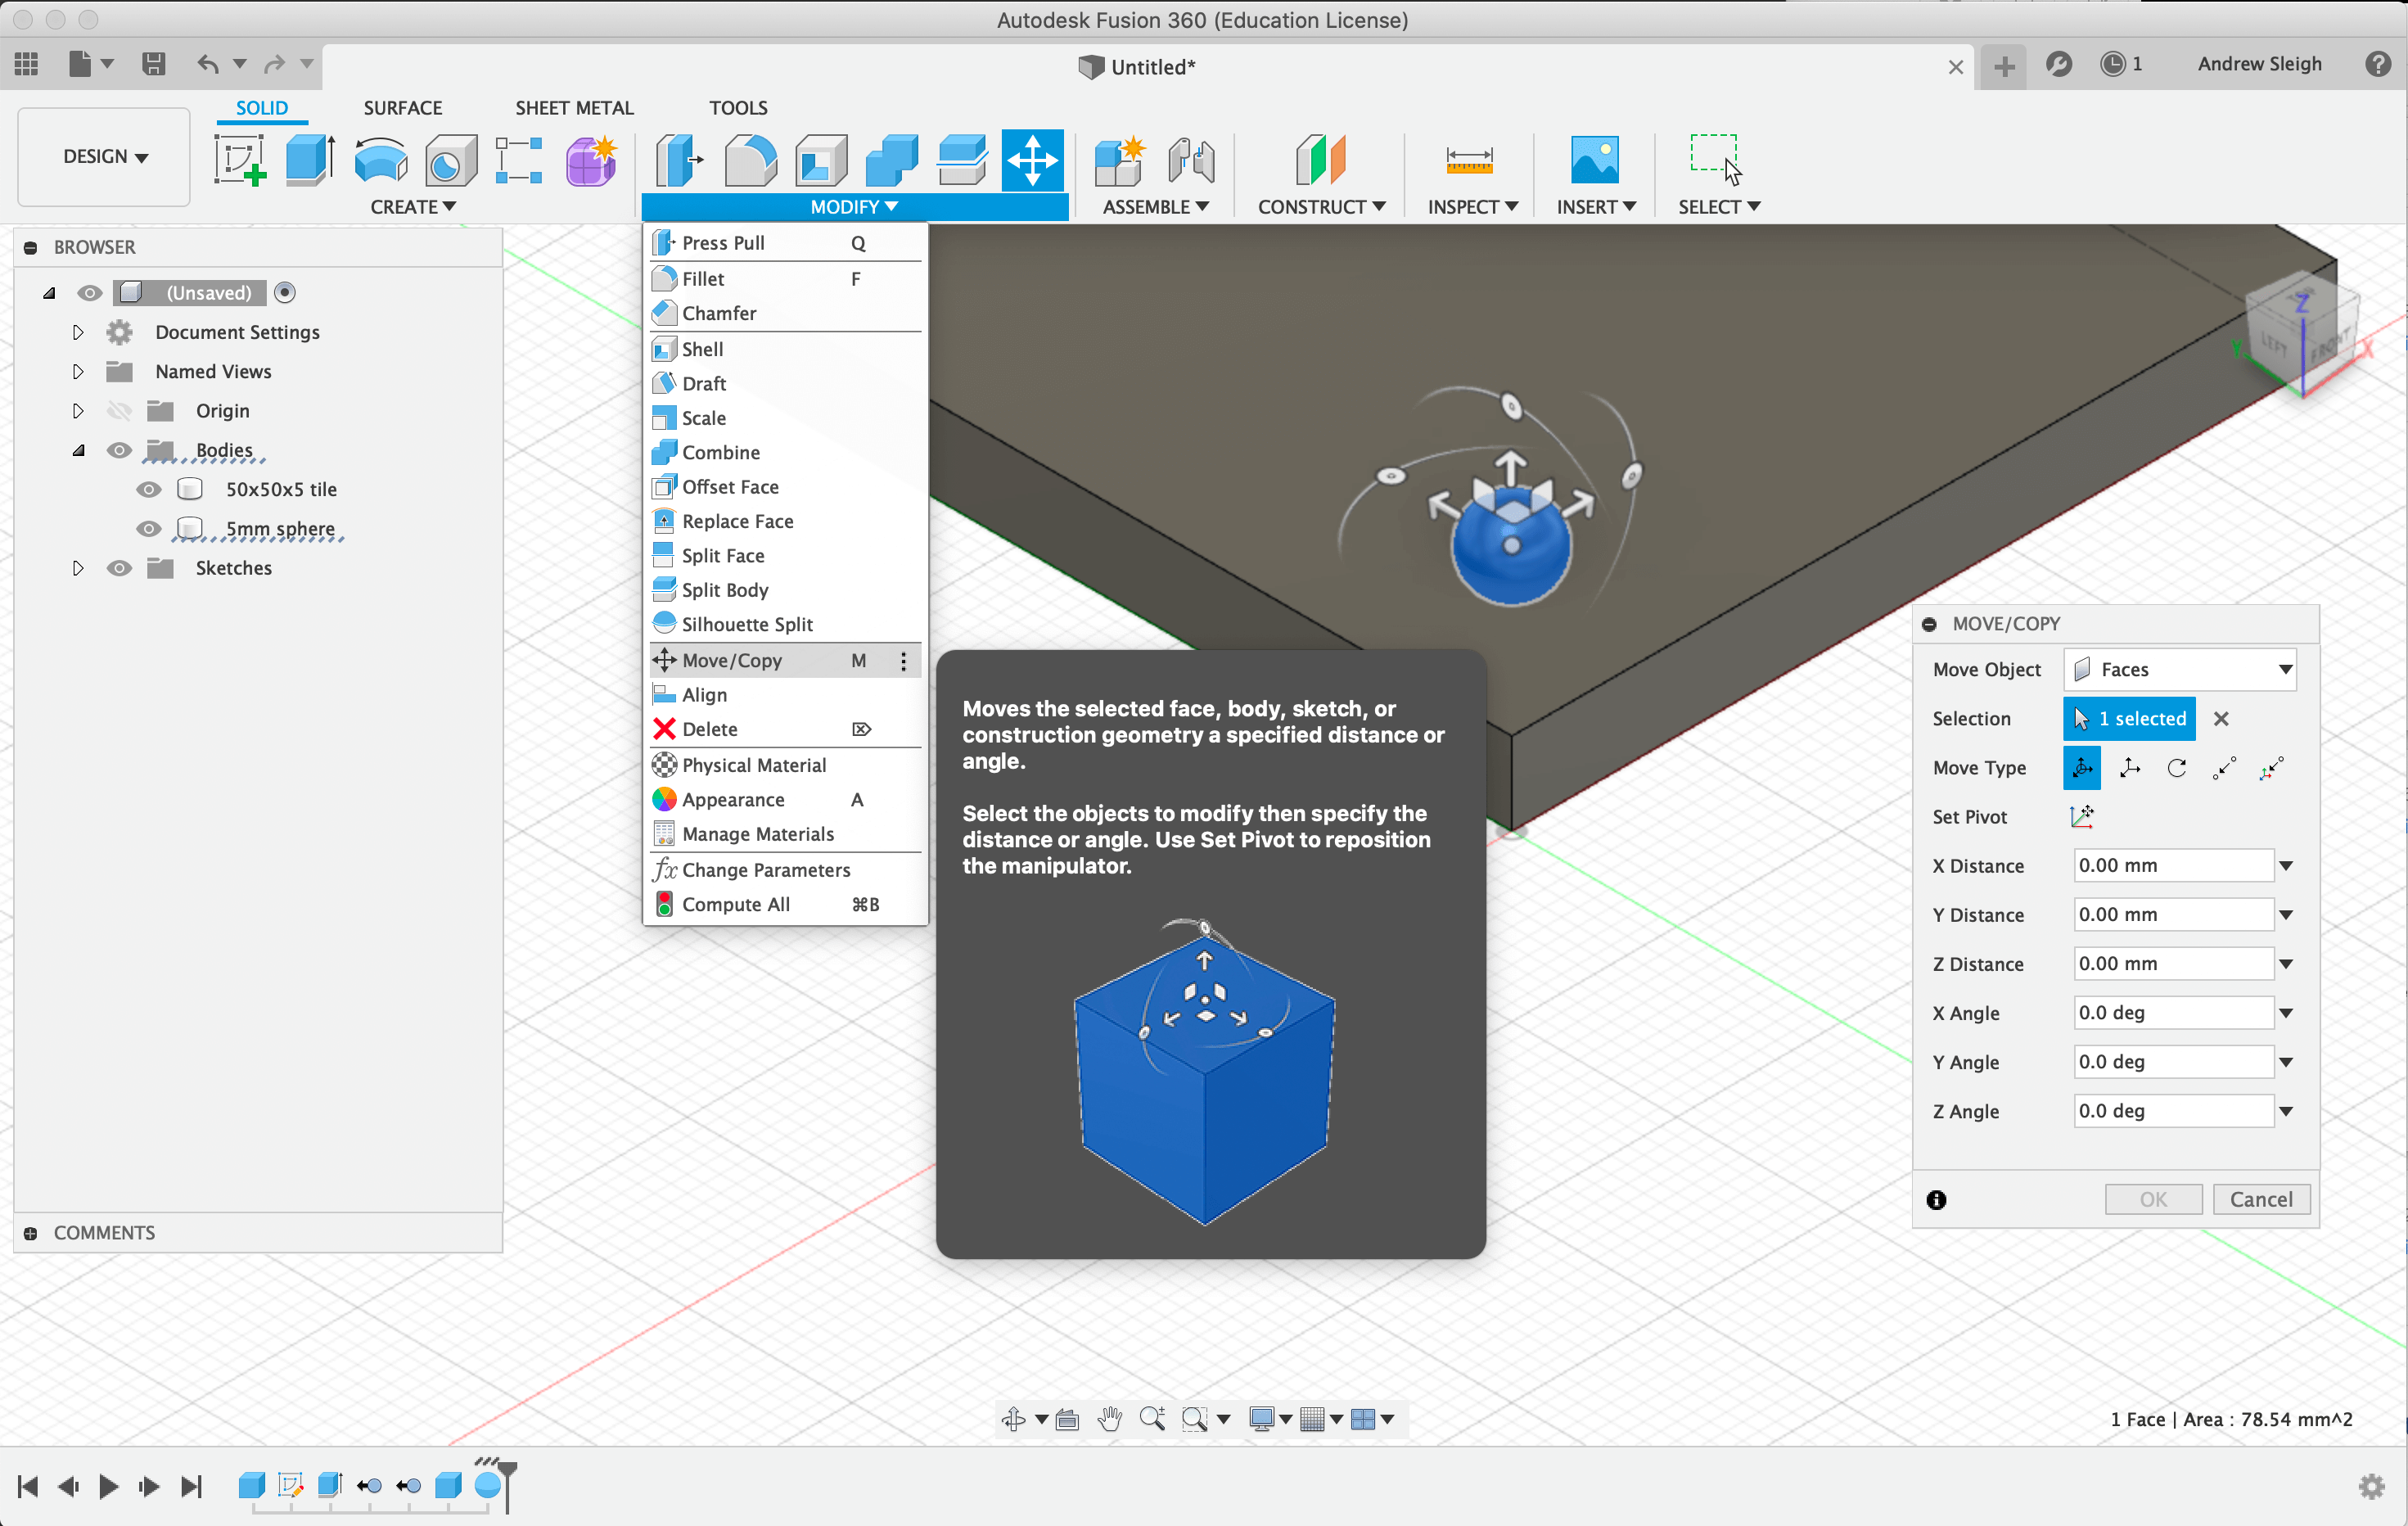
Many things can be moved, including bodies, faces and sketches.
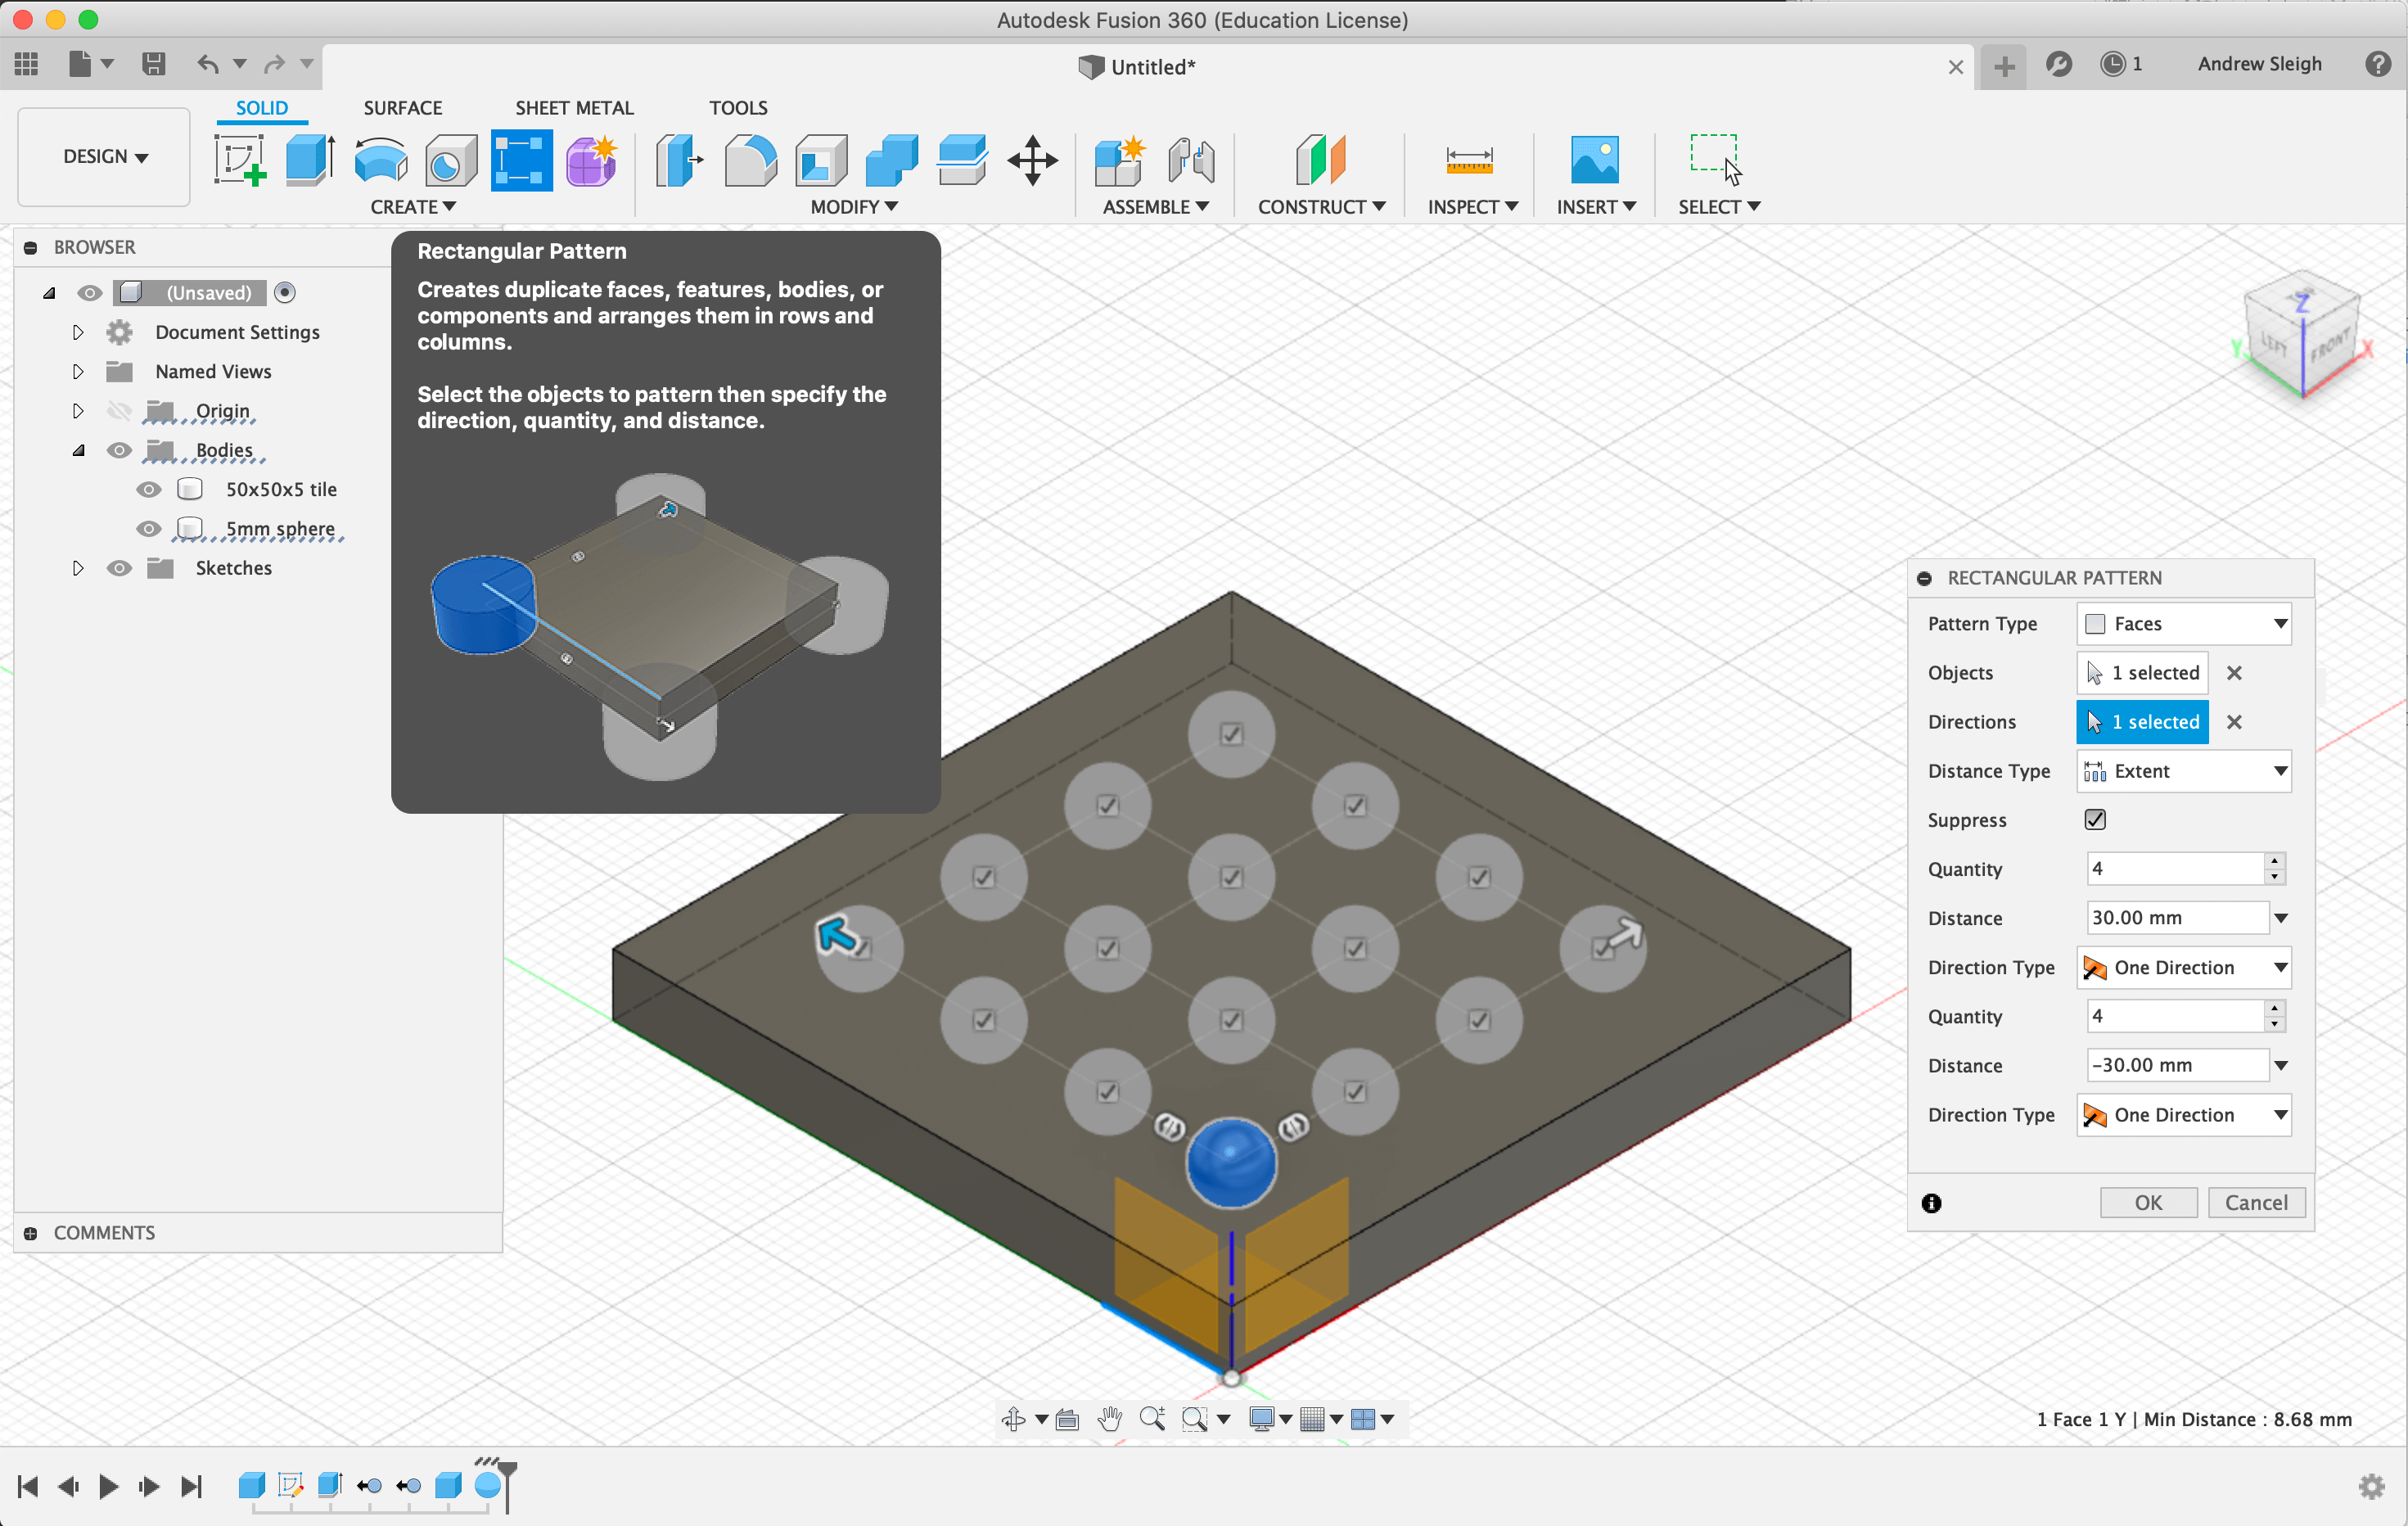
You can create patterns by copying instead of moving objects There is also a pattern tool to quickly make complex repeaing patterns (This can generate a lot of new objects!)
Use Combine to join bodies together, or cut them away
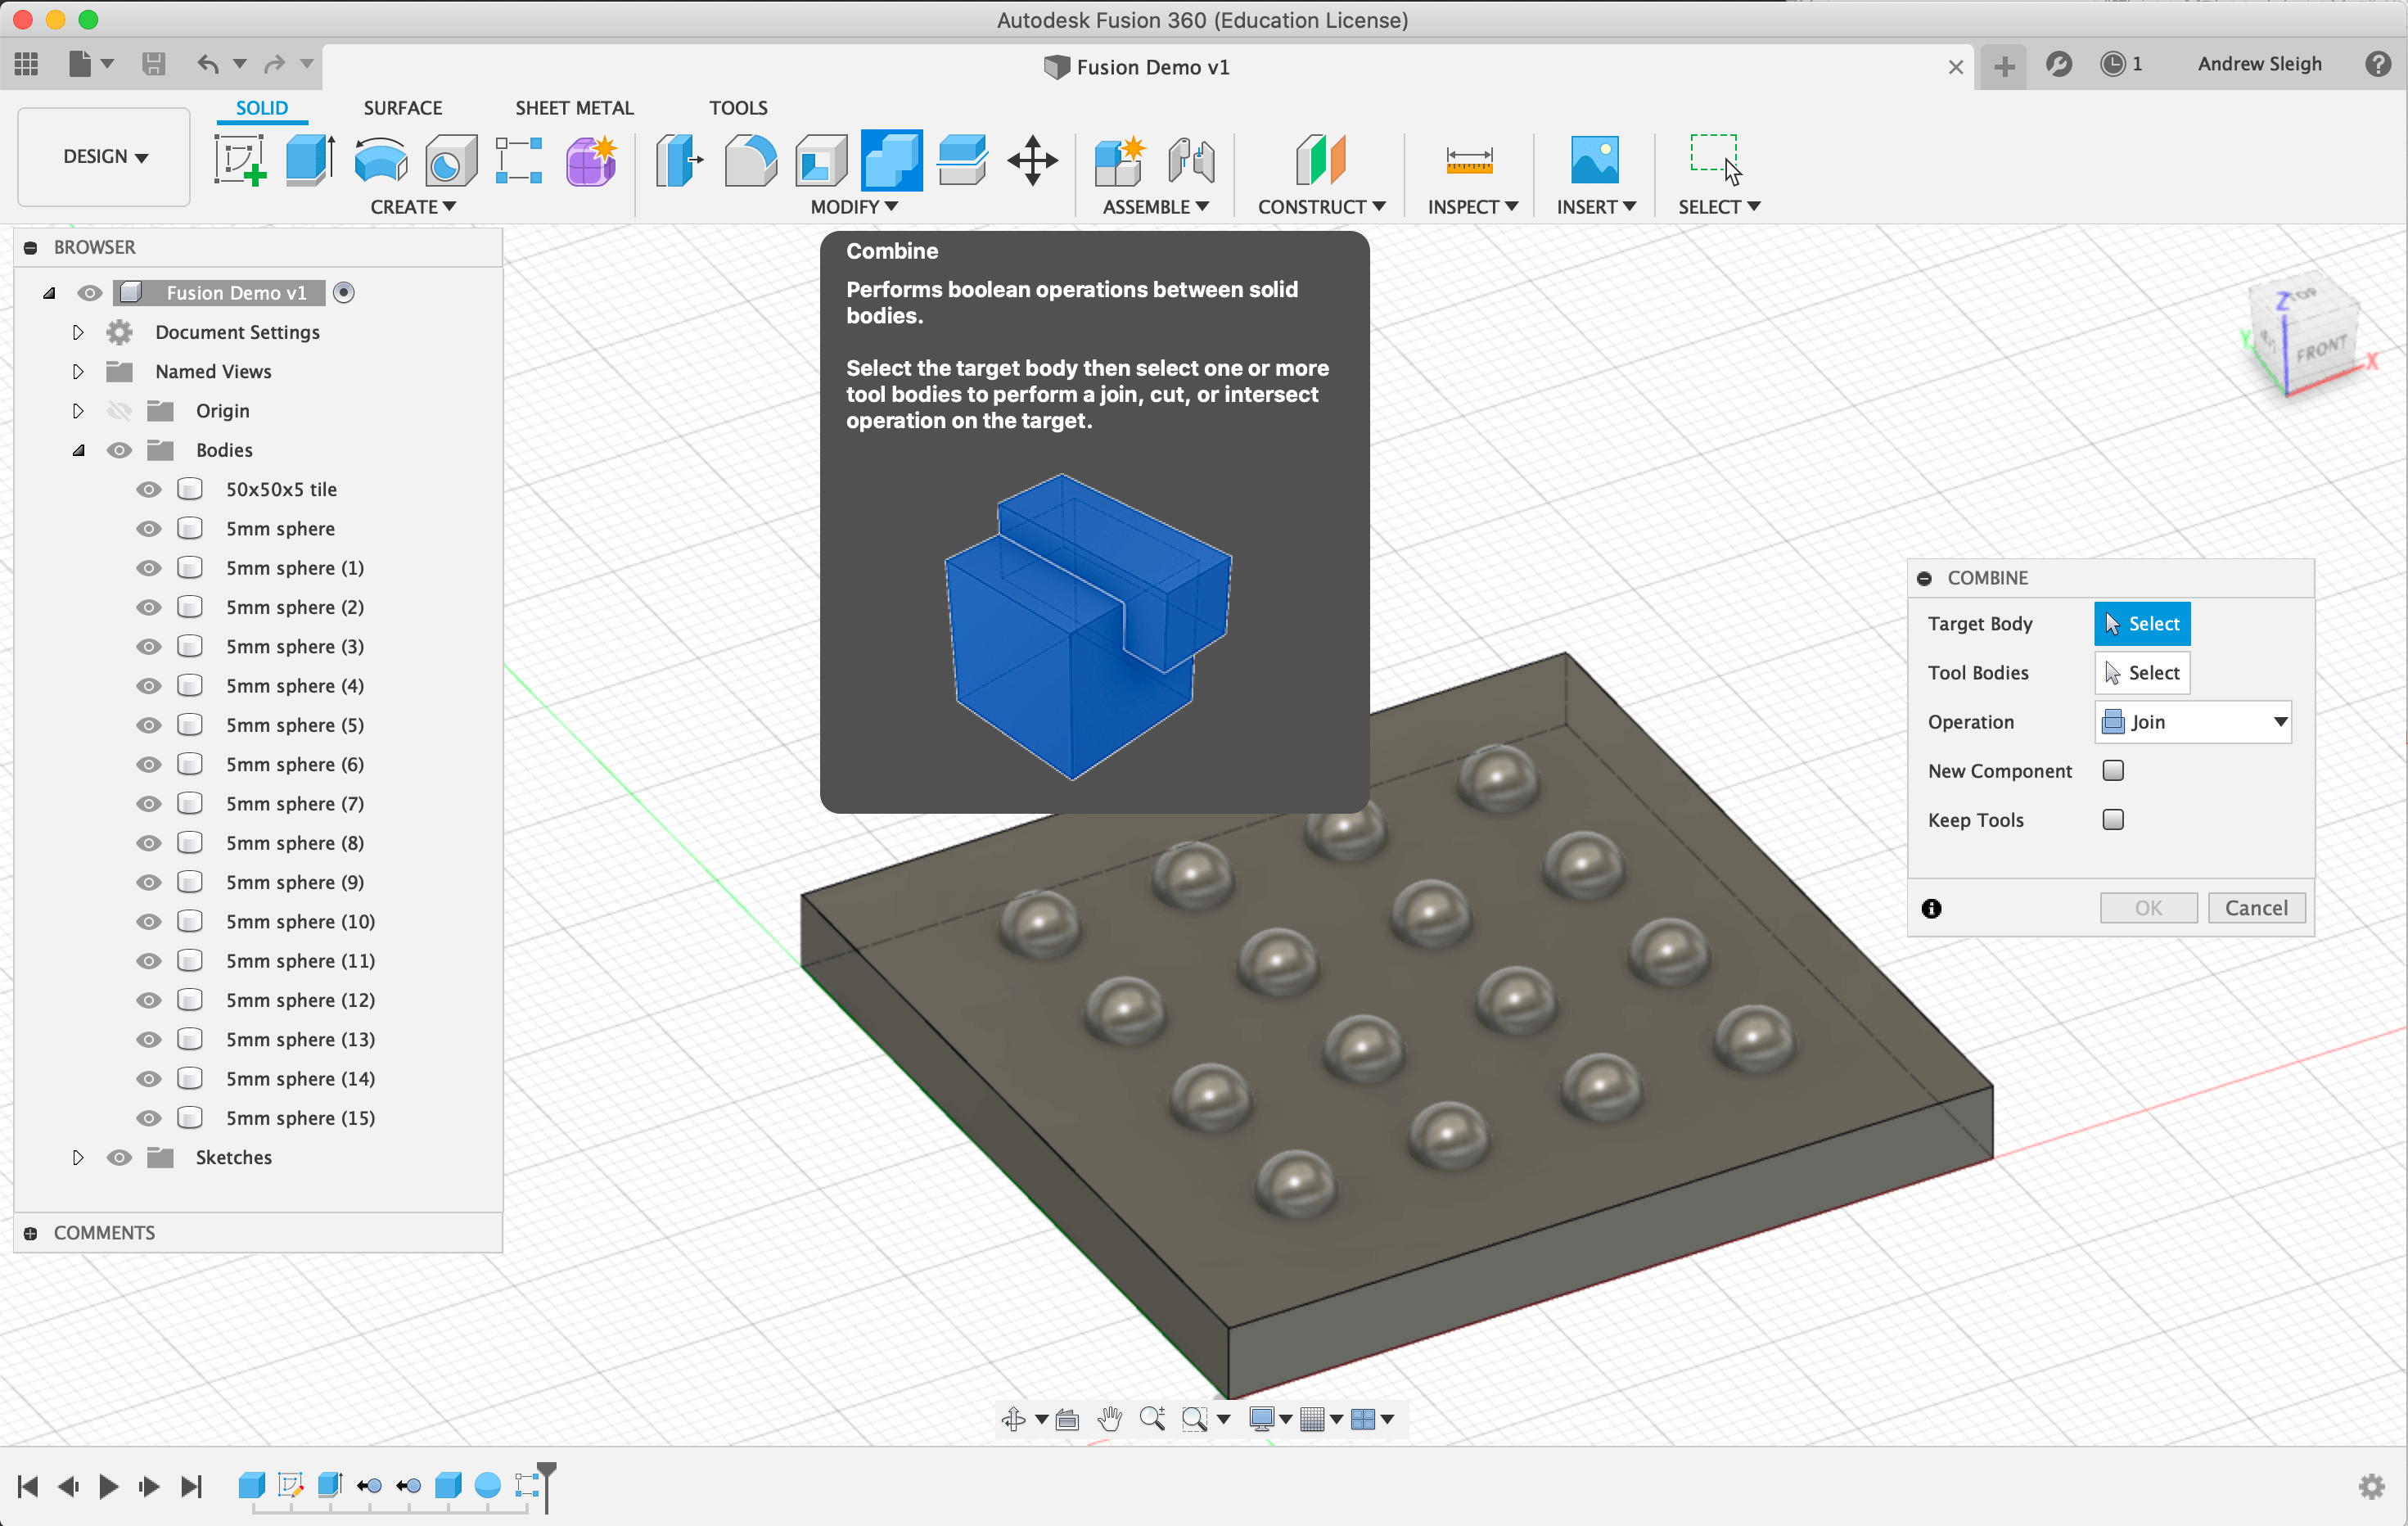
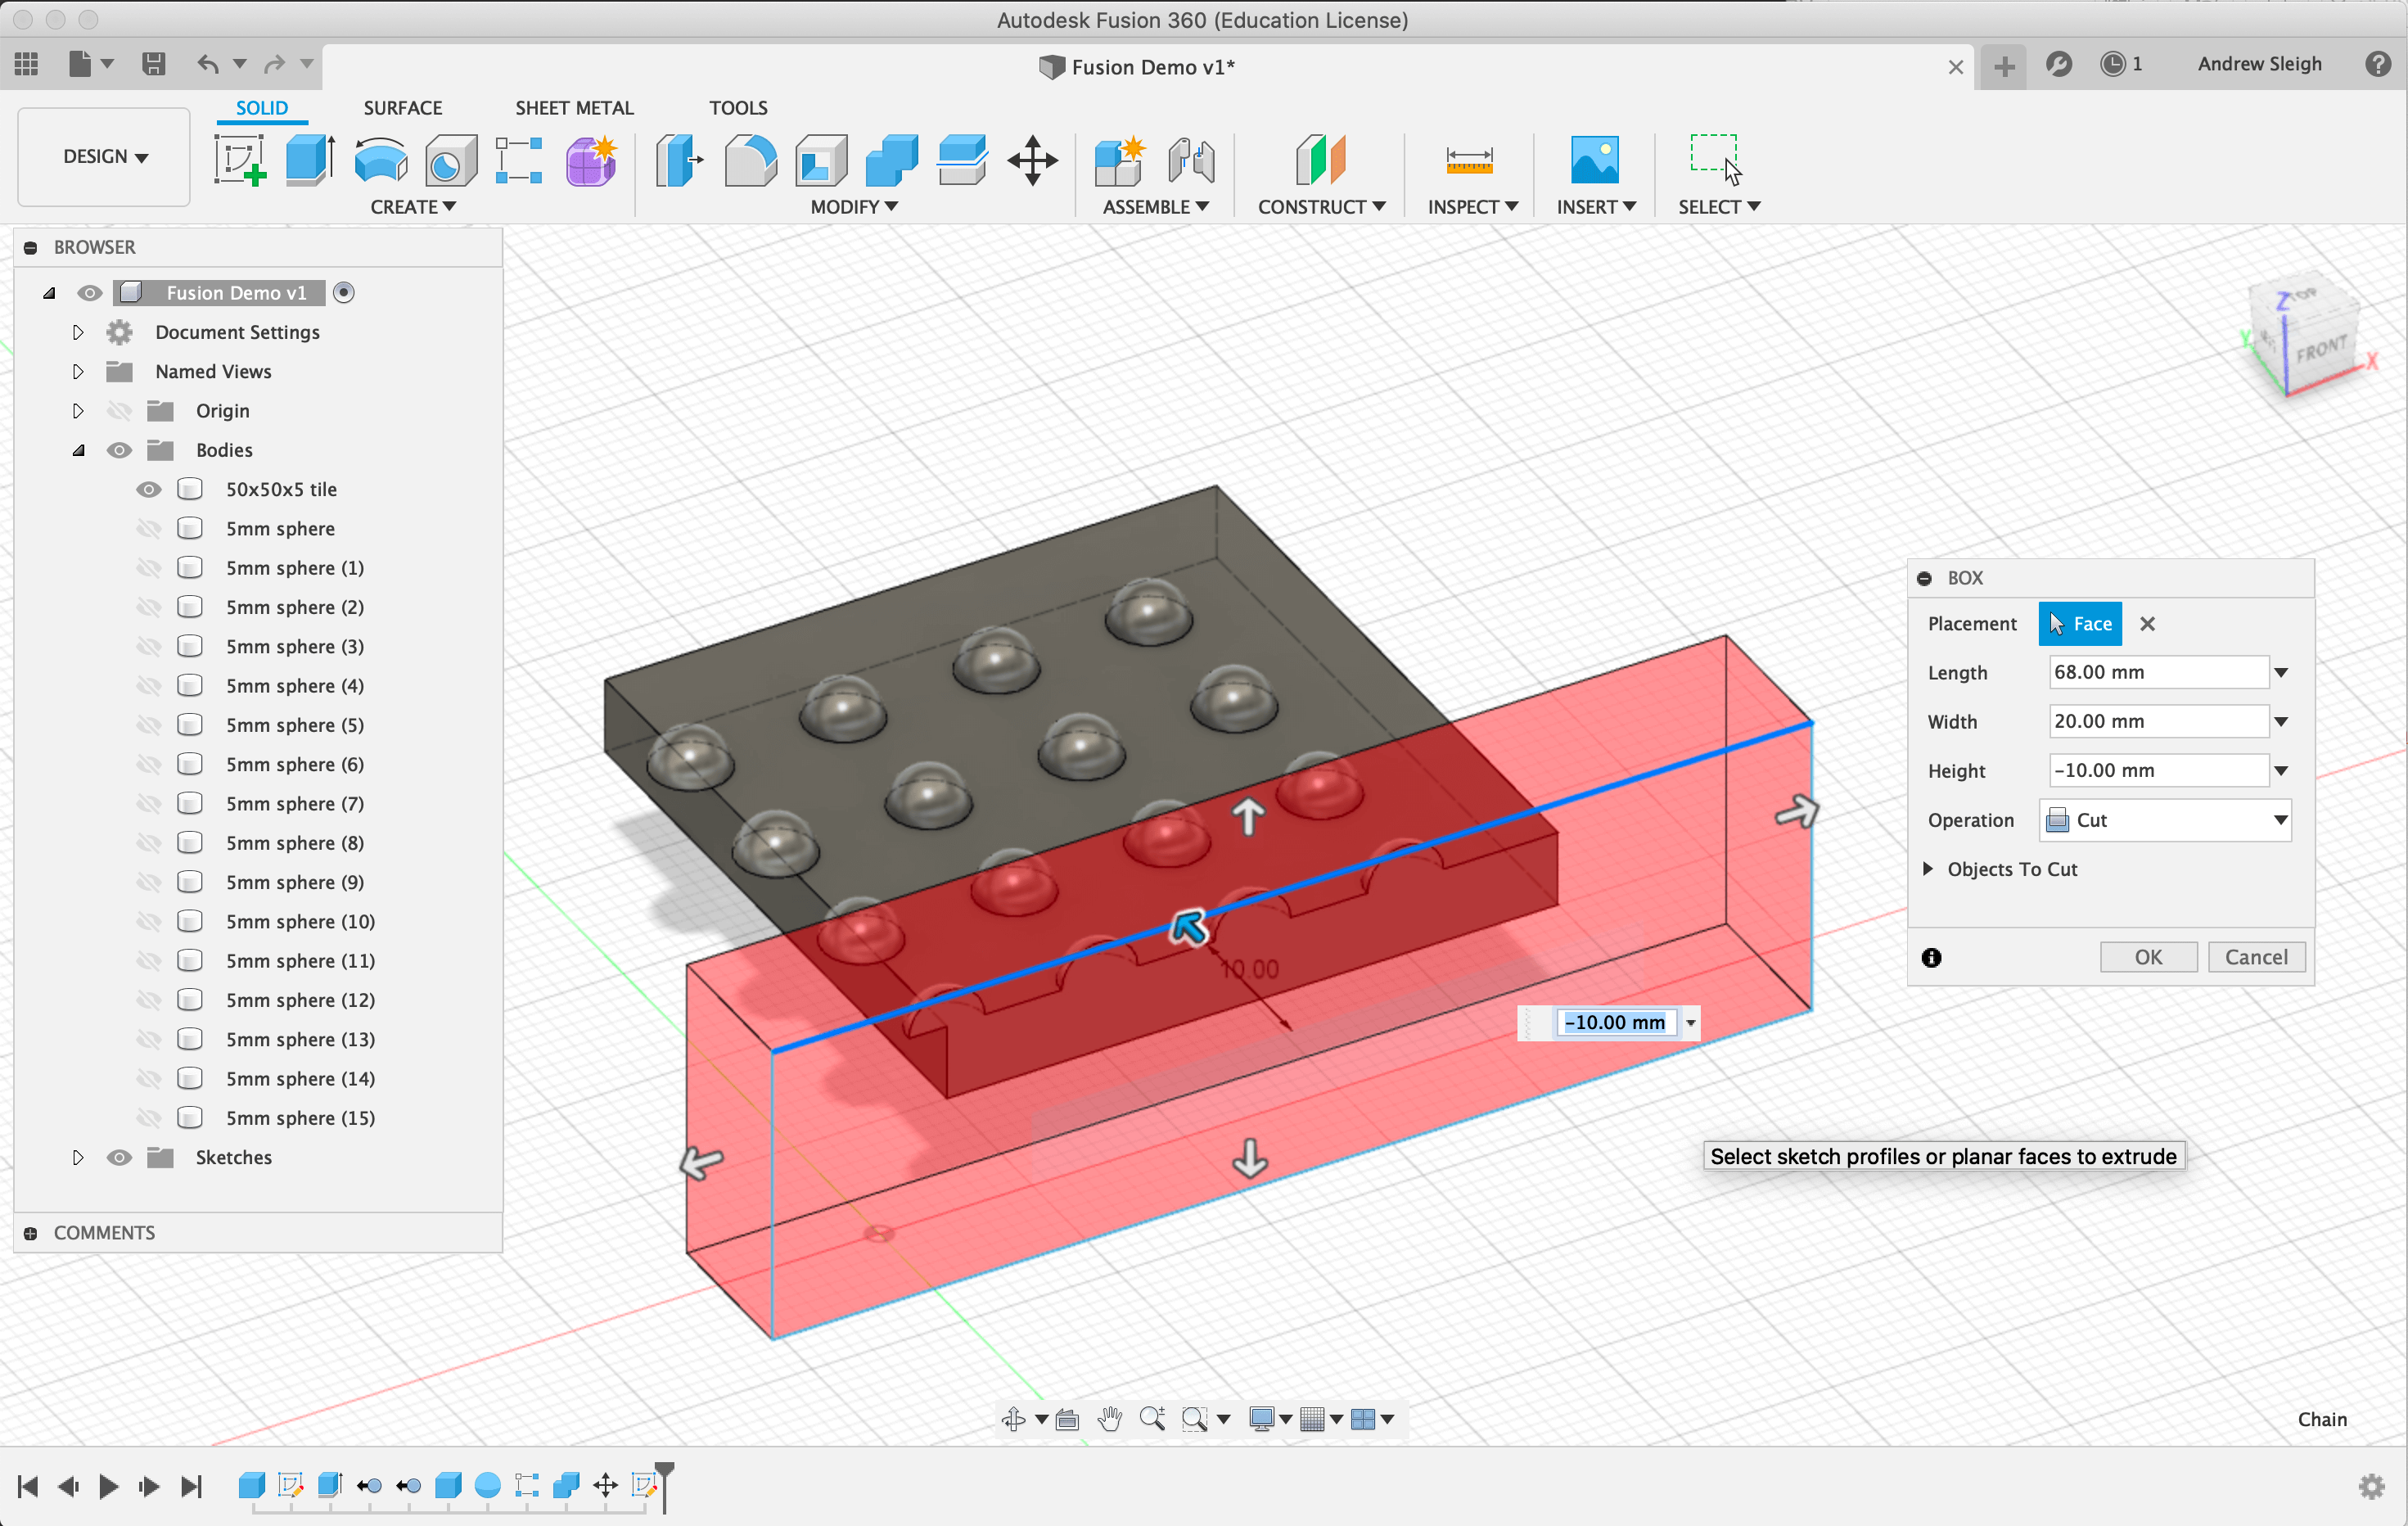
As well as adding objects, you can create complex shapes by working subtractively: punch holes, slice off volumes, trim faces, etc.
(Notice the difference between moving faces and trimming them.)

You can also create (or import as SVG) complex shapes in 2D, and then extrude them into 3D. (Beware, sketches are hidden by default after they’re extruded.)

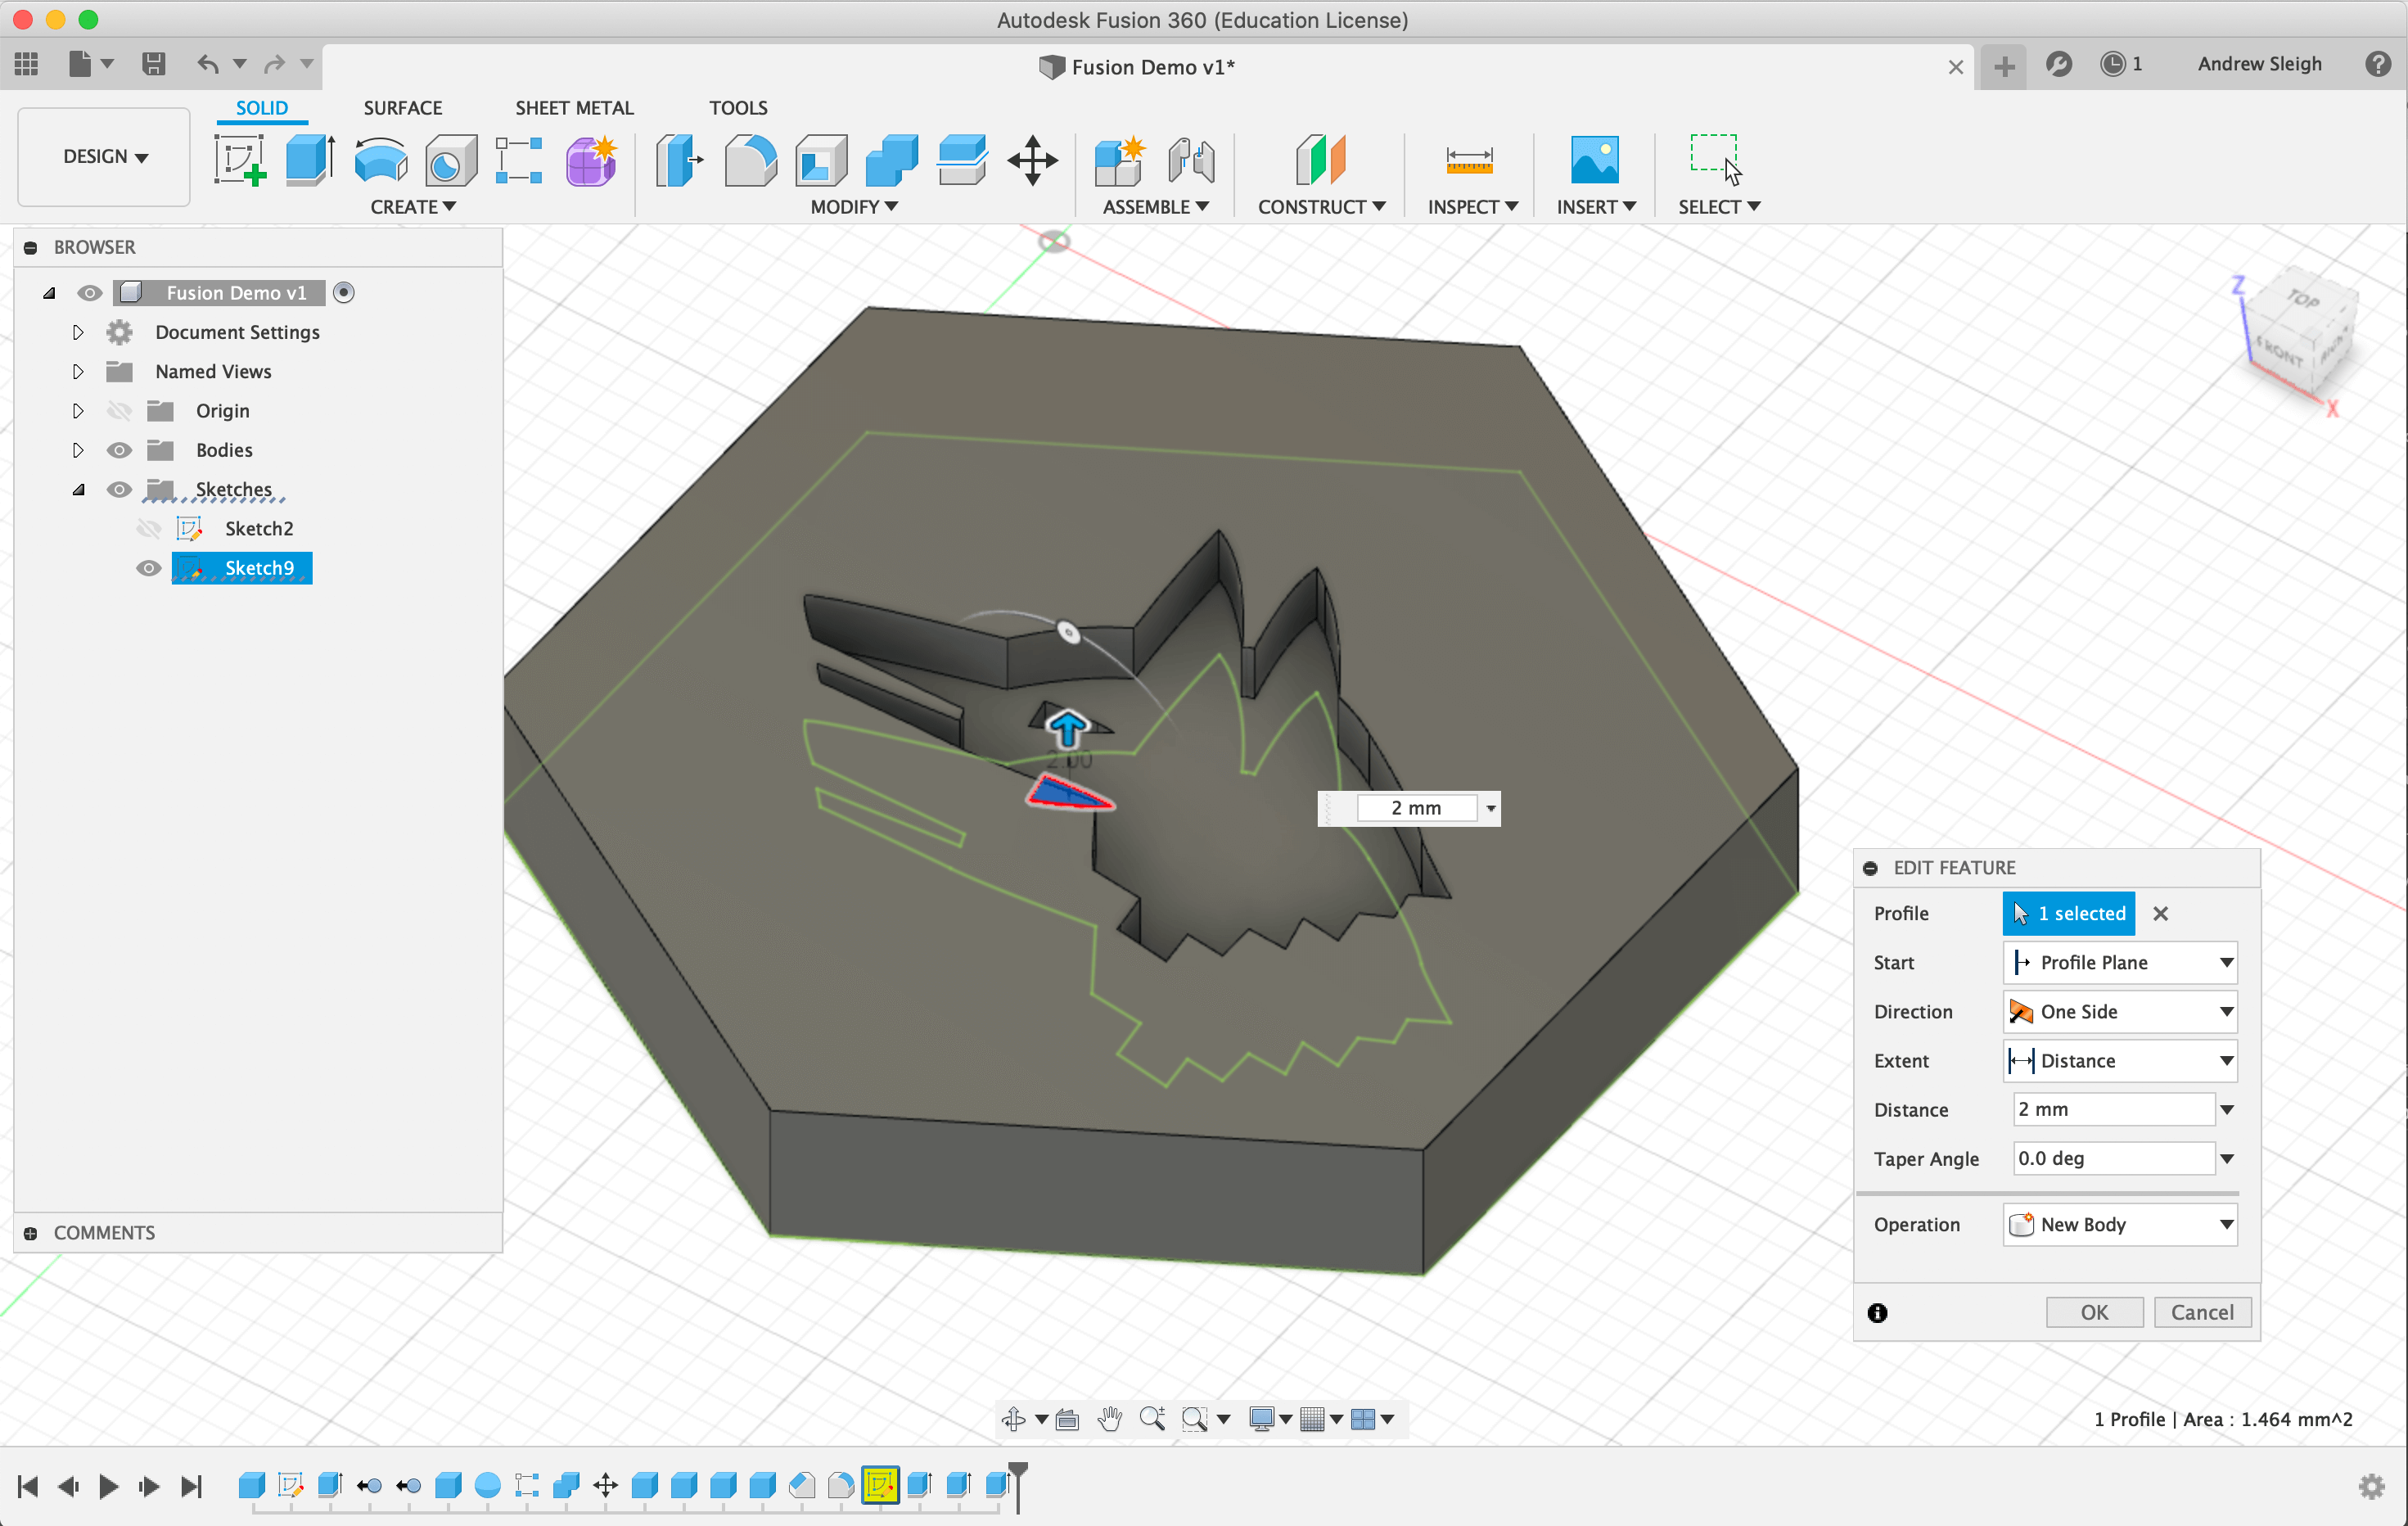
Task 3: Create or import some interresting 2D geometry and create a 3D shape (e.g. a pendant design)
Sometimes you ask Fusion to calculate impossible geometries, or imported artwork contains errors (such as unenclosed spaces), or objects look misleading (e.g. not quite touching).

Almost all designed products include fillets or chamfers somewhere.


Export your body as STL to open it in Cura for 3D printing or sen to the milling machine.
Other useful tools
- View cube
- Visual style selector
- Other ways of creating volumes: mirror, pattern, revolve,
- Download components to use in your model (e.g. standard hardware (M5 bolt, potentiometer) or Arduinos)
- Parametric tools (see https://tylko.com)
Assignment
Model an existing object (e.g. 6-sided die, simple table)
What do I need to do to pass? (40%)
Successfully model a simple 3D object, and show in your documentation how you got there.
Document all your work on your student blog, with photos and videos to show what you did, what went wrong, and how you fixed it. Cite external sources where you have used someone else’s work.
Use the screenshot tool on the computer to include images of each stage.
Reflect on your proces and how you could have achived the same reult differently.
Extra credit (50-100%)
Play with the tools to see how you can create complex 3D geometries. Can you reverse engineer a shape you’d like to make, and see how many ways you could make it:
- Additively
- Subtractively
- By extruding a 2D shape
- By revolving a 2D shape
- By mirroring or patterning a 2D or 3D geometry
Make a parametric model and show how it varies
Design a new model to 3D print or mill from wax
Design and print a model that also has laser-cut parts, e.g. a box with a clear acylic lid, or a form wrapped in laser-cut felt.