Week 6: Embedded Programming
Programming microcontroller boards
Prep for this week’s class
- Install the Arduino software: https://www.arduino.cc/en/Main/Software
-
(Bring any Arduino hardware you have. If you have your own Arduino, verify that you can program it – here are the instructions to set up an Uno board)
- Watch the corresponding Fab Academy lecture. We’ll be covering part of this content.
- Fab Academy lecture notes: http://academy.cba.mit.edu/classes/embedded_programming/index.html
- Lecture from 2018: Fab-20180314D_Lesson08: embedded programming
- If you’ve never done any Arduino programming before, read an introductory tutorial or watch a video to get some of the basics:
- Great introductory video series: Tutorial Series for Arduino - YouTube
- Arduino - Tutorials
Baseline
Who has:
- Done any programming at all (e.g. Scratch at school)
- Done any Arduino programming
- Succeeded in making a tested, working Echo Hello World Plus board
This week
Programming microcontrollers.
We’ll barely get started in one week.
So, the assignment is flexible – you might want buddy up.
Lecture is going to focus on the fundamentals - we’re not going to ‘learn programming’
What is a microcontroller?
Microcontroller vs Microprocessor
Simpler computer
Has lots of ‘peripherals’ inside - see block diagram
Microprocessor is what’s inside your computer - needs lots of external parts to make it work: RAM, GPU, disk, etc.
What’s inside a microcontroller?
See Megaprocessor
Or look at a datasheet:
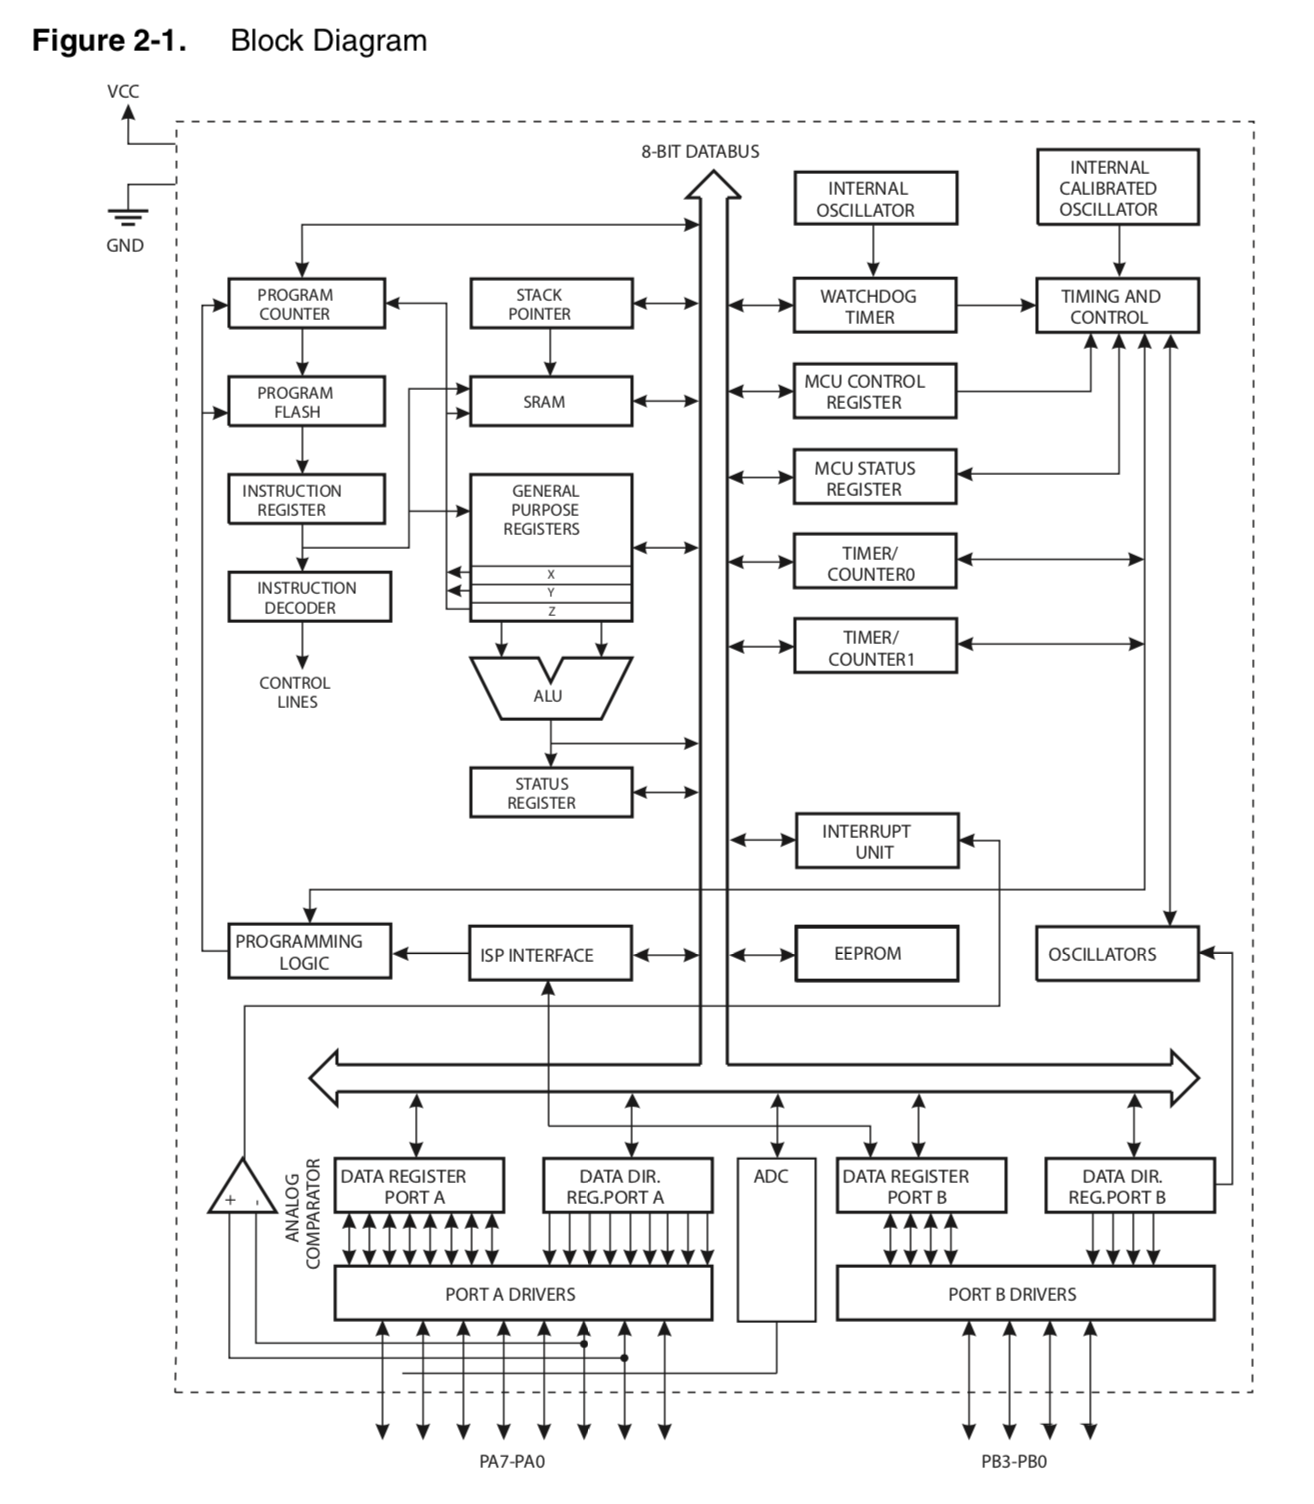
Capabilities:
- Tell time / keep time
- Remember data
- Read analogue signals from the outside world
- Talk to other microcontrollers
- Send and control power out to other devices
How can we access these capabilities?
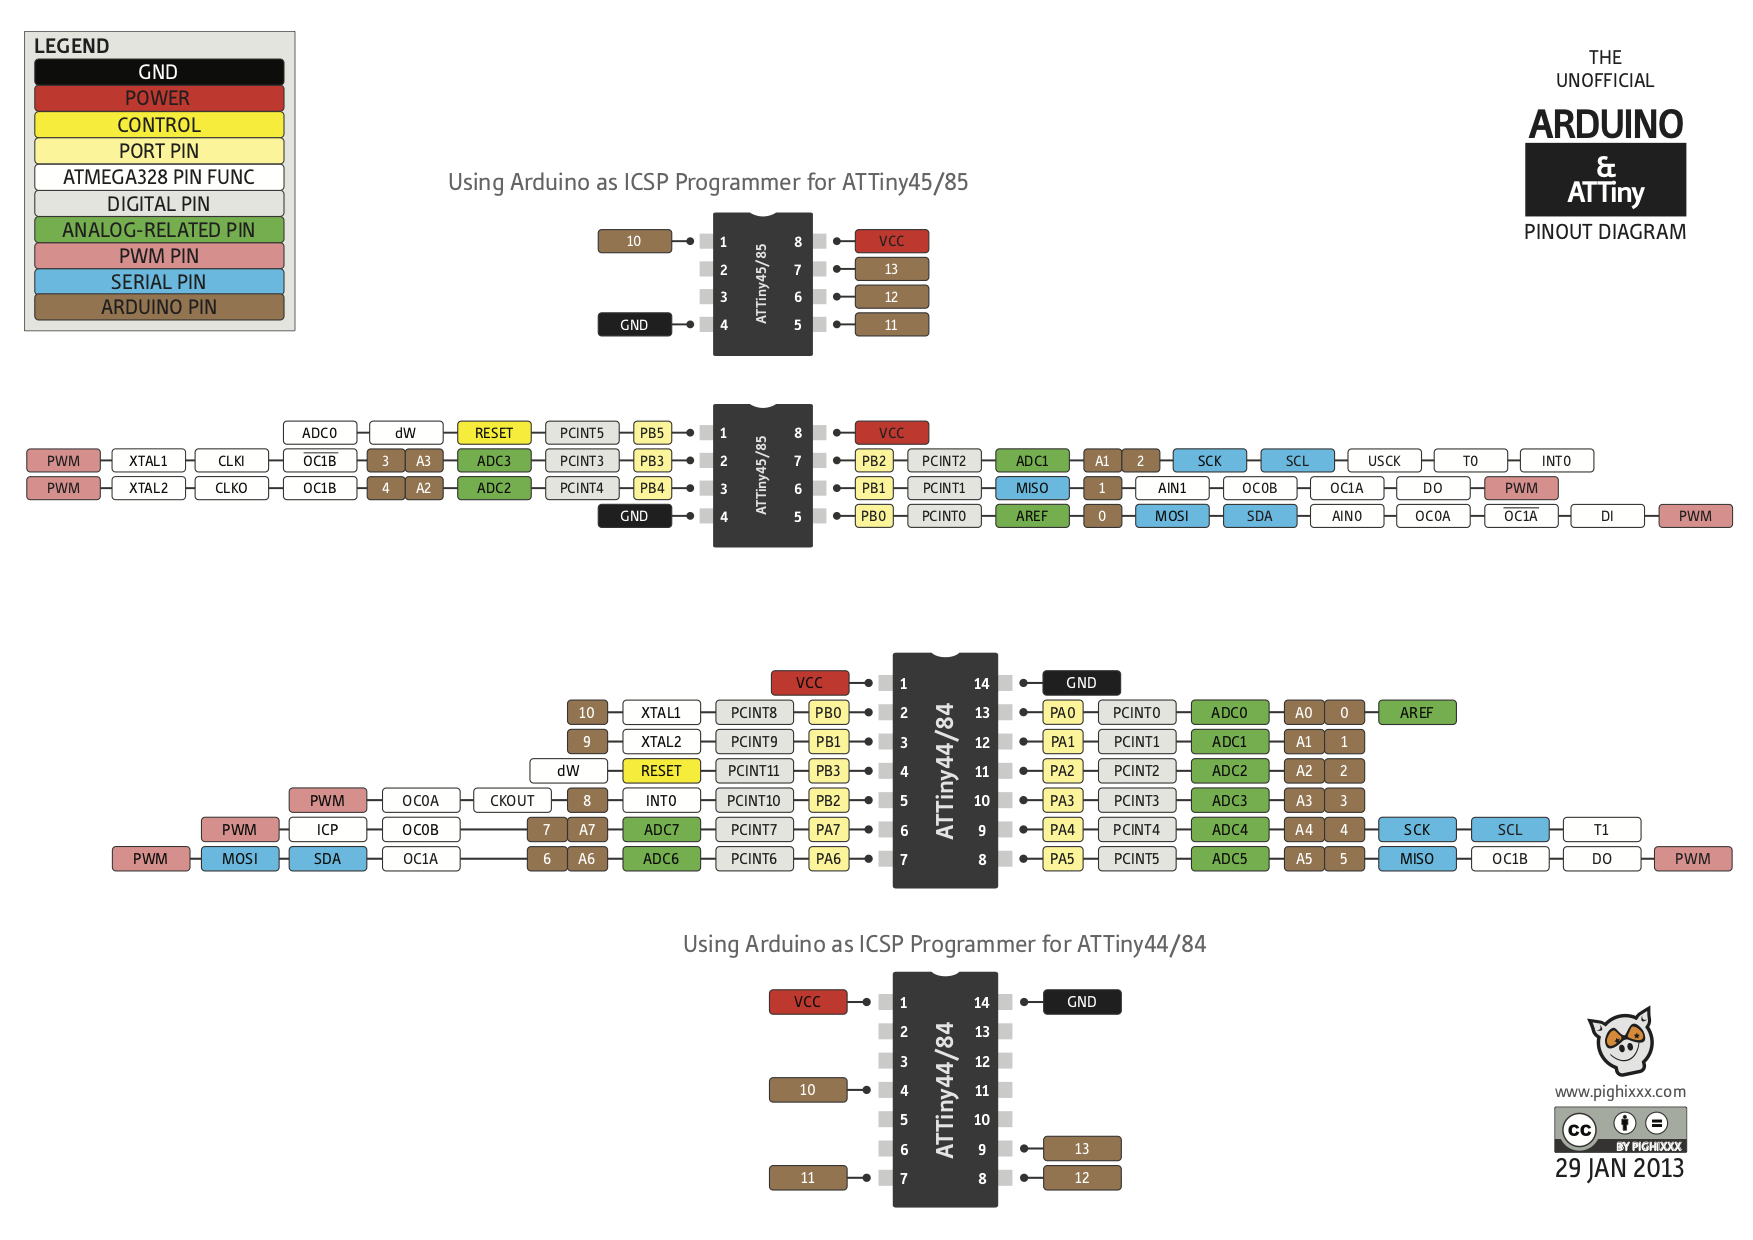
The AVR Family
Some of them:
| ATtiny10 | Smaller than a grain of rice |
| ATtiny45V | 8 Pin version (V: runs at low voltage) |
| ATtiny44A | 14 Pin version (A: newer version) |
| ATmega328P | Used in Arduino Uno - even more pins |
| ATmega16U2 | Similar (U: hardware USB support). We have 32U4s |
| ATxmega16E5 | XMegas run faster |
Same development tools work for all:
- Pick how many pins you need, what peripherals
- Lots of tutorials
- Come in many packages, we generally use SOIC (Small Outline Integrated Circuit )
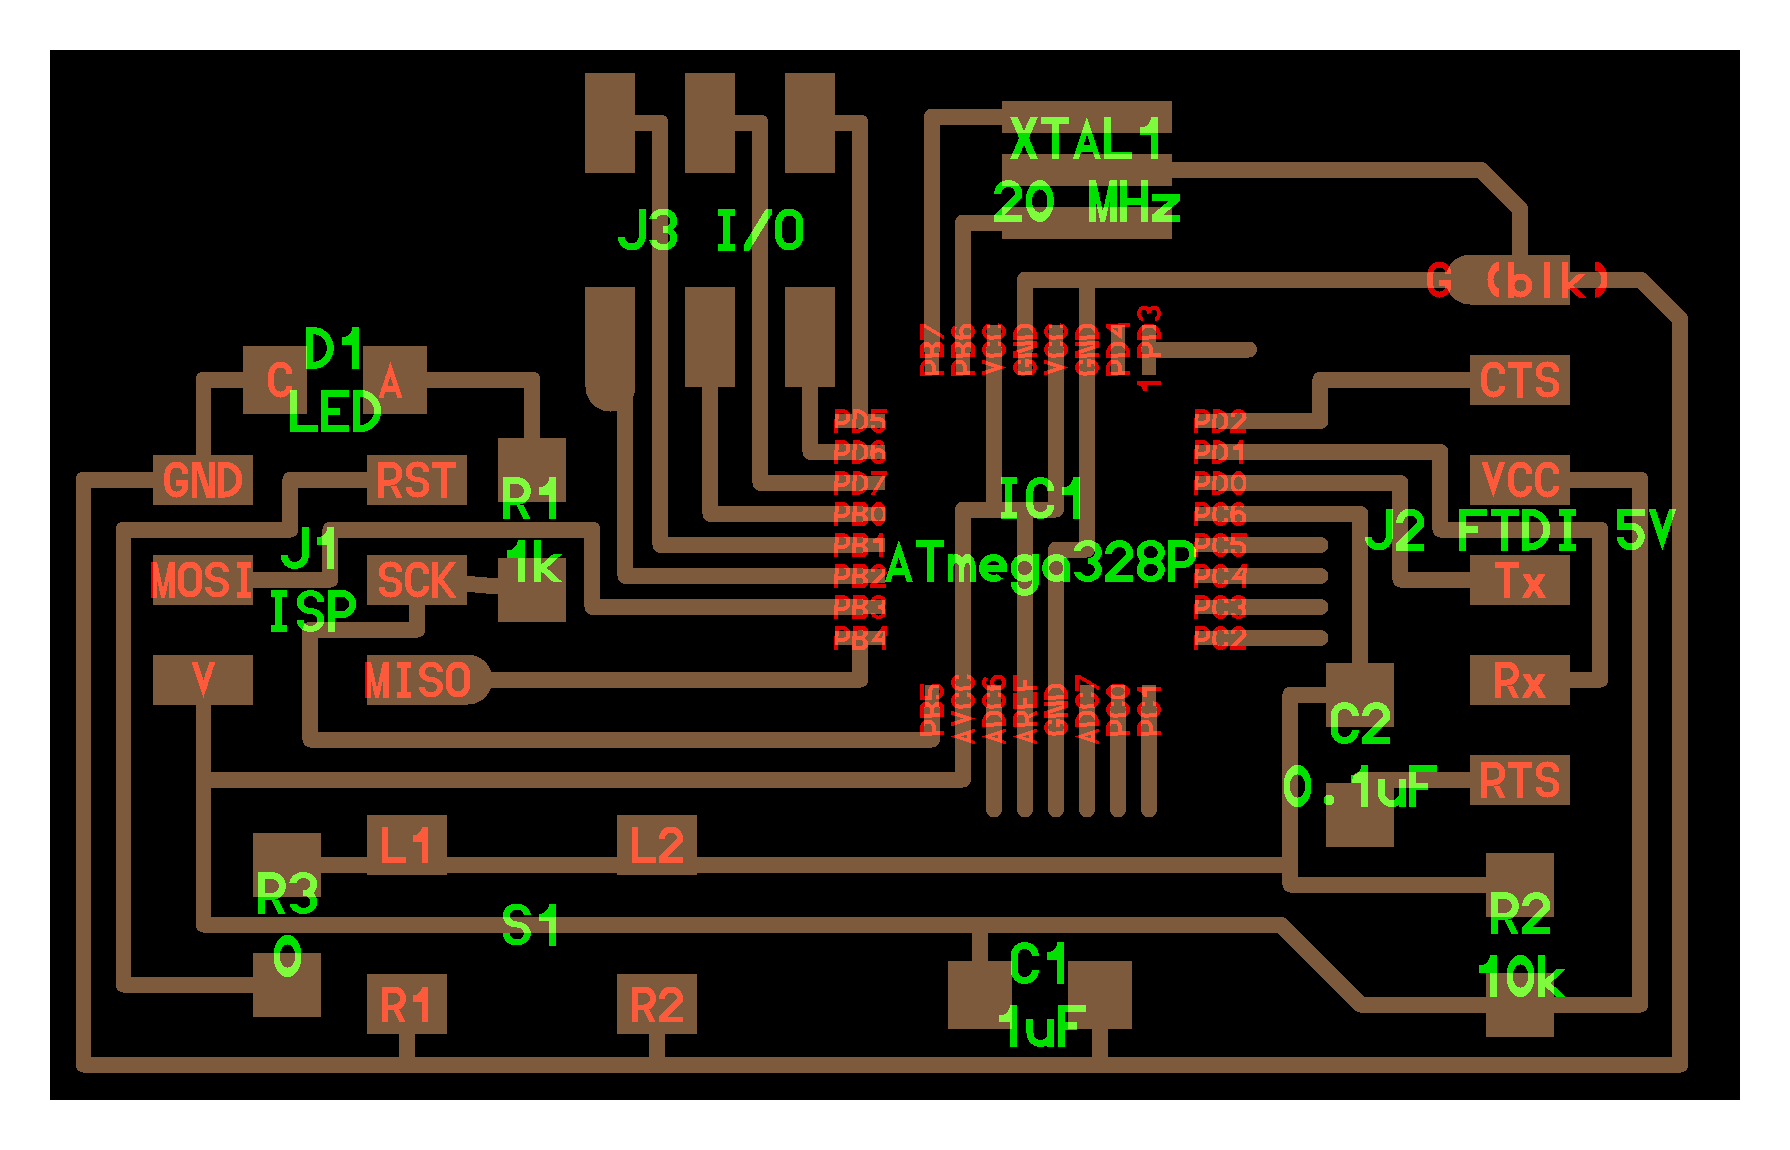
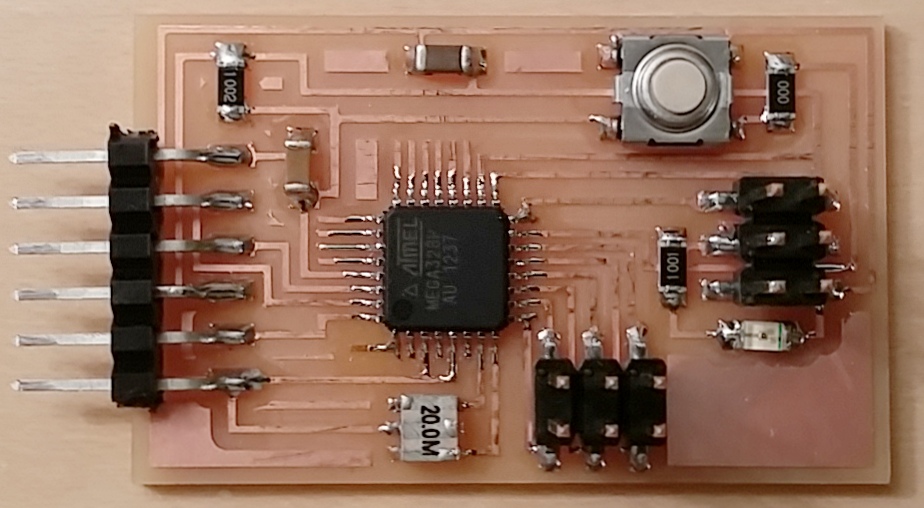
Programming a microcontroller
More detail in the guide: Guide: Programming an ATtiny board with a FabISP
Overview:
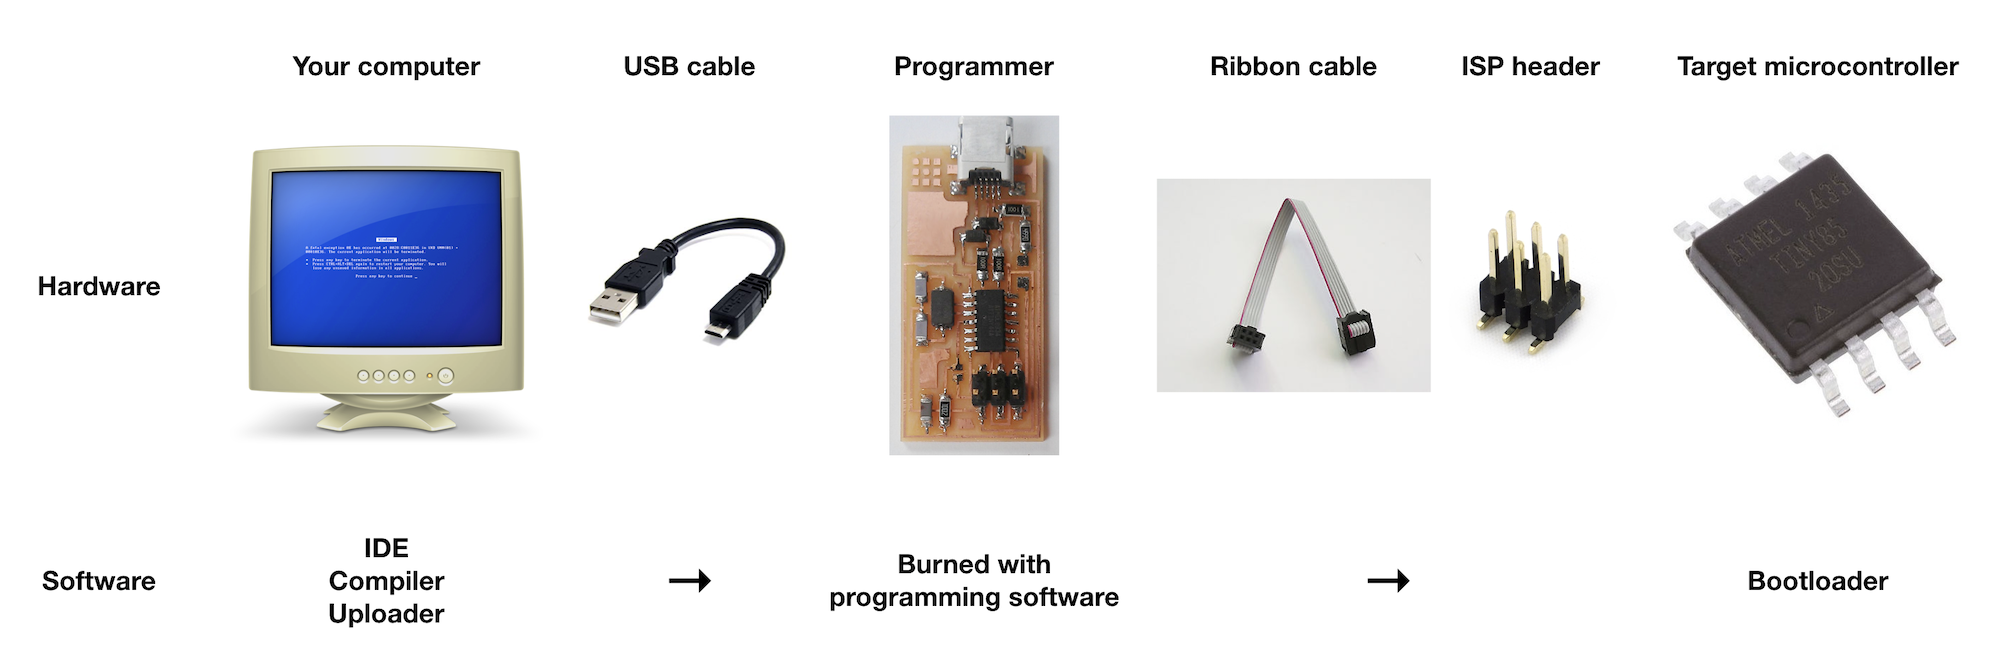
Compilers and Uploaders: GCC and AVRDUDE
These run on your computer
- Translate the program you write into something the microcontroller understands (hex)
- Communicate with the programmer to pass it the program.
Can be run on the command line, or bundled in the Arduino IDE.
Programmer: FabISP
You need another board, called a programmer, to load programs into your target board. This receives the program from your computer and loads it onto the target.
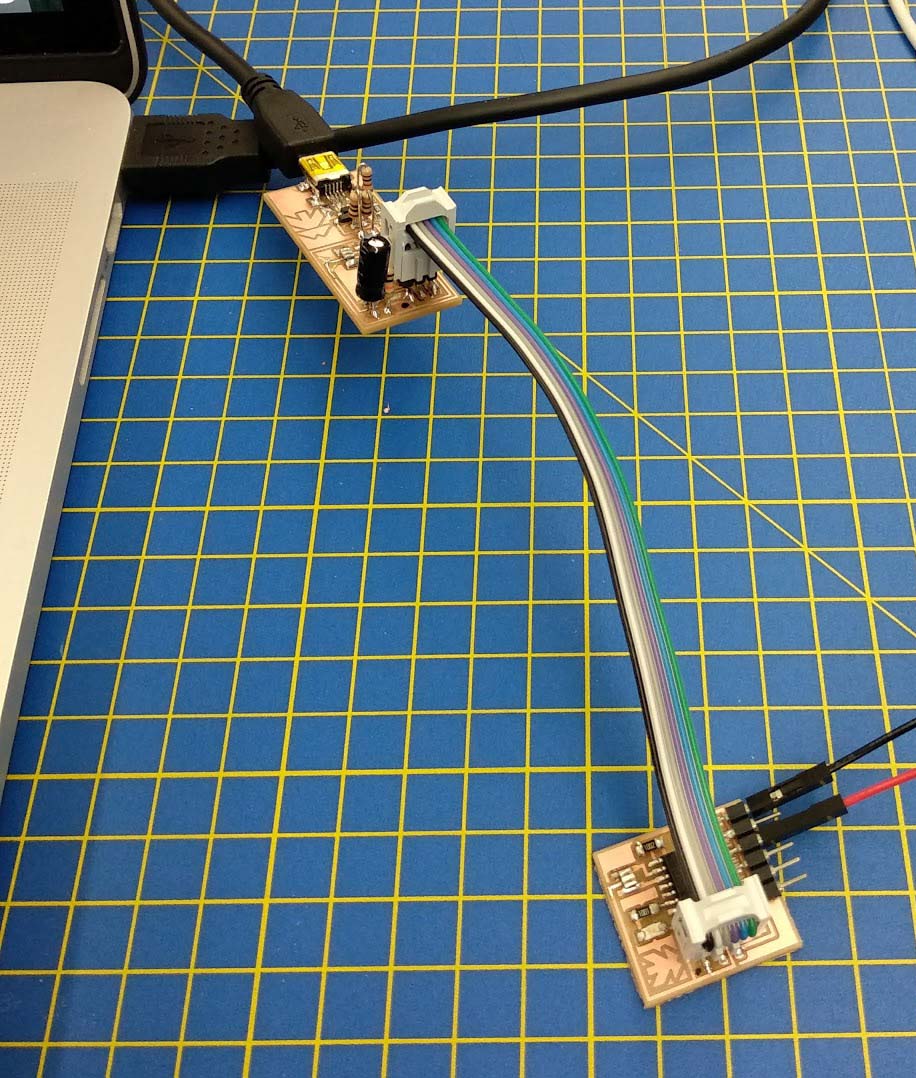
Physical connection: ISP header
https://en.wikipedia.org/wiki/In-system_programming
In-system programming (ISP), also called in-circuit serial programming (ICSP), is the ability of some programmable logic devices , microcontrollers , and other embedded devices to be programmed while installed in a complete system, rather than requiring the chip to be programmed prior to installing it into the system.
Bootloader
Software (“firmware”) on target board that lets it receive new programs through other connections (typically USB).
All Arduino boards have a bootloader installed.
If you want to make an Arduino clone, you should install a bootloader.
The “Burn Bootloader” commands in the Arduino environment use an open-source tool, avrdude. There are four steps: unlocking the bootloader section of the chip, setting the the fuses on the chip, uploading the bootloader code to the chip, and locking the bootloader section of the chip.
Can you do without a bootloader?
If you have an external programmer (e.g. an AVR-ISP, STK500, or parallel programmer ), you can burn sketches to the Arduino board without using the bootloader. This allows you to use the full program space (flash) of the chip on the Arduino board. So with an ATmega168, you’ll get 16 KB instead of 14 (on an ATmega8 you’ll get 8 KB instead of 7). It also avoids the bootloader delay when you power or reset your board. However you must have in mind that the Upload Using Programmer procedure doesn’t burn fuses so, if you have a fresh factory micro-controller you have to burn the boot-loader first in order to have a properly working device.
Programming
IDE (Integrated development Environment)
Arduino software is an IDE.
Bundles a serial monitor, compile and upload tools, debugger, console, etc. in one package.
Arduino is also a set of libraries, bootloader, and a physical microcontroller board.
Why is this useful to know?
You can separate the layers, e.g. use another AVR chip with he Arduino IDE, or upload C programs form the command line to your commercial Arduino board.
Can also make your own Arduino Board: http://academy.cba.mit.edu/classes/embedded_programming/index.html:
- Fabkit / Fabio / satshakit
- hello.arduino.328P.py / board / components / traces / interior
See my DIY Arduino notes
Example sketch: Blink
// the setup function runs once when you press reset or power the board
void setup() {
  // initialize digital pin LED_BUILTIN as an output.
  pinMode(LED_BUILTIN, OUTPUT);
}

// the loop function runs over and over again forever
void loop() {
  digitalWrite(LED_BUILTIN, HIGH);   // turn the LED on (HIGH is the voltage level)
  delay(1000);                       // wait for a second
  digitalWrite(LED_BUILTIN, LOW);    // turn the LED off by making the voltage LOW
  delay(1000);                       // wait for a second
}
(We can step through this line-by-line)
Language: C
Lower level than something like Python or JavaScript, but much faster.
Arduino language is C, plus a set of libraries to make it easier to use (and much slower).
Terms like digitalWrite refer to Arduino libraries.
Internal structure of digitalWrite()
Arduino IDE needs to be customised to work with ATTiny boards - not standard. See:
High-Low Tech – Programming an ATtiny w/ Arduino 1.6 (or 1.0).
Or our programming guide: Guide: Programming an ATtiny board with a FabISP
Assignment
Program your board to do something.
See board programming guide for details on how to get a program onto your board
Flexible:
- Upload an Arduino Blink sketch (in simulation if you cannot access or make a physical board)
- Communicate with your board over a serial connection
- Connect two boards together over SPI
- Communicate with another program on your computer, e.g. Processing.
- Remake your board with more pins accessible and add more inputs or outputs
- Make a 32u4- or 328p-based Arduino clone and program that
(More time this week to make a functioning board if you didn’t manage it last week.)
What do I need to do to pass?
Upload an existing program to your board, (e.g. an Arduino Blink or Button sketch) with the minimal customisation needed to get it to work on your board. Verify that it works.
Document all your work on your student blog, with photos and videos to show what you did, what went wrong, and how you fixed it. Cite external sources where you have used someone else’s work.
If you are unable to use a phyoscial board, a simulation is an acceptable subsitute: Try https://www.tinkercad.com
Extra credit
- Write your own program (building on others’ work if you like) and upload it to your board. Verify that it works. How many other things can you make your board do? What other capabilities does it have? (e.g. inputs, outputs, networking - look at the datasheet)
- Upload a program to your board to communicate with a host computer, e.g.:
- Serial communication: Arduino Reference
- Arduino - Processing: Arduino Playground - Processing
- Arduino - Python: Arduino Playground - Python
- Remake your board to expose more functionality, or make another Arduino-compatible board:
- Fab Academy boards: see above
- Bueno Board
- DIY Arduino
Source material and further reading/watching
- Fab Academy embedded programming week:
- Fab Academy lecture notes: http://academy.cba.mit.edu/classes/embedded_programming/index.html
- Lecture from 2018: Fab-20180314D_Lesson08: embedded programming
Materials we need this week
- Functioning Echo Hello World Plus boards
- Functioning FabISP programmers
- ISP ribbon cables
- Computers running Arduino IDE
Failsafe for next week
WIP