Guide: Milling a circuit board on the MDX-50
How to make your own boards on our milling machine.
See also our Fab Academy docs
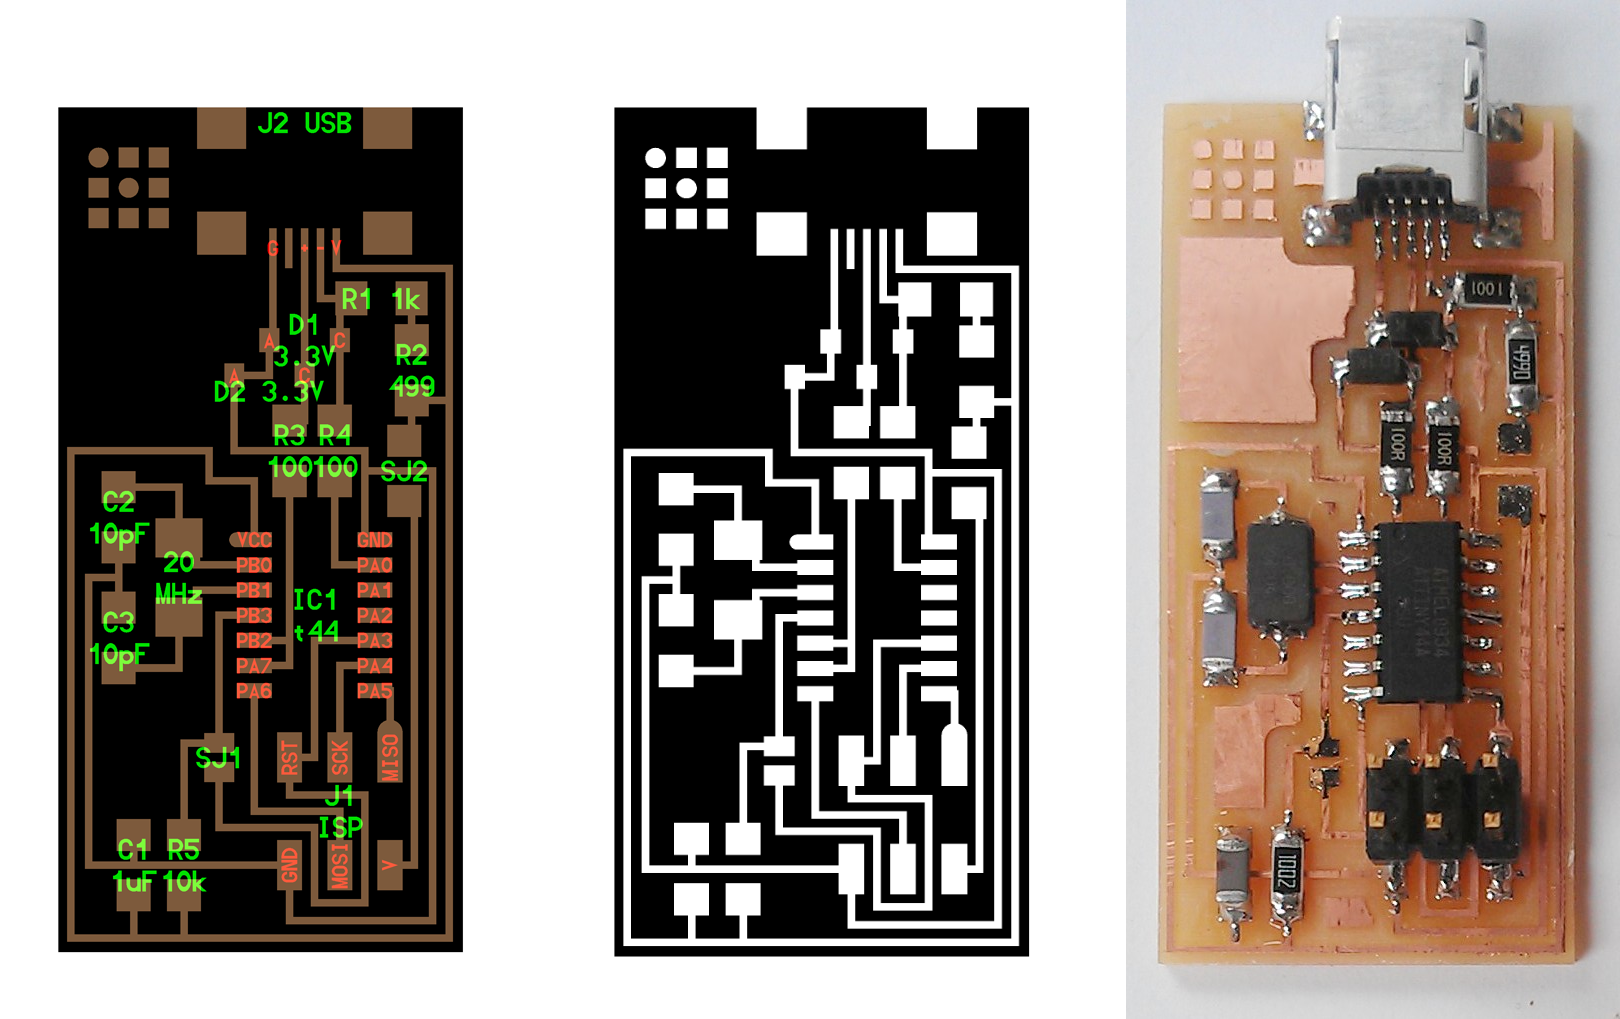
1. Starting point: a PNG file of the circuit you want to mill
2. Generate a tool path (CAD to CAM)
CAM software:
- Fab Modules. Web-based, so use it on any computer
Fab Modules settings
Input format
Choose your png traces file.
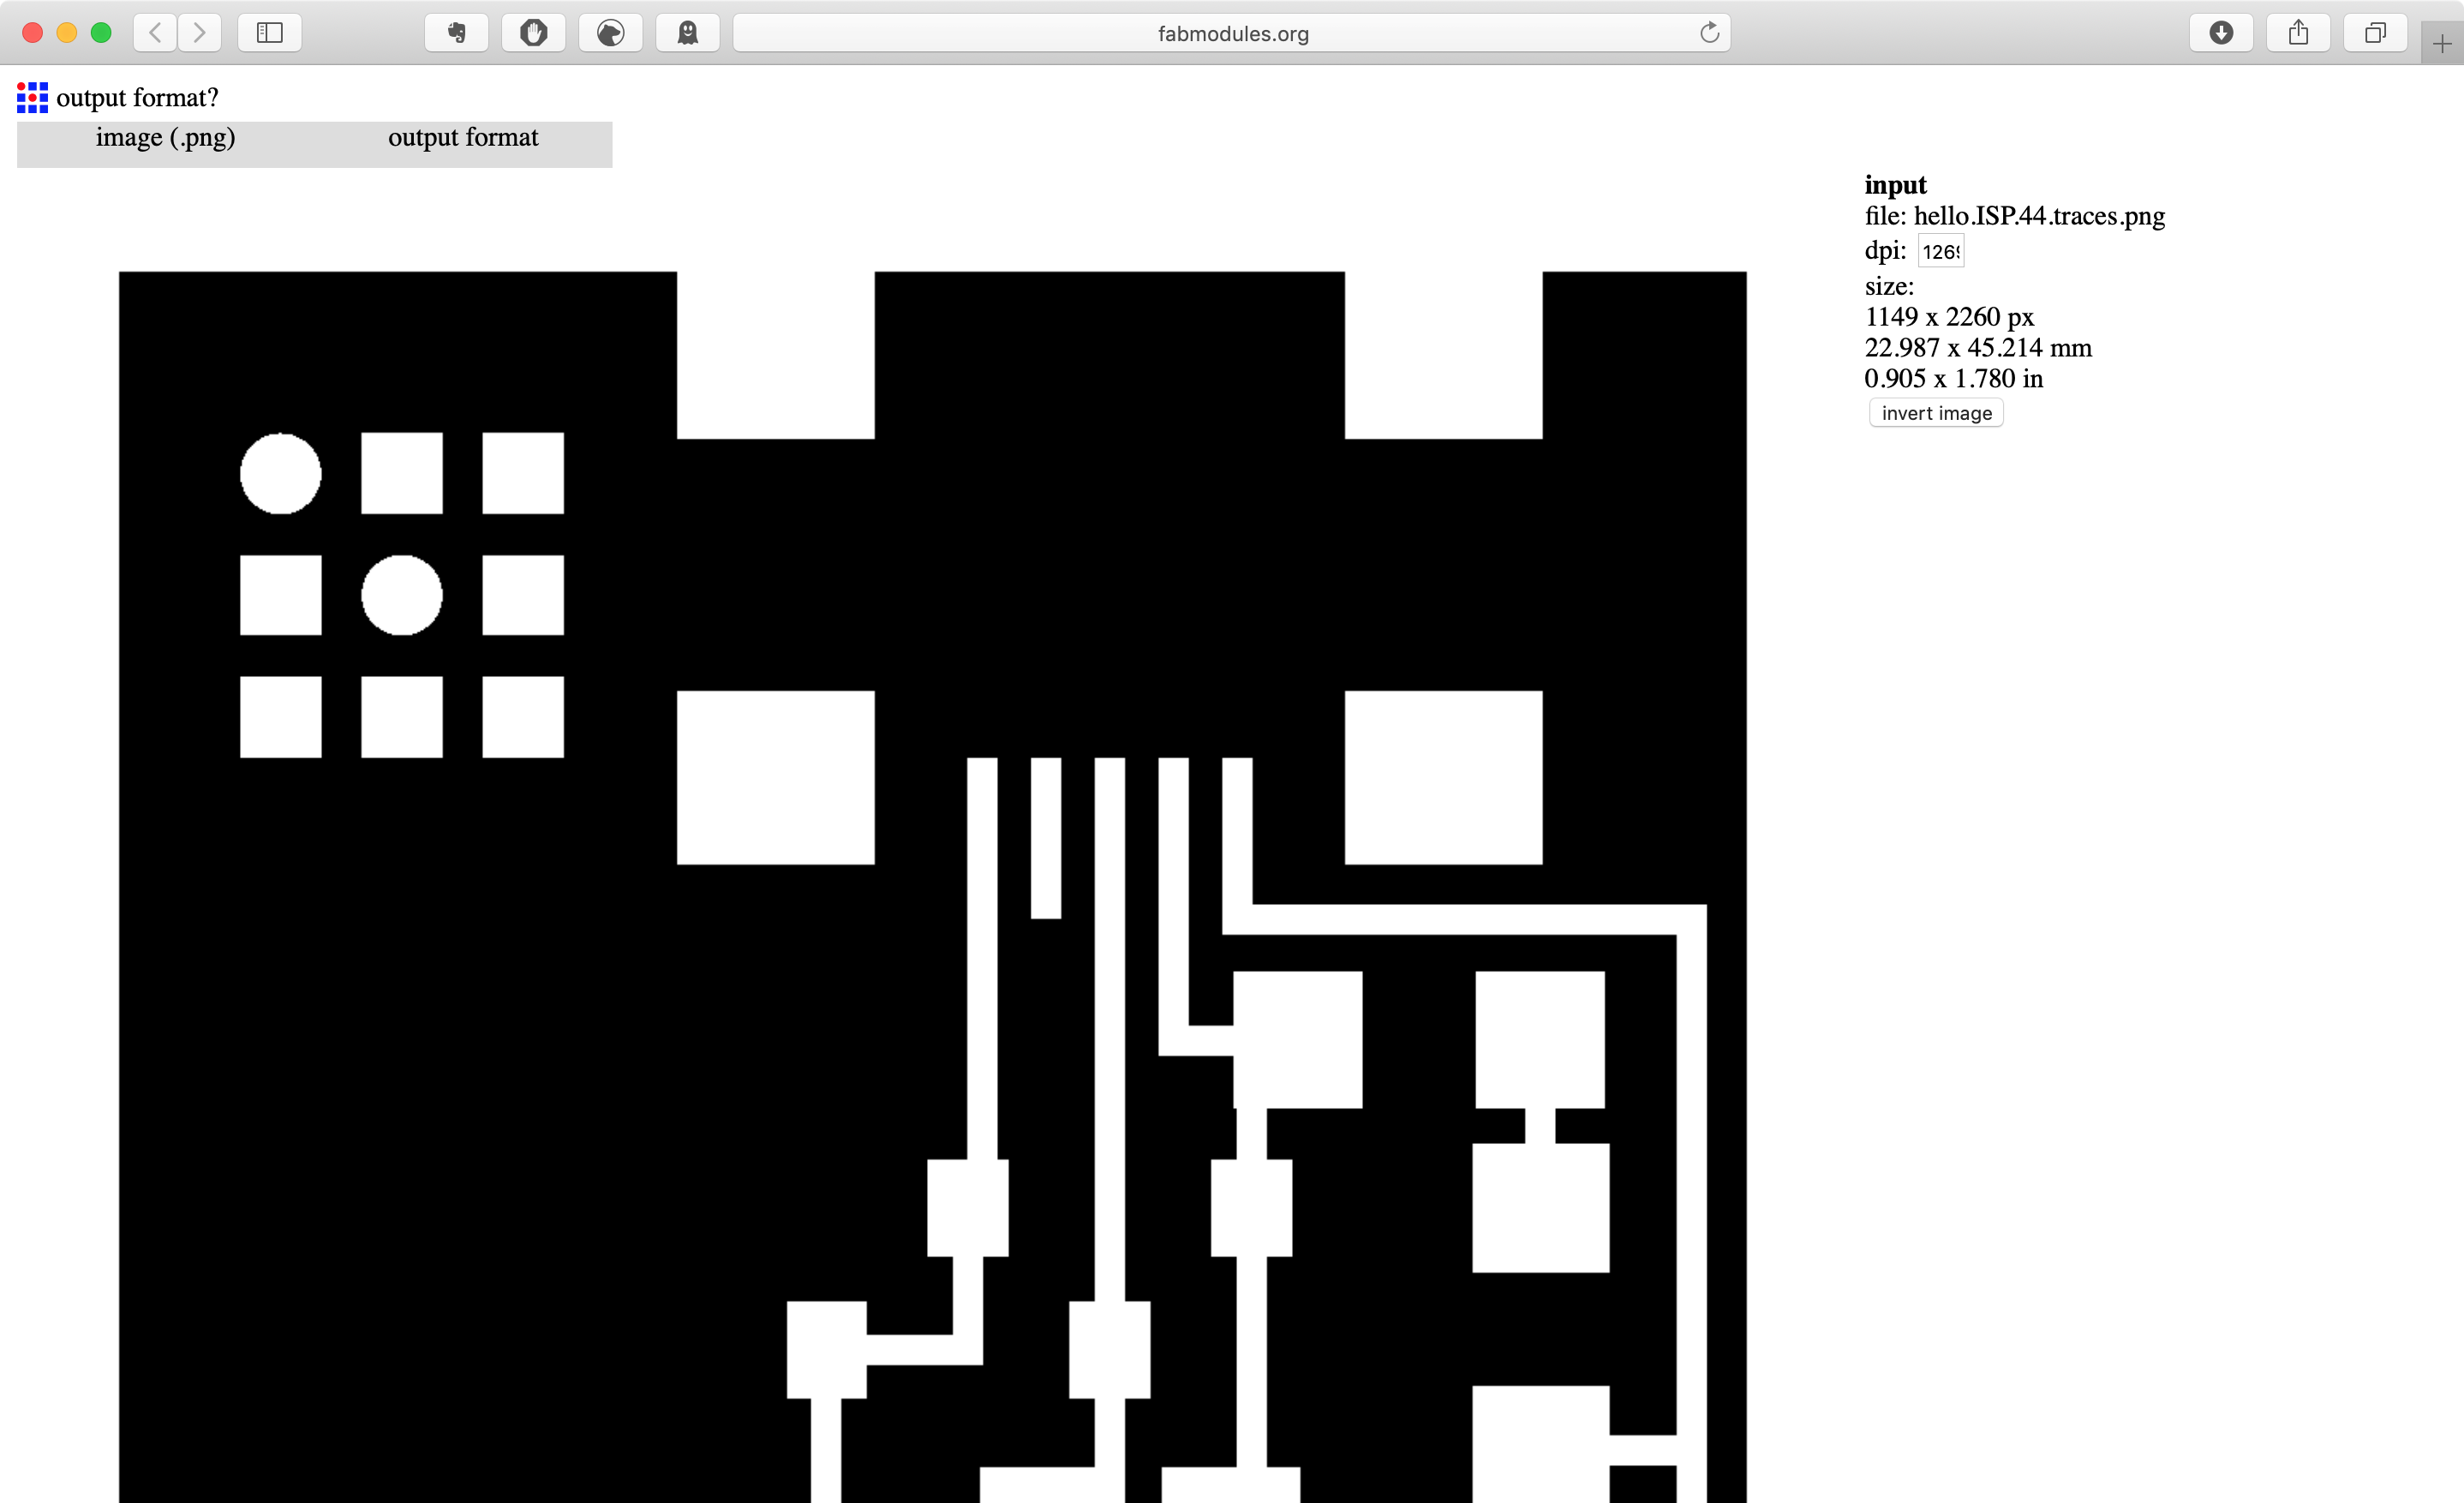
Traces are white, material to be removed is black - may need to invert your png.
Check resolution is the same as your png file.
Output format
Roland mill (.rml)
Process
PCB traces (1/64”) or PCB outline (1/32”)
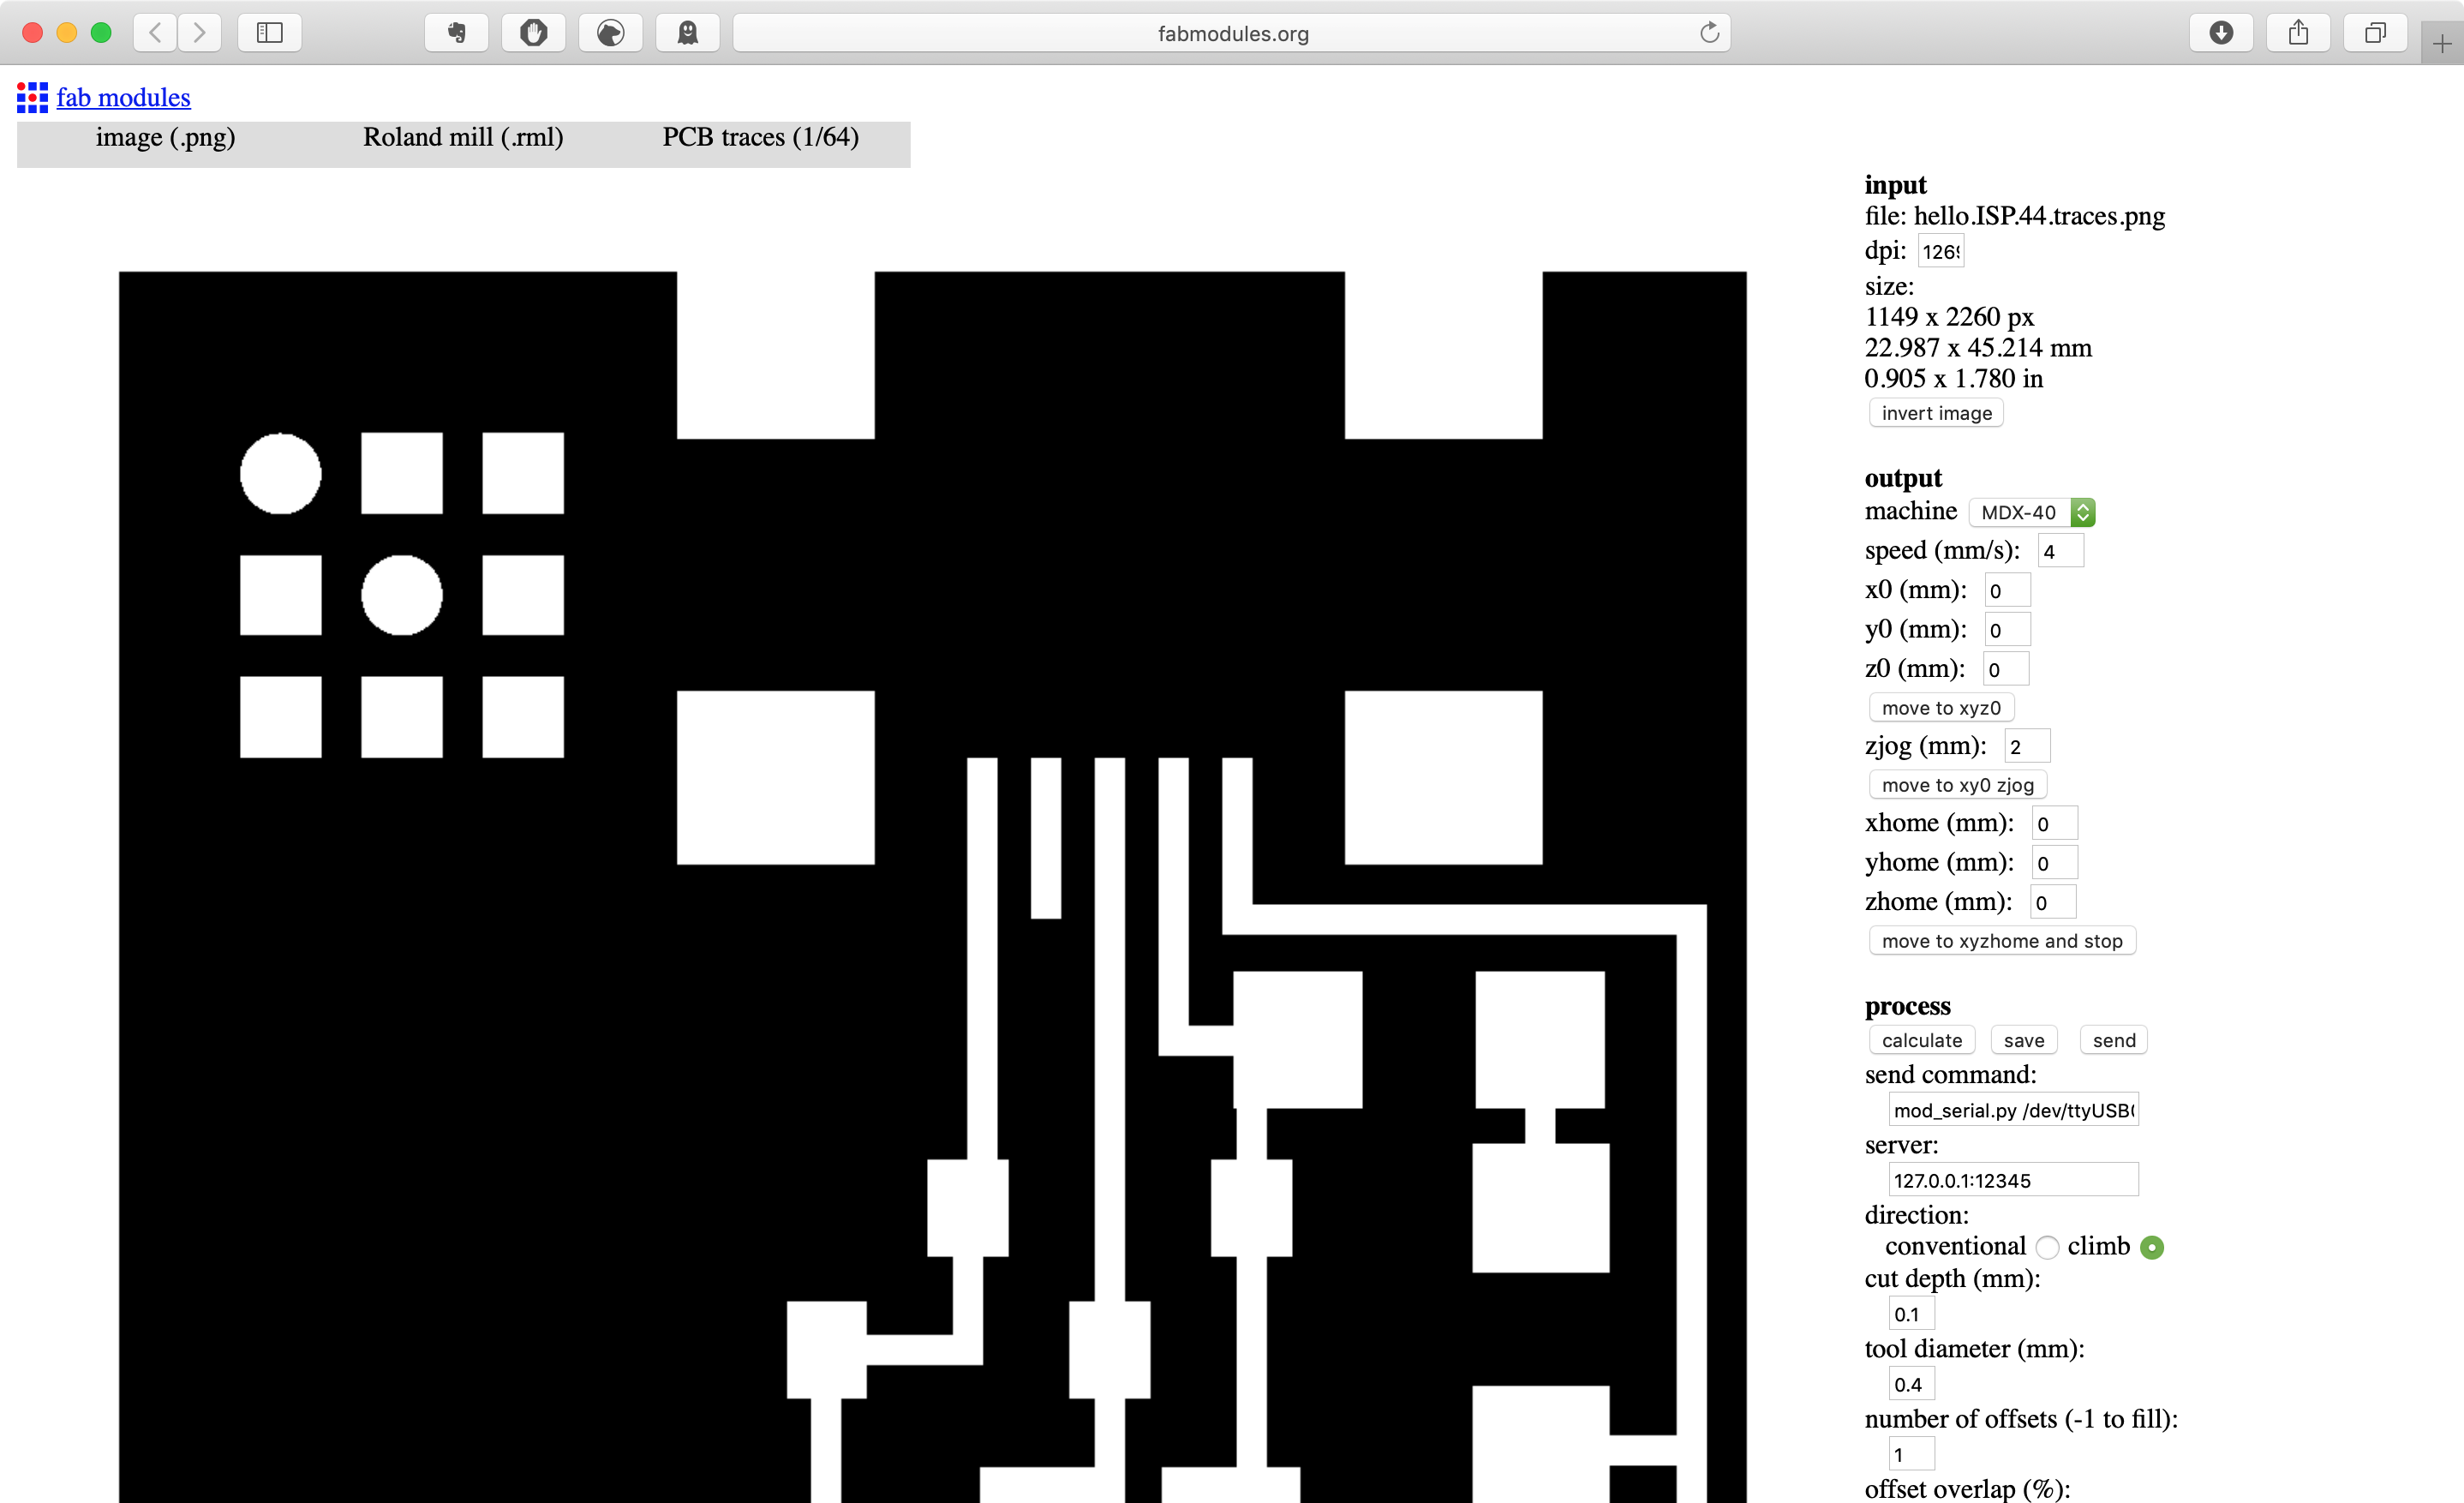
Output
Machine: MDX-40

speed (mm/s):   4

x0 (mm):  0
y0 (mm):   0
z0 (mm): 0

zjog (mm):  2  (a safe height above board)

xhome (mm):  0
yhome (mm):  0
zhome (mm):  10  <- IMPORTANT: Make sure this is more than 0mm

cut depth (mm): 0.1mm (can adjust this)

tool diameter (mm): 0.4 or 0.3 (Make sure it’s the same as the tool!)

number of offsets (-1 to fill):
1 to verify.
2 is enough clear space to solder.
4 makes life a bit easier.
-1 removes all non-circuit material. Looks nice, but takes ages.
Calculate
Hit calculate to see a preview of tool path.
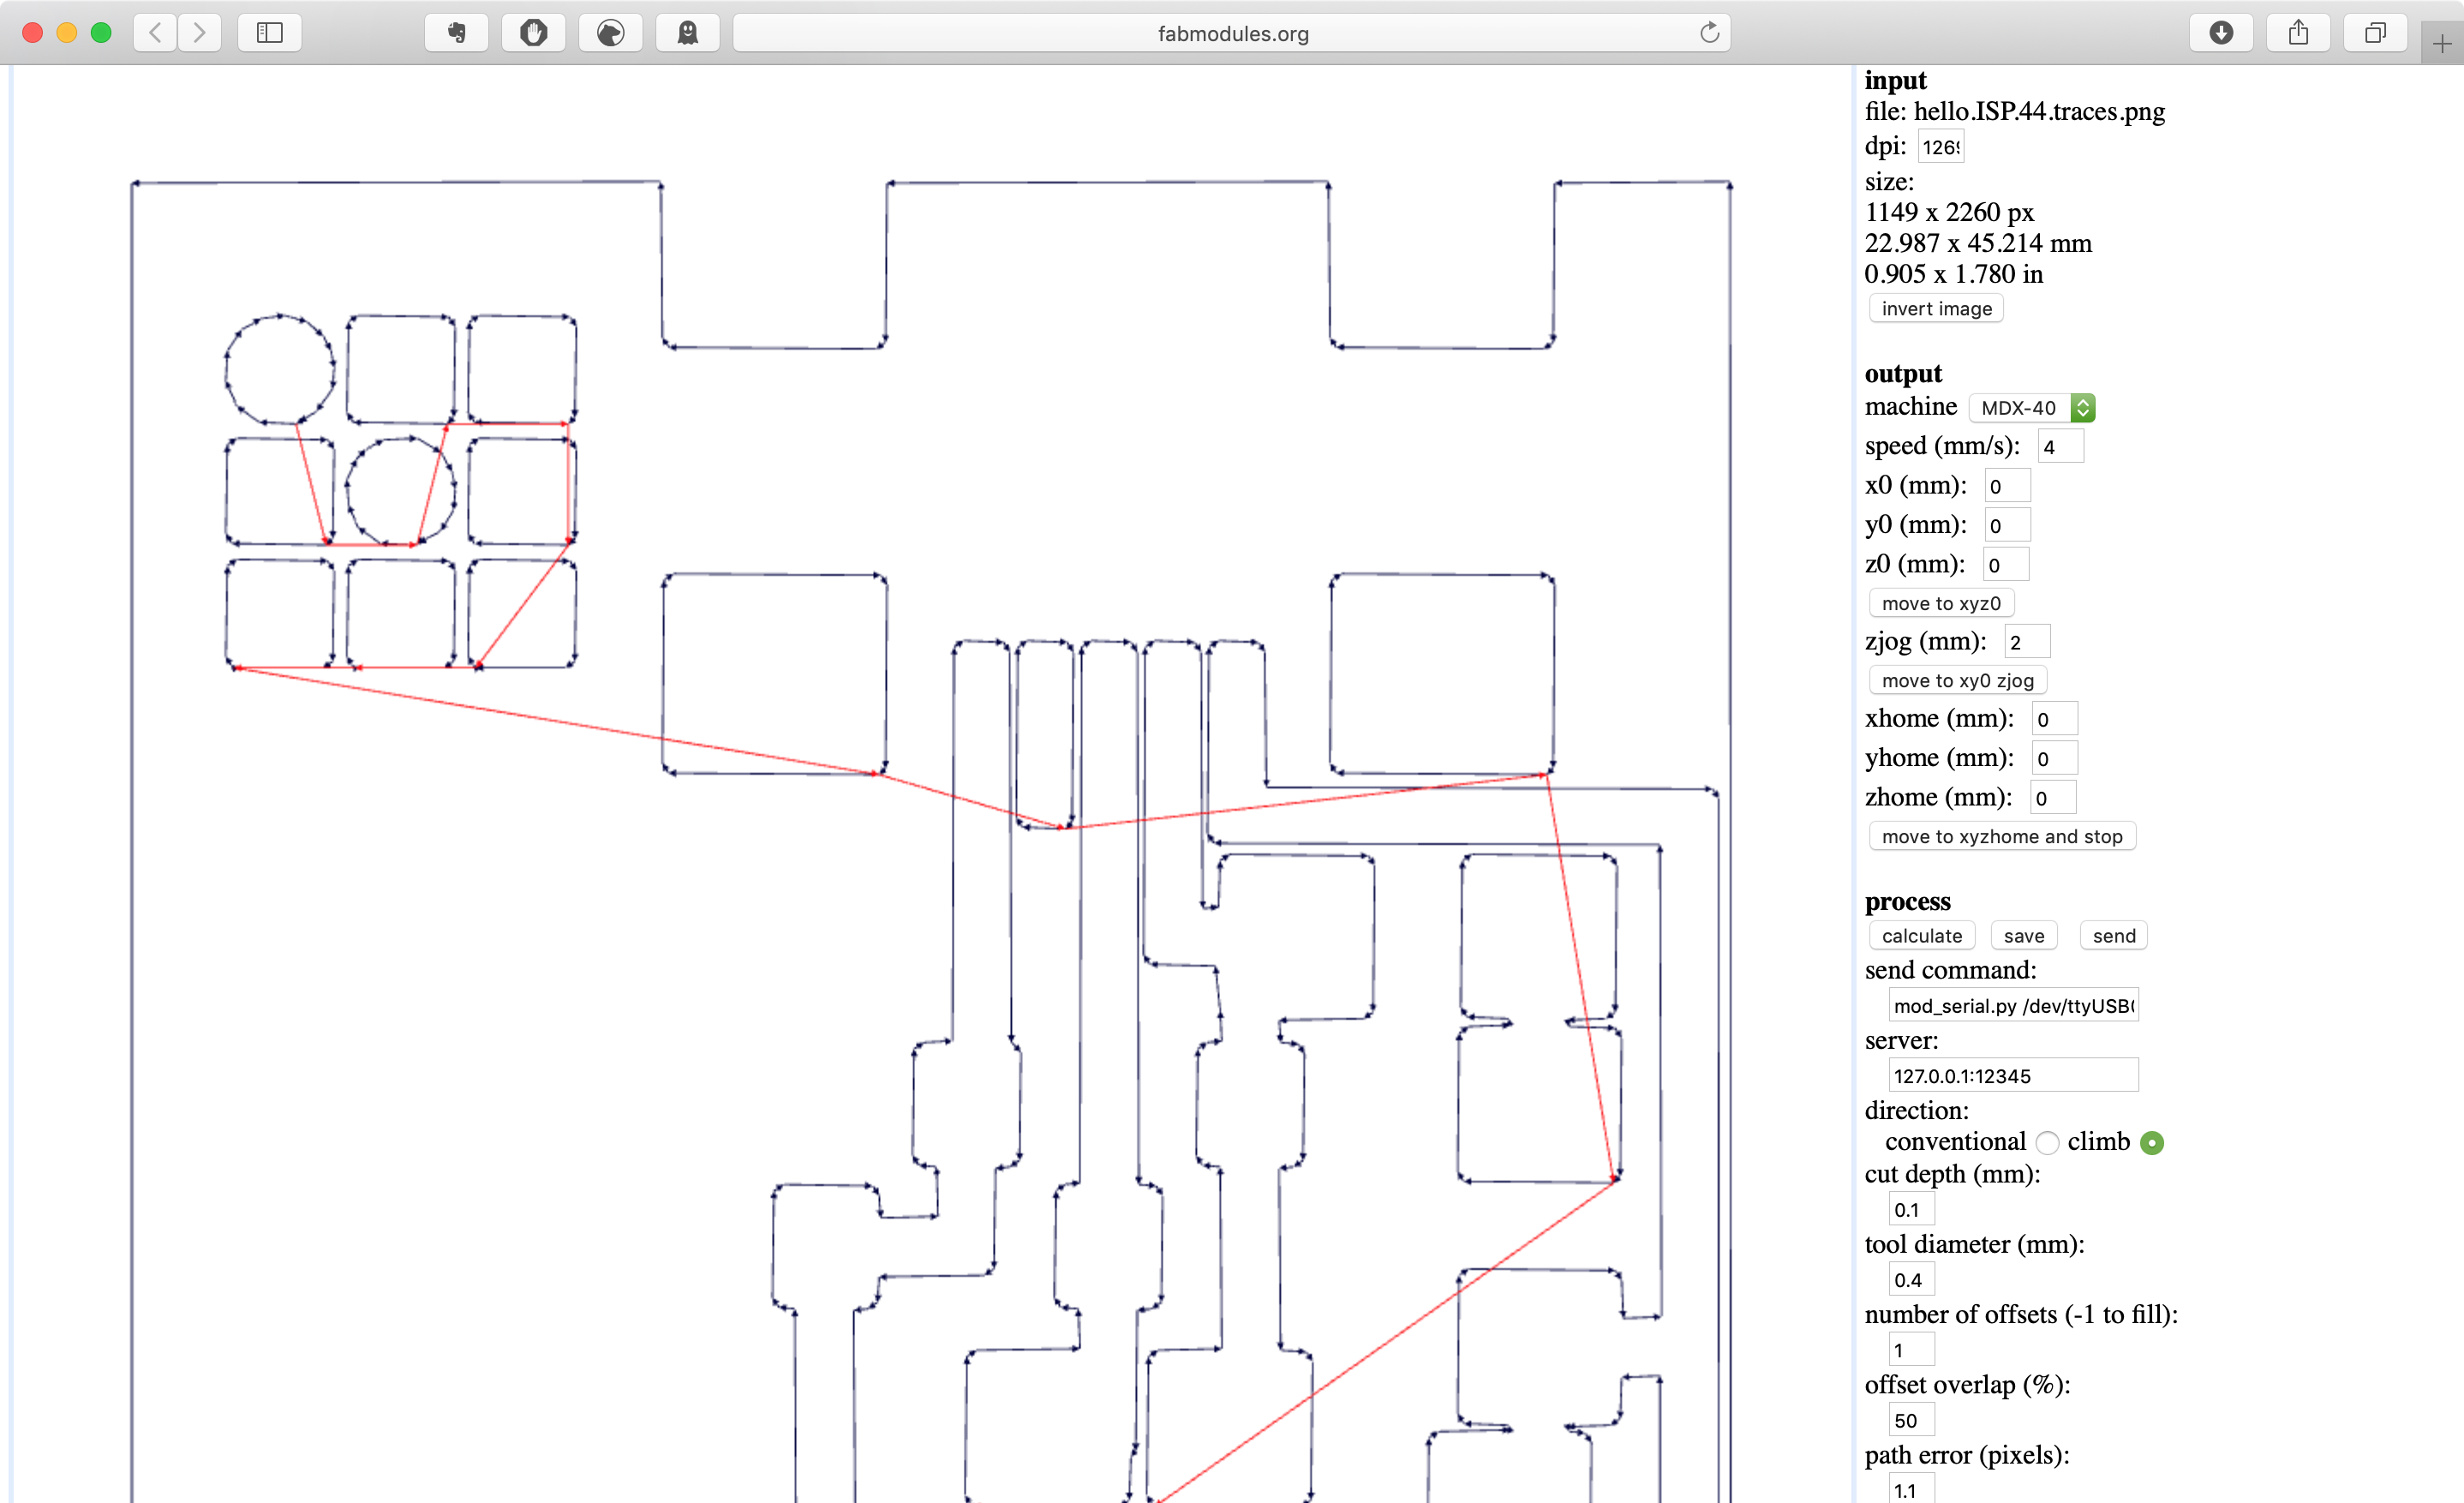
You will probably need to go back several steps in the workflow here to address problems.
Typical problems:
- Traces and pads merging
- Traces running underneath components
Fixes:
- Move components in the board layout
- Reduce pad sizes (don’t change pitch!)
- Use a different milling bit
- Lie to the machine about which milling bit you’re using
Save
Once it’s working, hit save to generate RML file.
(A similar process to generate RML file for cutting outline.)
Save the rml file somewhere you can find it.
Rml looks like this; very simple instructions:
PA;PA;VS4;!VZ4;!PZ0,200;!MC1;
PU350,4075;
Z350,4075,-10;
Z304,4077,-10;
Z276,4097,-10;
Z262,4129,-10;
Z264,4167,-10;
Z282,4193,-10;
Z306,4207,-10;
Z336,4211,-10;
...
3. Set up the milling machine (docs)
Prepare bed
- Sacrifical material
- Must be flat and clean
Attach board to bed
- Double-sided tape
- Got to get board flat - secure taping, and remove warps
Select tool
- Know what tool is in what cartridge (1-6).
Set x, y, z zero
- Set x and y home (allow some space, but make your your design fits on your board)
- Lower tool to surface, set z0. Always spin the tool when setting z
4. Back to the computer: Send your rml file to the mill.
Open your rml file in VPanel.
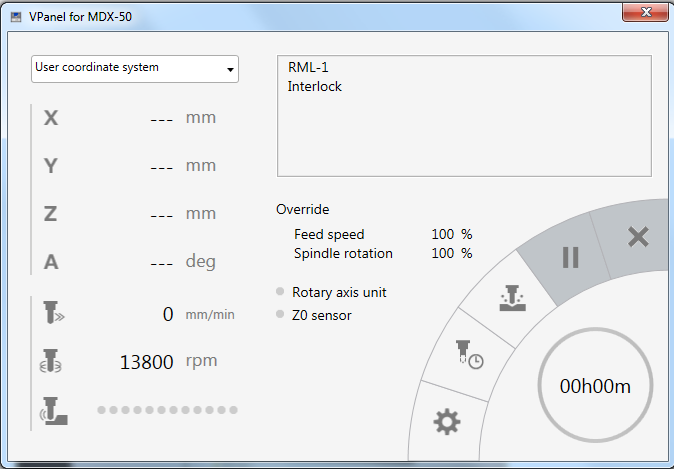
When you hit output, the machine will start milling. Stand by in case something goes wrong.
5. Mill it
Keep an eye on things!
6. Cut outline
- Similar process to cut outline. See docs for more detail.
Ensure that you do not change the XY origin between the traces and outline jobs
7. Clean and check board
- Deburr board with abrasive sponge or wire wool
- Clean skin oils off copper
- Verify your traces look correct (clean, not shorting, right size)