3D Fabrication: Milling, Moulding and Casting
Part 1: Introducing computer-controlled machining.
Part 2: Introducing moulding and casting
1. Computer-controlled machining
Hardware and software
Roland MX-50 milling machine, 400x350x150mm (XYZ)
CAM
- SRP player: creates tool paths from STL files
- Fusion 360
- fabmodules, and here’s the documentation
- fabmods, and here’s the documentation
![]() Explore the machine
Explore the machine
Tooling
![]() Look at some bits
Look at some bits
- milling bit types: ball-nose, flat-end mills
- number of flutes
- coatings, centre-cutting and general cutter guide
- up/down cut
Workflow for CNC machining
- CAD: Design model, export as STL
- CAM: Generate toolpath + export G-code
- Load into machine software
- Set machine origin (XYZ0) values and verify bits
- Run job (cut fresh air)
- Run job (with stock)
SRP Player Workflow
- Model size
- Understanding margins - the job will be centered in the workpiece. So a 4x4cm job in a workpiece of 5x5cm will have an extra 0.5cm boder all round
-
Setting model placement and cut type
- Creating tool paths
- Roughing and finishing
- Excluding margins
- Previewing
- Check small features and corners
- Check
- Send to machine
- Set origins and check tools
Machine setup
- Fasten workpiece
- Set origins
- Check tools
- Check spindle speed
Safety
- Sharp bits
- Protect the machine
Terminology
Milling
-
- Spindle speed (speed of rotation)
- Feed rate (movement of bit acros the workpiece)
-
Chip load: “the size or thickness of the chip that is removed with each flute per revolution”
- Use a chart to calculate feedrate and spindle speed
Molding and casting
- ‘Pattern’ or ‘Model’ or ‘Mould Tool’ https://en.wikipedia.org/wiki/Pattern_(casting)
- ‘Mould’ https://en.wikipedia.org/wiki/Molding_(process)
- ‘Casting’ from the mould https://en.wikipedia.org/wiki/Casting
Design rules and considerations
Cutting from above
- No undercuts, you should be able to cut it all from above.
- Model placement and design
Releasing the part
- Vertical walls should have draft angles
- (Also helps with tool collisions)
Bit must fit!
- Diameter, spindle length, shoulder
- Minimum feature size
- Interior corners vs exterior corners
Material qualities
- Fast or slow spindle speed, feedrate
- Adding fragile parts manually (e.g. using straws, bolts, sheets)
Casting process
- Pour holes, vent holes
- 2-part molds
Mixing processes
- Time - quicker to make a box on the laser cutter, than to mill it from wax
- Adding fragile parts manually (e.g. using straws, bolts, sheets)
Gotchas!
- Check tools in magazine
- Set machine origin correctly
- Cut air first!!!
2. Introducing moulding and tools
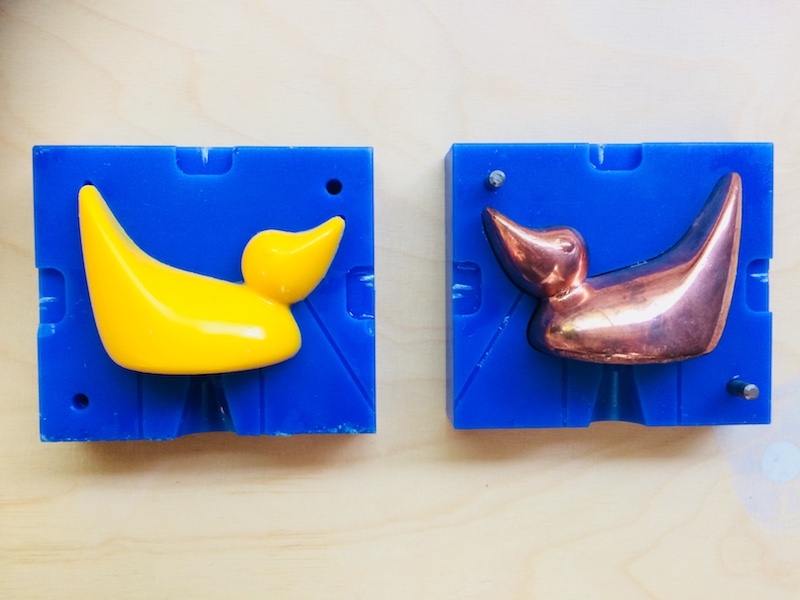
Positive solid tool > Negative flexible tool > Positive solid part:
Negative solid tool > Positive flexible part:


See also, flexible parts
Mould tool considerations
- mixing: by weight or volume
- pouring: starting, filling, vent location
- bubbles: stirring, pouring, vibrating, painting, vacuum, pressure, time
- curing: polymerization, cross-linking, hydration, endothermic, exothermic
- demolding: draft angle, release agents (dilute dish soap, vaseline, talc, other), deformation
Materials
Making flexible moulds
Food safe silicon: Polycraft Food Safe Addition Cure Silicone Moulding Making Rubber
- Safety (MSDS (base, curing agent))
- Skin
- Eyes
- Respiratory
- Technical properties (TDS)
- Pot time
- Cure time
- Endo- / exo-thermic (note: plaster of paris, resin)
- Protective gear
- Personal: gloves, eye protection, lab coat
- The space: trays, newspaper, bin bags
- Safe disposal
- Storage and shelf life
Take your time, focus, and prepare the space before you start.
Casting solid objects
- 2-Part resin
- Plaster of Paris
- Cement
- Ice
- Chocolate
Assignment
Create a 40 x 40 x 5 mini tile model in Fusion 360. Mill it out of a block of wax.
What do I need to do to pass?
Create the CAD model of your tile and mill it from wax.
Demonstrate safe and tidy use of the CNC mill, and moulding and casting materials.
Document all your work on your student blog, with photos and videos to show what you did, what went wrong, and how you fixed it. Cite external sources where you have used someone else’s work.
Extra credit
Create a silicon mould and cast the finished part from chocolate or plaster of paris.
Try milling from another material, or experiment with adding parts to your mould tool manually.
Resources / find out more
- Fab Academy lecture notes (computer-controlled machining): http://academy.cba.mit.edu/classes/computer_machining/index.html
- Fab Academy lecture notes (moulding&casting): http://academy.cba.mit.edu/classes/molding_casting/index.html
- Lecture from 2018 - computer-controlled machining
- guide to CNC machining a mould tool using the 1610 mini CNC machine
- CNC design guide
- Make: Design for CNC book