Week 8: computer-controlled machining + moulding and casting
Part 1: Introducing computer-controlled machining Part 2: Introducing moulding and casting
Prep for this week’s class
Watch the corresponding Fab Academy lectures. We’ll be covering part of this content.
- Fab Academy lecture notes (computer-controlled machining): http://academy.cba.mit.edu/classes/computer_machining/index.html
- Fab Academy lecture notes (moulding&casting): http://academy.cba.mit.edu/classes/molding_casting/index.html
- Lecture from 2018 - computer-controlled machining
- Lecture from 2018 - moulding&casting
Baseline
Who has:
- done any workshop machining or CNC machining?
- made a mould?
- done any casting?
Resources (computer-controlled machining)
- guide to CNC machining a mould tool using the 1610 mini CNC machine
- CNC design guide
- Make: Design for CNC book
Computer-controlled machining
- our machines
- office (Des): 1610 3-axis router, 160x100x45mm (XYZ)
- E28 (Gary/Jon): Imes-Icore M40 3-axis router, 1000x900x250mm (XYZ)
- EM13 (Des/Andrew): Roland MX-50 milling machine, 400x350x150mm (XYZ)
- E19 (Adam Cable): Herco VM10UI 5-axis milling machine, 400x400x400mm (XYZ)
- software
- Solidworks CAM
- SolidCAM , demo , tutorials, machine building (see simulation below)
- Fusion 360
- SRP player (Roland MX-50)
- fabmodules, and here’s the documentation
- fabmods, and here’s the documentation
software to run CNC machines
- GRBL (standard)
- GRBLcontrol - PC/linux only (runs the small 1610 machine in fablab)
- ??? (Imes-Icore M40 in E28)
- swift cut (plasma cutter)
- VPanel (Roland MX-50 in fablab)
- Winmax (Herco VM10UI in Adam’s workshop)
- VCarvePro (AXYZ at Grand Parade)
- Marlin
- Mach3
tooling
- milling bit types: ball-nose, flat-end mills
- number of flutes
- coatings, centre-cutting and general cutter guide
- up/down cut
speeds n feeds
- speeds n feeds
- chip load: ~ 0.001-0.010”
- feed rate (inches per minute) / (RPM x number of flutes)
- cut depth: ~ tool diameter
- step-over: ~ tool diameter/2
process for CNC machining
- CAD > CAM: generate toolpath + export G-code > load into machine software > set XYZ0 values > run machine (cut fresh air) > run machine (with stock)
Introducing moulding and tools
- injection moulding: sprue, gate, runner, vent, parting line, flashing
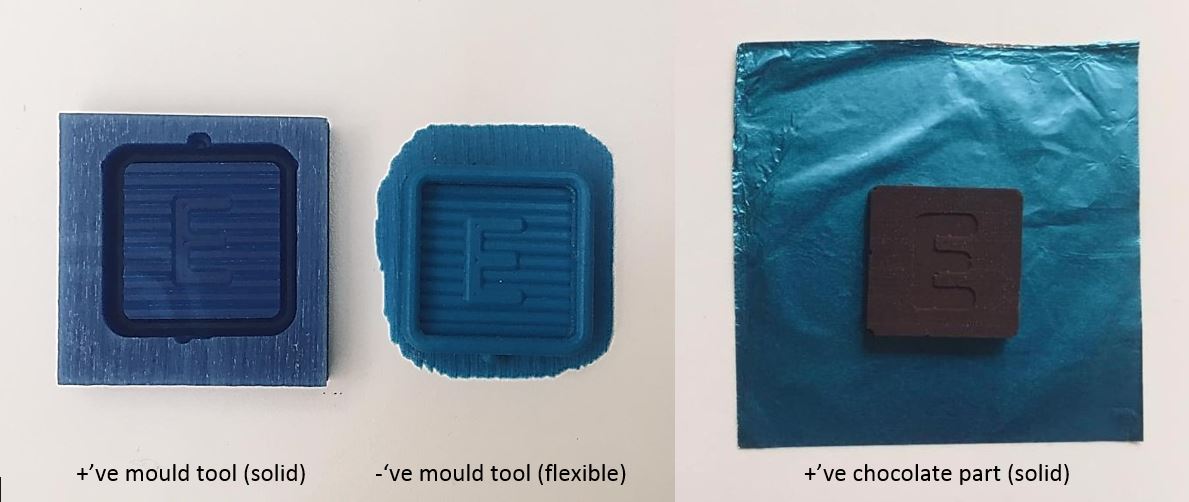
- +’ve solid tool > -‘ve flexible tool > +’ve solid part
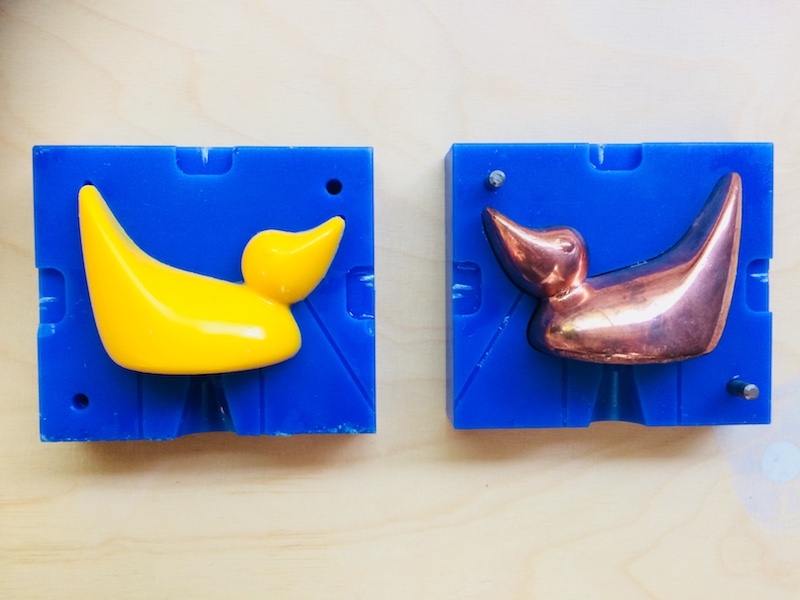
- -‘ve solid tool > +’ve flexible part
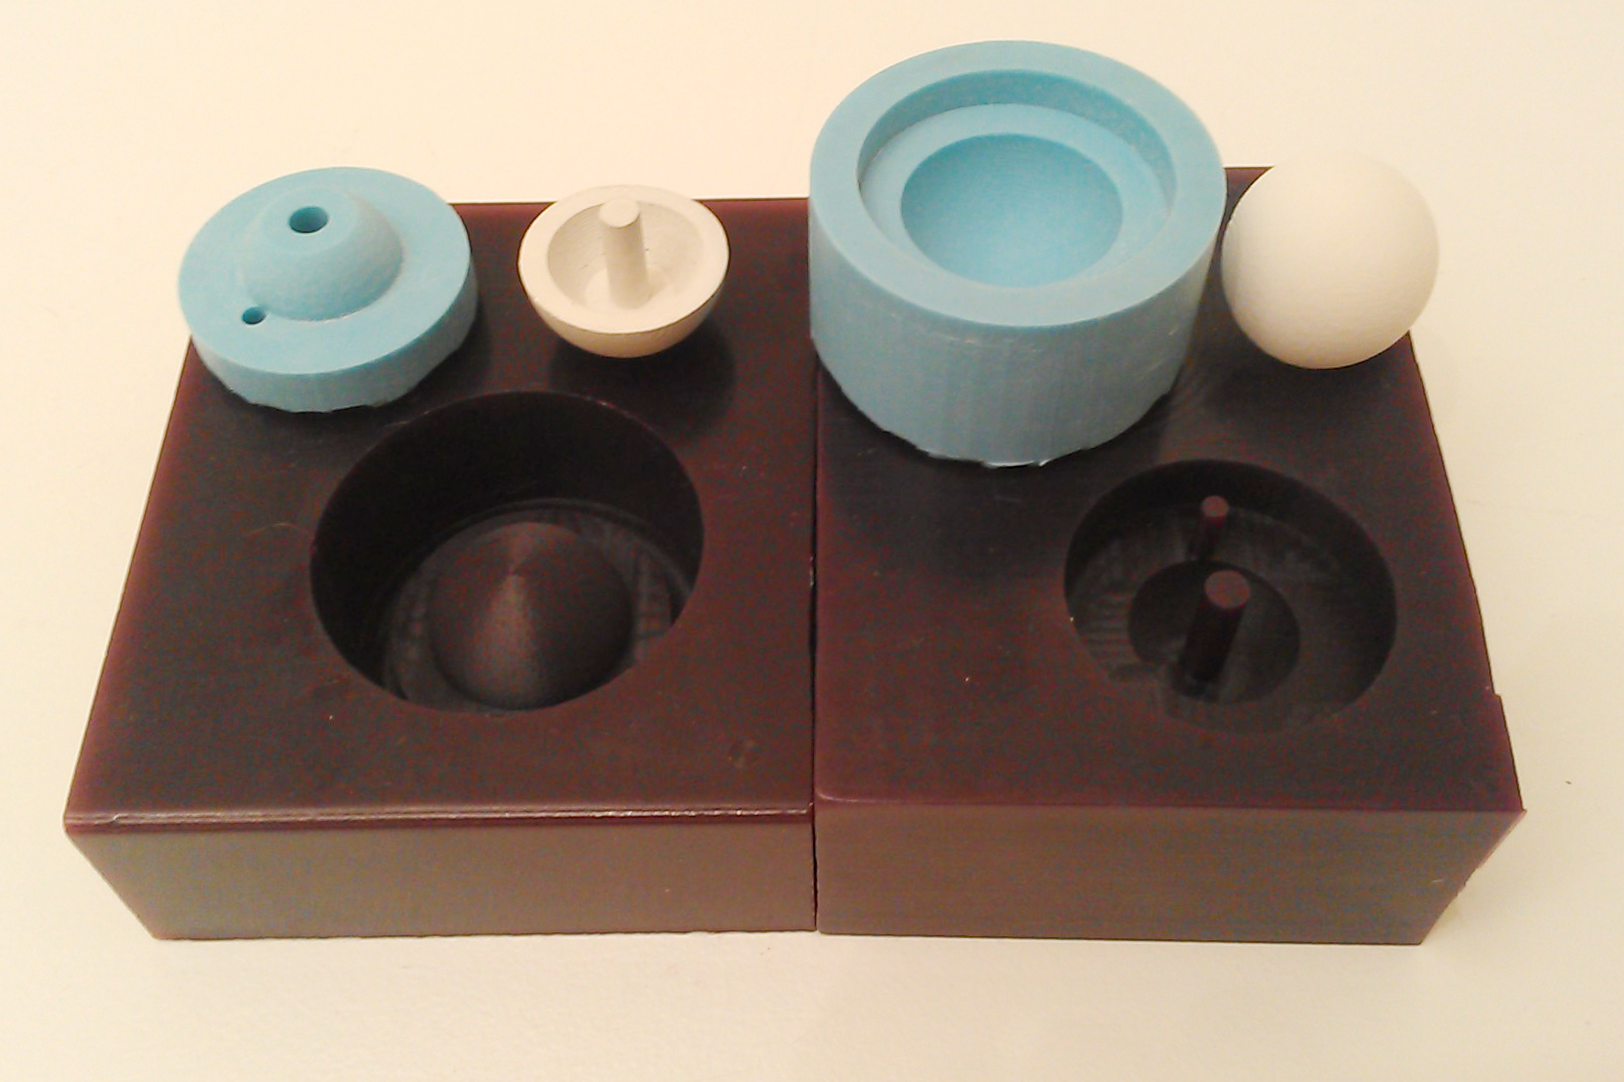
- mould tools with registration
- flexible parts
process for making mould tools
- mixing: by weight or volume
- pouring: starting, filling, vent location
- bubbles: stirring, pouring, vibrating, painting, vacuum, pressure, time
- curing: polymerization, cross-linking, hydration, endothermic, exothermic
- demolding: draft angle, release agents (dilute dish soap, vaseline, talc, other), deformation
other notes
- storage and shelf life
- safety: read the SDS!, ventilation, personal protective equipment (PPE), disposal
rules for making simple mould tools
- Vertical walls should have draft angles
- There should be no undercuts, you should be able to cut it all from above.
Assignment
- create a 30x30x5 mini tile part in Fusion 360 and generate the toolpath to cut it out of a solid block (50x50x10mm) using a 3mm flat or ball-nose end mill (ideally include 3deg of draft angle on all vertical surfaces). It’s best to be oriented with the front view being the top of your part. All stepdowns should be 1mm and stepovers should be 1.5mm. Document all this on your blog. Set up your stock as indicated below.
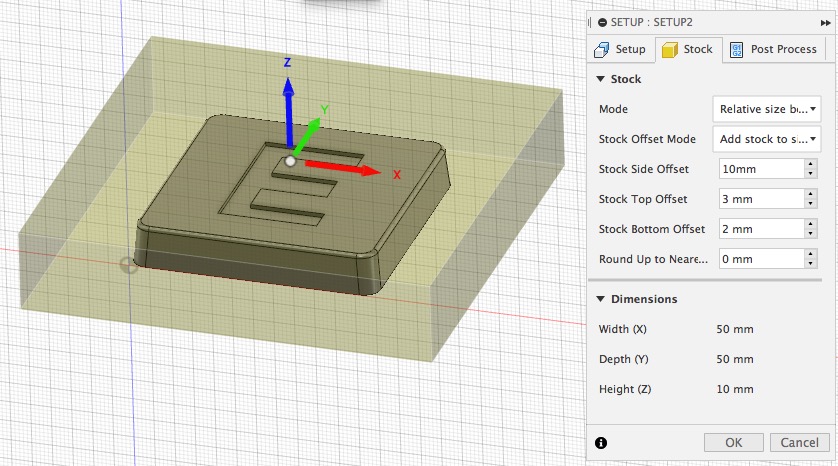
- here’s a full guide showing how to setup the CAM for this. The guide also shows how to setup the machine, cut out the stock material and then to cast silicone into it also, although these steps are not required for this assignment - they’re optional - see below).
Extra credit
- cut the tile from the solid block of 50x50x10mm foam or wax using a CNC milling machine
- cast an elastic material (e.g. silicone or jelly) into the cavity and wait for this to set
- remove the new elastic mould tool
- cast a molten liquid (e.g. resin or chocolate) into your mould tool to create a solid part
What do I need to do to pass?
- create the cad model of your tile and generate the toolpath and document this on your blog, ideally including an animation of the toolpath (like the one provided on the guide).